ENGLISH
– 5 –
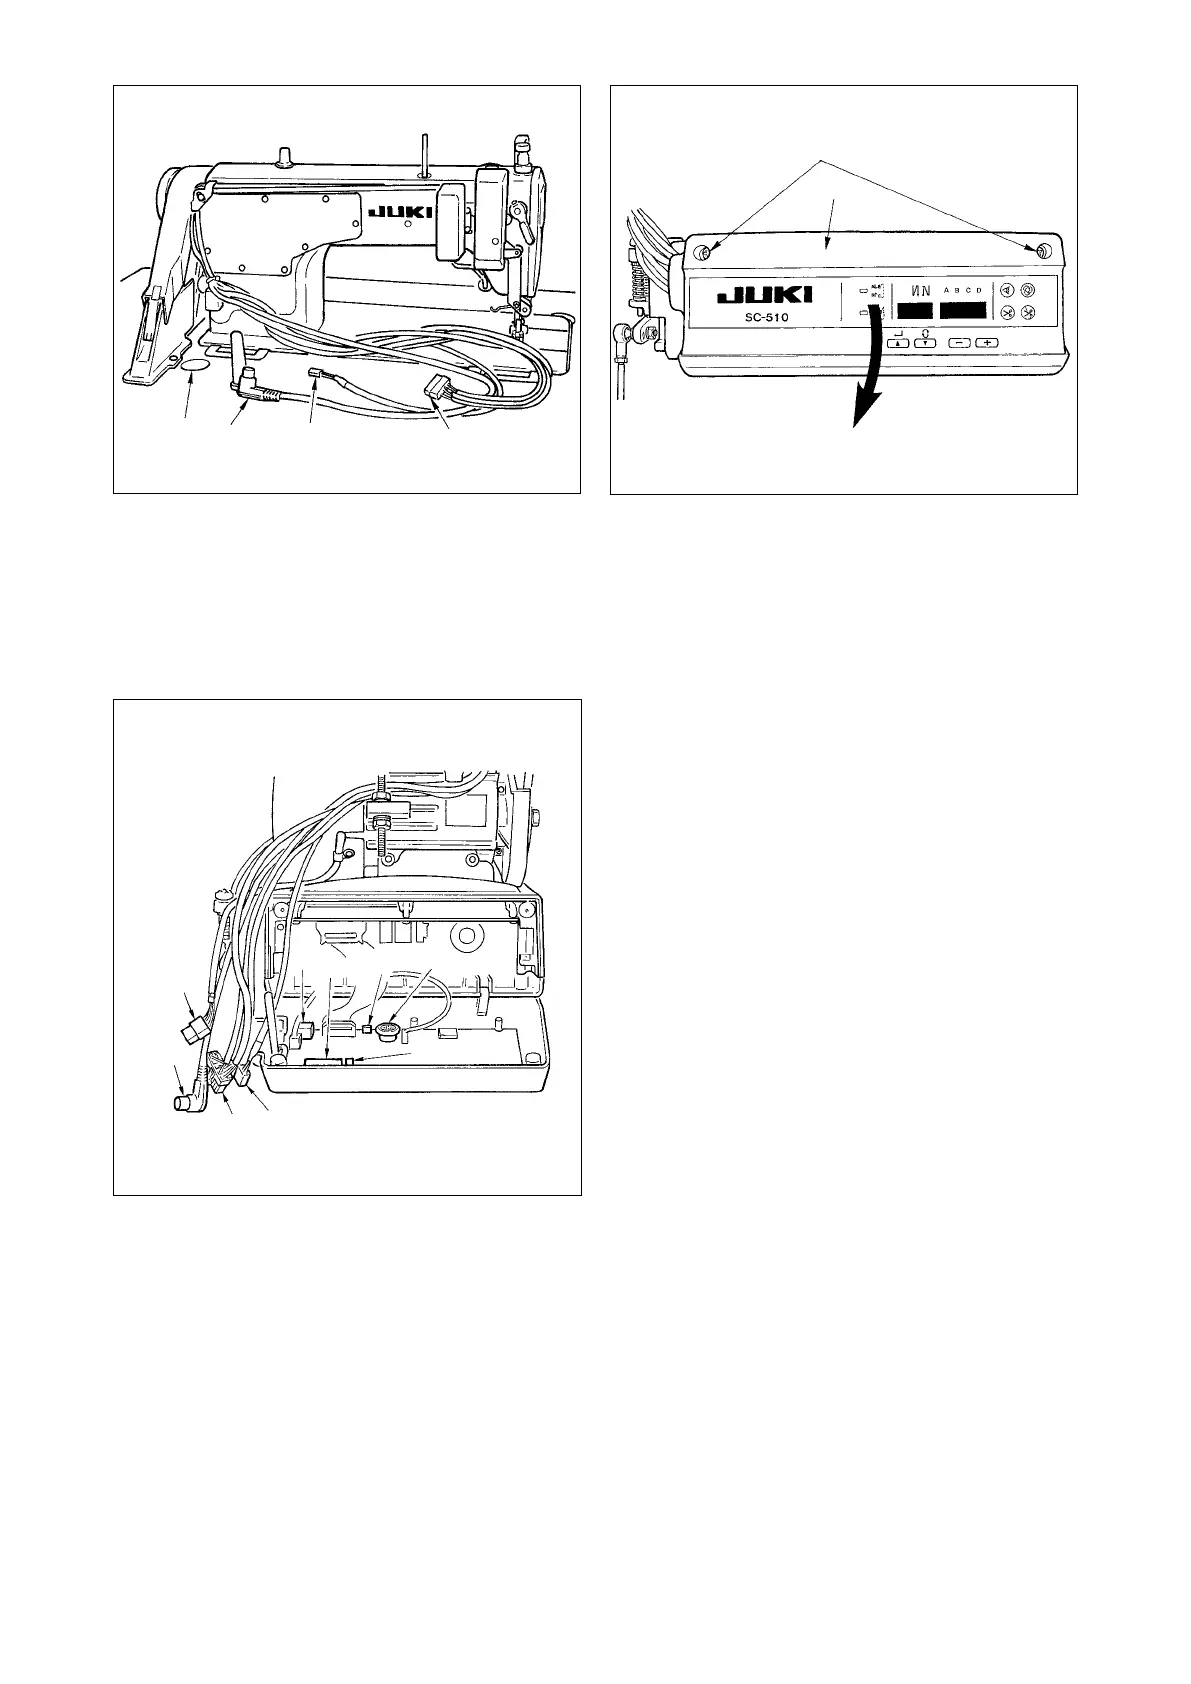
1) Pass the cords
1
of the thread trimming sole-
noid, reverse-stitching solenoid, etc., and the
cords of the synchronizer
2
, machine head 4P
connector
3
through hole
A
in the table to route
them down under the machine table.
2) Loosen setscrew
5
in front cover
4
.
3) Pressing the side of front cover
4
in the direction
of the arrow, open the front cover toward you.
Note :
Be sure to open / close the front cover with your hands.
4) Connect 14P code
1
coming from the machine
head to connector
7
(CN36).
5) Connect 4P connector coming from the machine
head
3
to connector
8
(CN32).
6) Connect 7P connector
2
coming from the ma-
chine head to connector
9
(CN33).
7) When the optional AK device is attached, con-
nect 2P connector coming from the AK device to
connector
!1
(CN37) .
8) Connect the connector
6
coming from the motor
to connector
!0
(CN30) on the circuit board.
(Caution) 1. When using the AK device, set whether
to use the AK device after conrming
how to select the auto-lifter function.
(Refer to page 37.)
2. Be sure to securely insert the respective
connectors after checking the inserting
directions since all connectors have the
inserting directions.
(When using a type with lock, insert the
connectors until they go to the lock.)
The sewing machine is not actuated un-
less the connectors are inserted prop-
erly.
In addition, not only the problem of error
warning or the like occurs, but also the
sewing machine and the control box are
damaged.
3.
Perform the insertion of the connector by
lending your hands to the front cover.
1
2
3
6
8
9
7
!0
!1
5
4
1
A
2
3

 Loading...