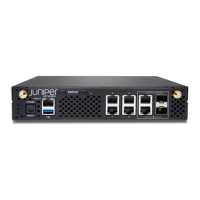
The MX150 has eight 1GbE RJ-45 network ports, two 1GbE RJ-45 access or uplink ports, two 1GbE SFP ports, and two
10GbE SFP+ ports. You can manage the router through an 1GbE RJ-45 management port, mini-USB console port, and an
RJ-45 console (CON) port. The MX150 is shipped with a built-in AC power supply, and fans with front-to-back airflow.
Install the MX150
IN THIS SECTION
What’s in the Box? | 2
What Else Do I Need? | 2
Install the MX150 on a Desk | 3
Install the MX150 in a Two-Post Rack | 3
You can install the MX150 on a desktop, in a two-post or four-post rack, or on a wall. The MX150 comes with the mounting
brackets you need to install it in a two-post rack. You’ll need to order a separate rack mount kit if you want to install it in
a four-post rack. Likewise, you’ll need to order a separate wall mount kit if you want to install the MX150 on a wall.
What’s in the Box?
•
MX150 router
•
AC power cord appropriate for your geographic location
•
AC power cord retainer clip
•
RJ-45 Ethernet cable
•
RJ-45 to DB-9 serial port adapter
•
Accessory kit
The accessory kit contains four rubber feet (for desktop installations), one pair of mounting brackets, and eight Phillips
mounting screws.
What Else Do I Need?
You’ll also need:
•
Someone to help you secure the router to the rack
•
A number 2 Phillips (+) screwdriver
•
Four rack mount screws
•
Cage nuts and washers, if your rack requires them
2

 Loading...


