•
An electrostatic discharge (ESD) grounding strap
•
Grounding cable (optional)
•
A management host, such as a laptop or PC with a serial port
•
Serial-to-USB adapter (if your laptop or PC doesn’t have a serial port)
Install the MX150 on a Desk
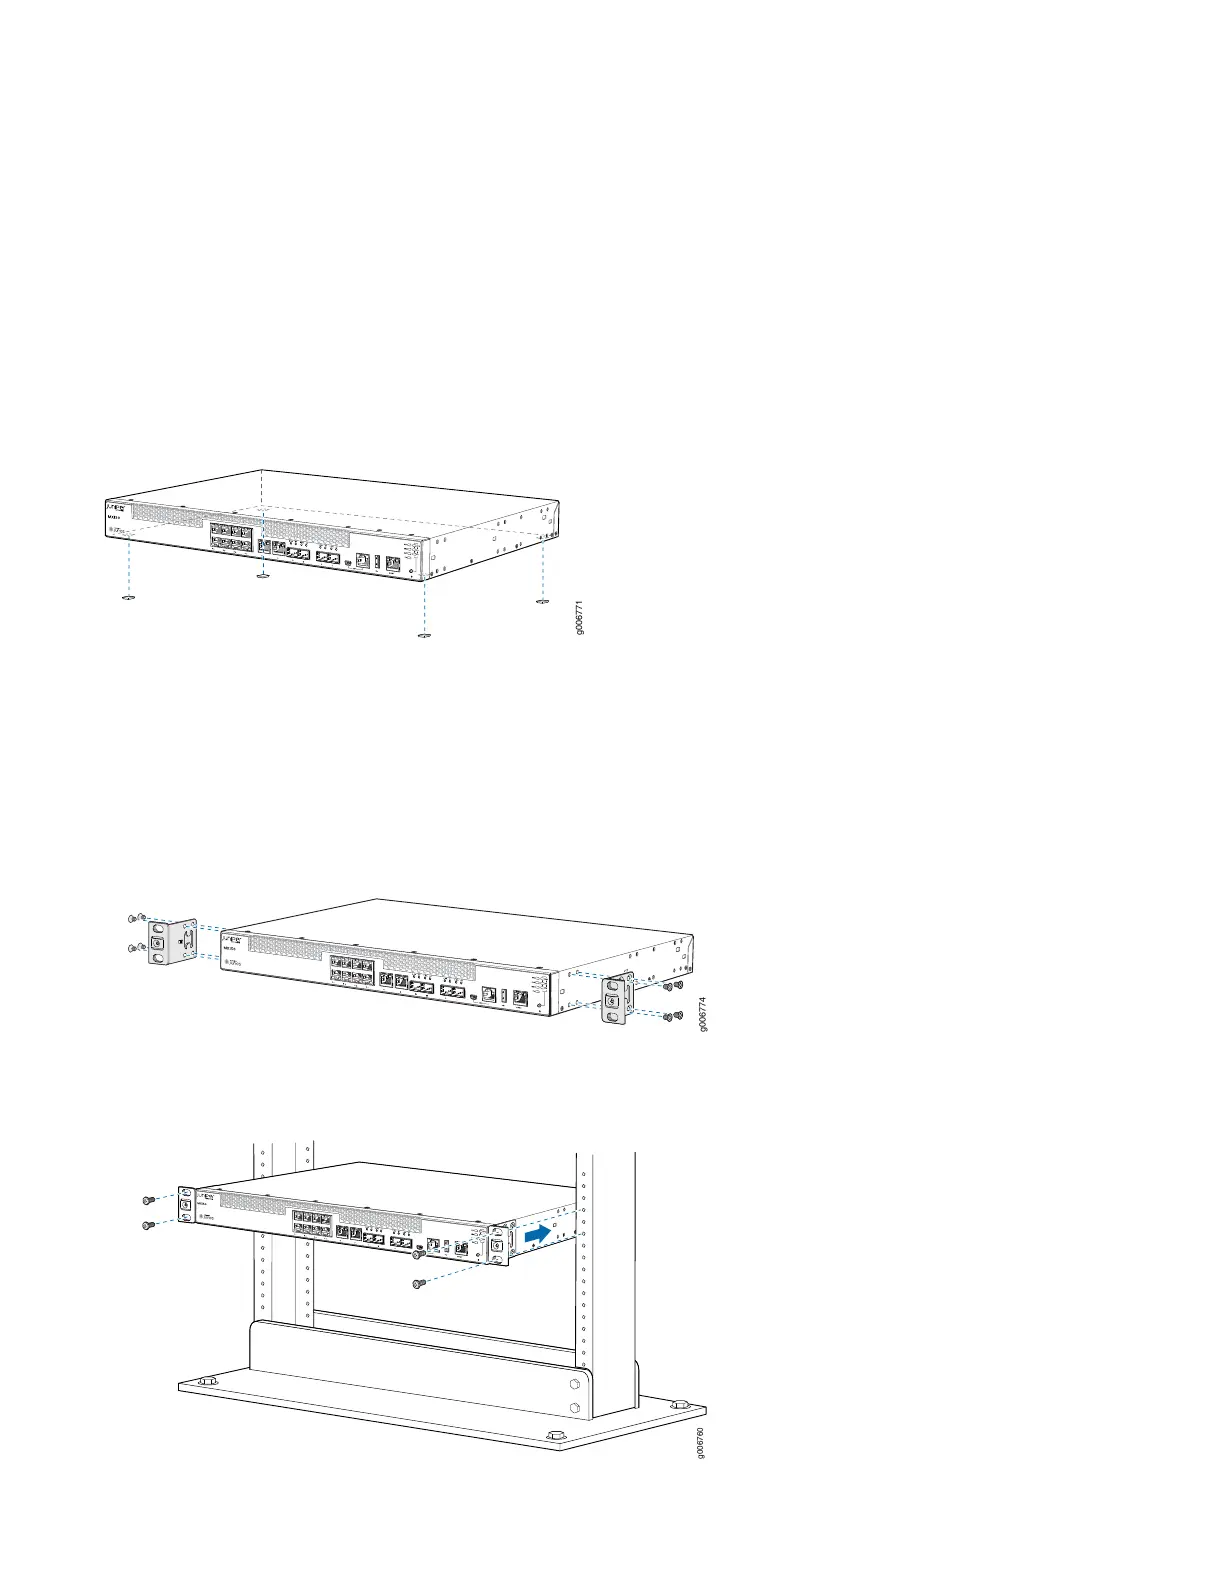
To install the MX150 on a desk or other flat surface, simply attach the four rubber feet (included in the accessory kit) to
the bottom of the chassis. Place the chassis on a desk or level surface.
Install the MX150 in a Two-Post Rack
1. Review General Safety Guidelines and Warnings.
2. Depending on how you want the MX150 to sit in the rack, secure the mounting brackets to the front, center, or rear
mounting holes on the side panels. Use the supplied mounting screws.
3. Lift the MX150 and position it in the rack. Line up the bottom hole in each mounting bracket with a hole in each rack
rail, making sure the MX150 is level.
3