4. While you’re holding the MX150 in place, have a second person insert and tighten the rack mount screws to secure
the mounting brackets to the rack rails. Make sure they tighten the screws in the two bottom holes first, and then
tighten the screws in the two top holes.
5. Check that the mounting brackets on each side of the rack are level.
Power On
1. Wrap the ESD grounding strap around your bare wrist and ground yourself to an ESD point or to the rack.
2. Attach a grounding cable to earth ground and then attach it to the grounding point on the rear panel of the MX150.
NOTE: Earth grounding is recommended, but optional for the MX150. The chassis meets electromagnetic
compatibility (EMC) and ESD requirements, allowing the MX150 to function normally without earth grounding.
The MX150 gets additional grounding when you plug the AC power cord into a grounded AC power outlet.
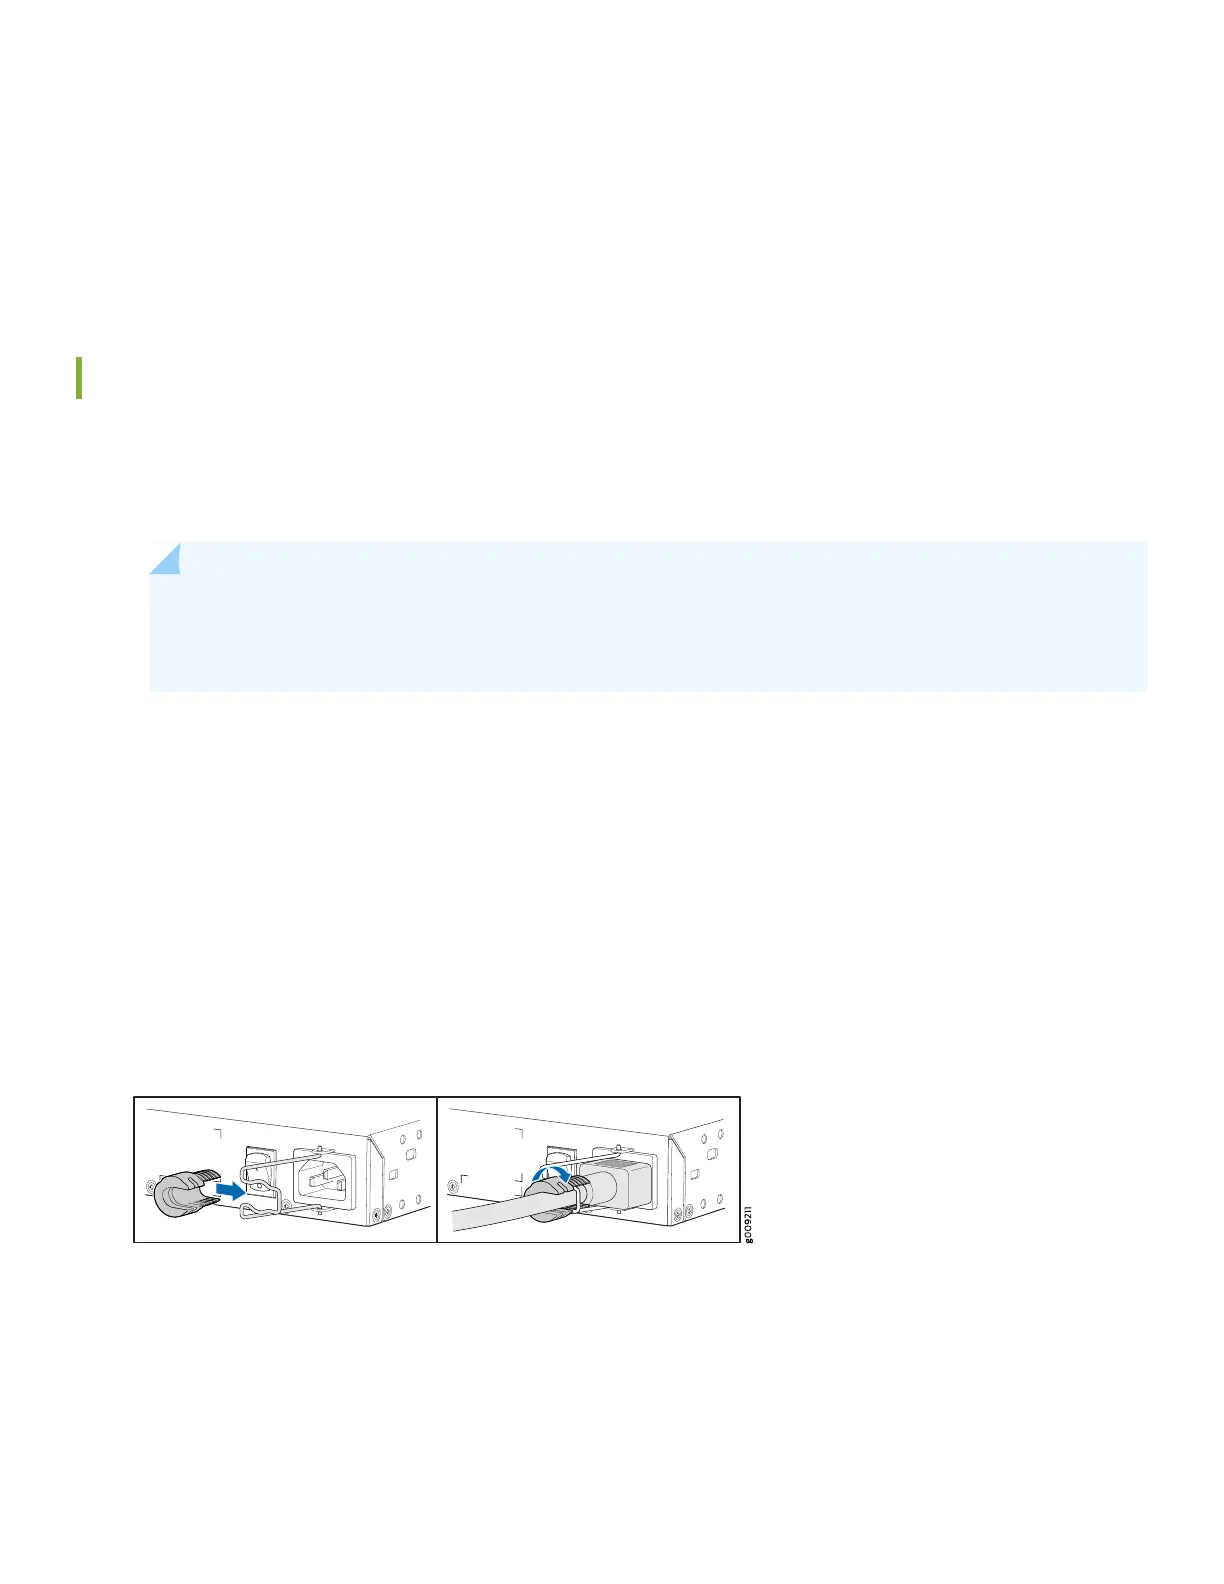
3. Attach the power cord retainer clip:
a. Squeeze the two sides of the power cord retainer clip.
b. Insert the L-shaped ends of the wire clip into the holes in the bracket on each side of the AC power socket on the
rear panel. The power cord retainer clip extends out of the chassis by three inches.
4. Insert the AC power cord firmly into the AC power socket.
5. Push the power cord into the slot in the adjustment nut of the power cord retainer clip. Turn the nut until it’s tight
against the base of the coupler and the slot in the nut is turned 90° from the top of the MX150.
6. If the AC power source outlet has a power switch, turn it off.
7. Plug in the AC power cord to the AC power source outlet.
8. If the AC power source outlet has a power switch, turn it on.
4