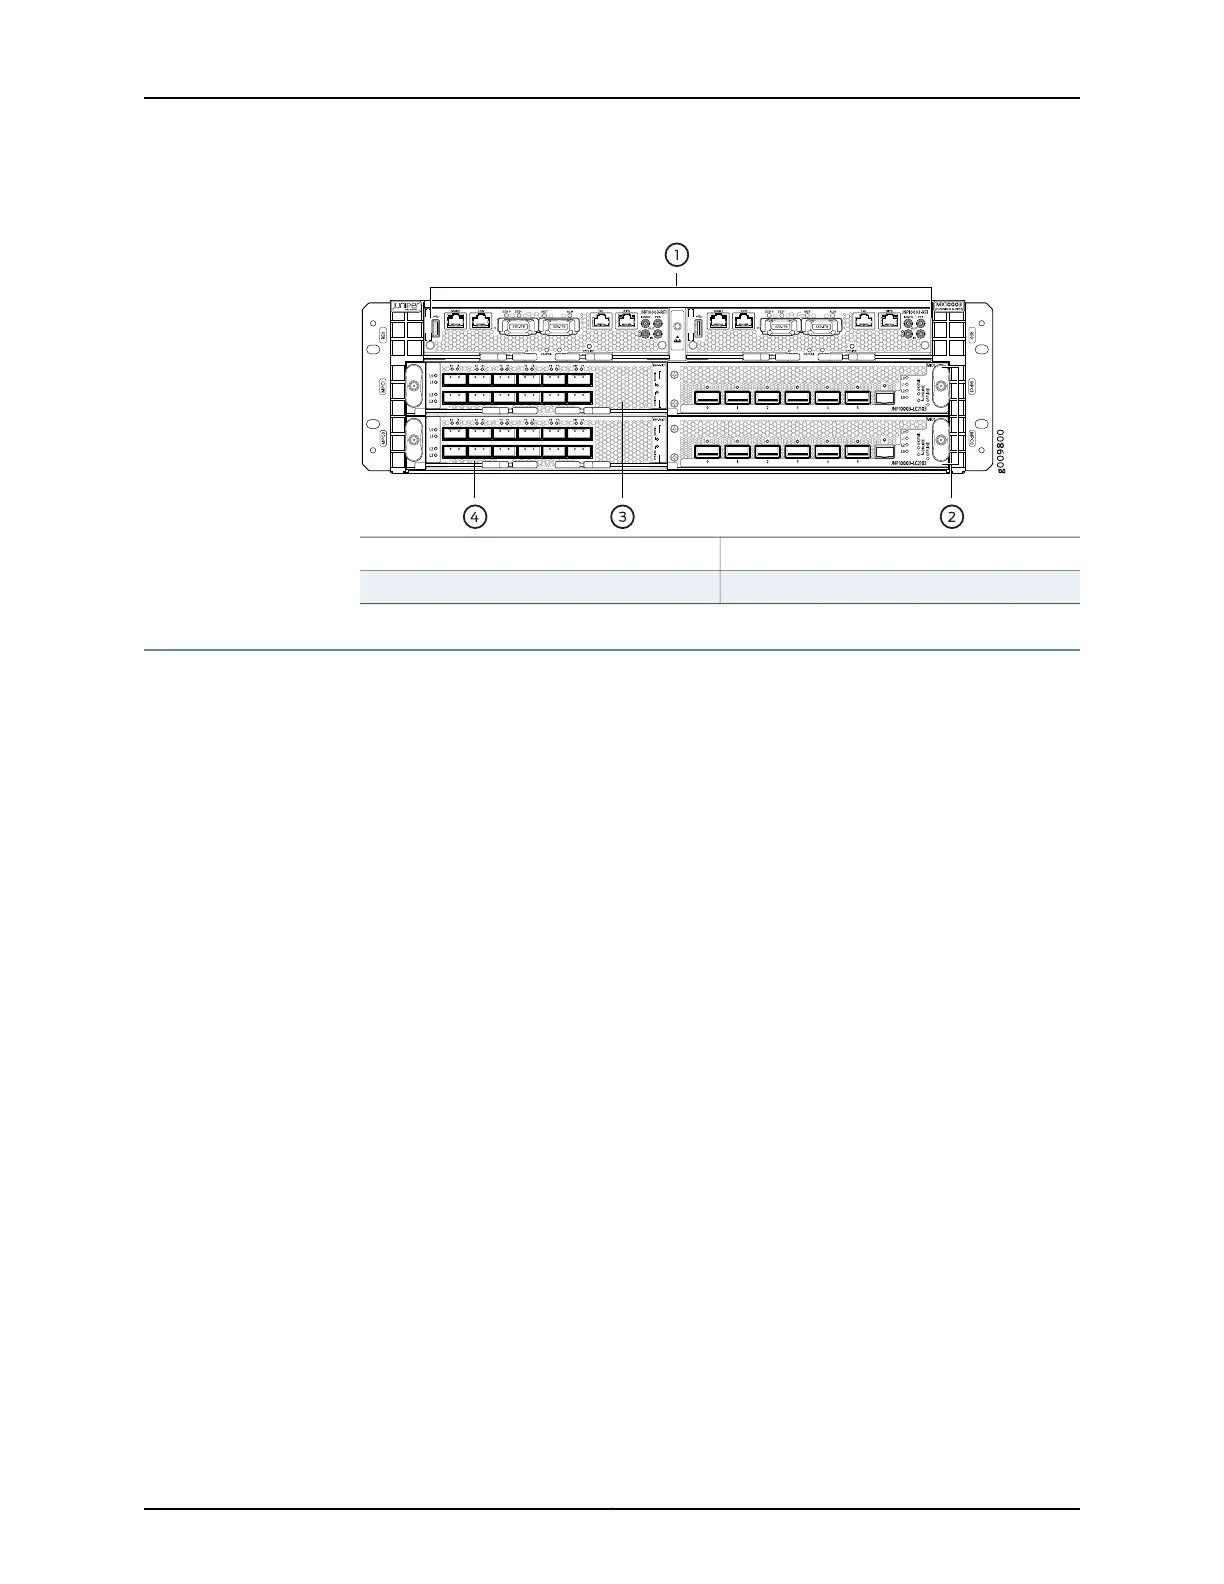
Figure 1: Front View of the MX10003 Router
3—1—
MIC installed in MPC1
Routing and Control Board (RCB)
4—2—
MIC installed in MPC0
MPCs
Step 1: Prepare the Site for MX10003 Installation
•
Router Rack Requirements on page 4
•
Router Clearance Requirements on page 5
•
Router Cooling and Airflow Requirements on page 5
•
Tools Required to Prepare the MX10003 Router for Installation on page 6
Router Rack Requirements
•
You can install the router in a four-post rack or cabinet or an open-frame rack.
•
The rack must be strong enough to support the weight of the fully configured router:
up to 157.4 lb (71.4 kg) for AC-powered chassis, and up to 163.4 lb (74.1 kg) for
DC-powered chassis.
•
Material handling systems (such as levers, slings, lifts, and so on) must be used to lift
any equipment weighing more than 121.2 lb (55 kg). In installation sites where using a
lift is not practical, specially trained persons or systems must be used (riggers or
movers).
•
The rack rails must be spaced widely enough to accommodate the external dimension
of the chassis: 5.21 in. (13.23 cm) high, 30 in. (76.2 cm) deep, and 17.3 in. (43.9 cm)
wide. The outer edges of the mounting brackets extend the width to 19 in. (48.3 cm).
•
Ensure that the cabinet allows the hot exhaust air of the chassis to exit from the cabinet
without recirculating into the router.
•
The router must be installed in a rack that is secured to the building structure.
•
Mount the router at the bottom of the rack if it is the only unit in the rack.
•
When mounting the router in a partially filled rack, load the rack from the bottom to
the top with the heaviest component at the bottom of the rack.
Copyright © 2017, Juniper Networks, Inc.4
MX10003 3D Universal Edge Router Quick Start