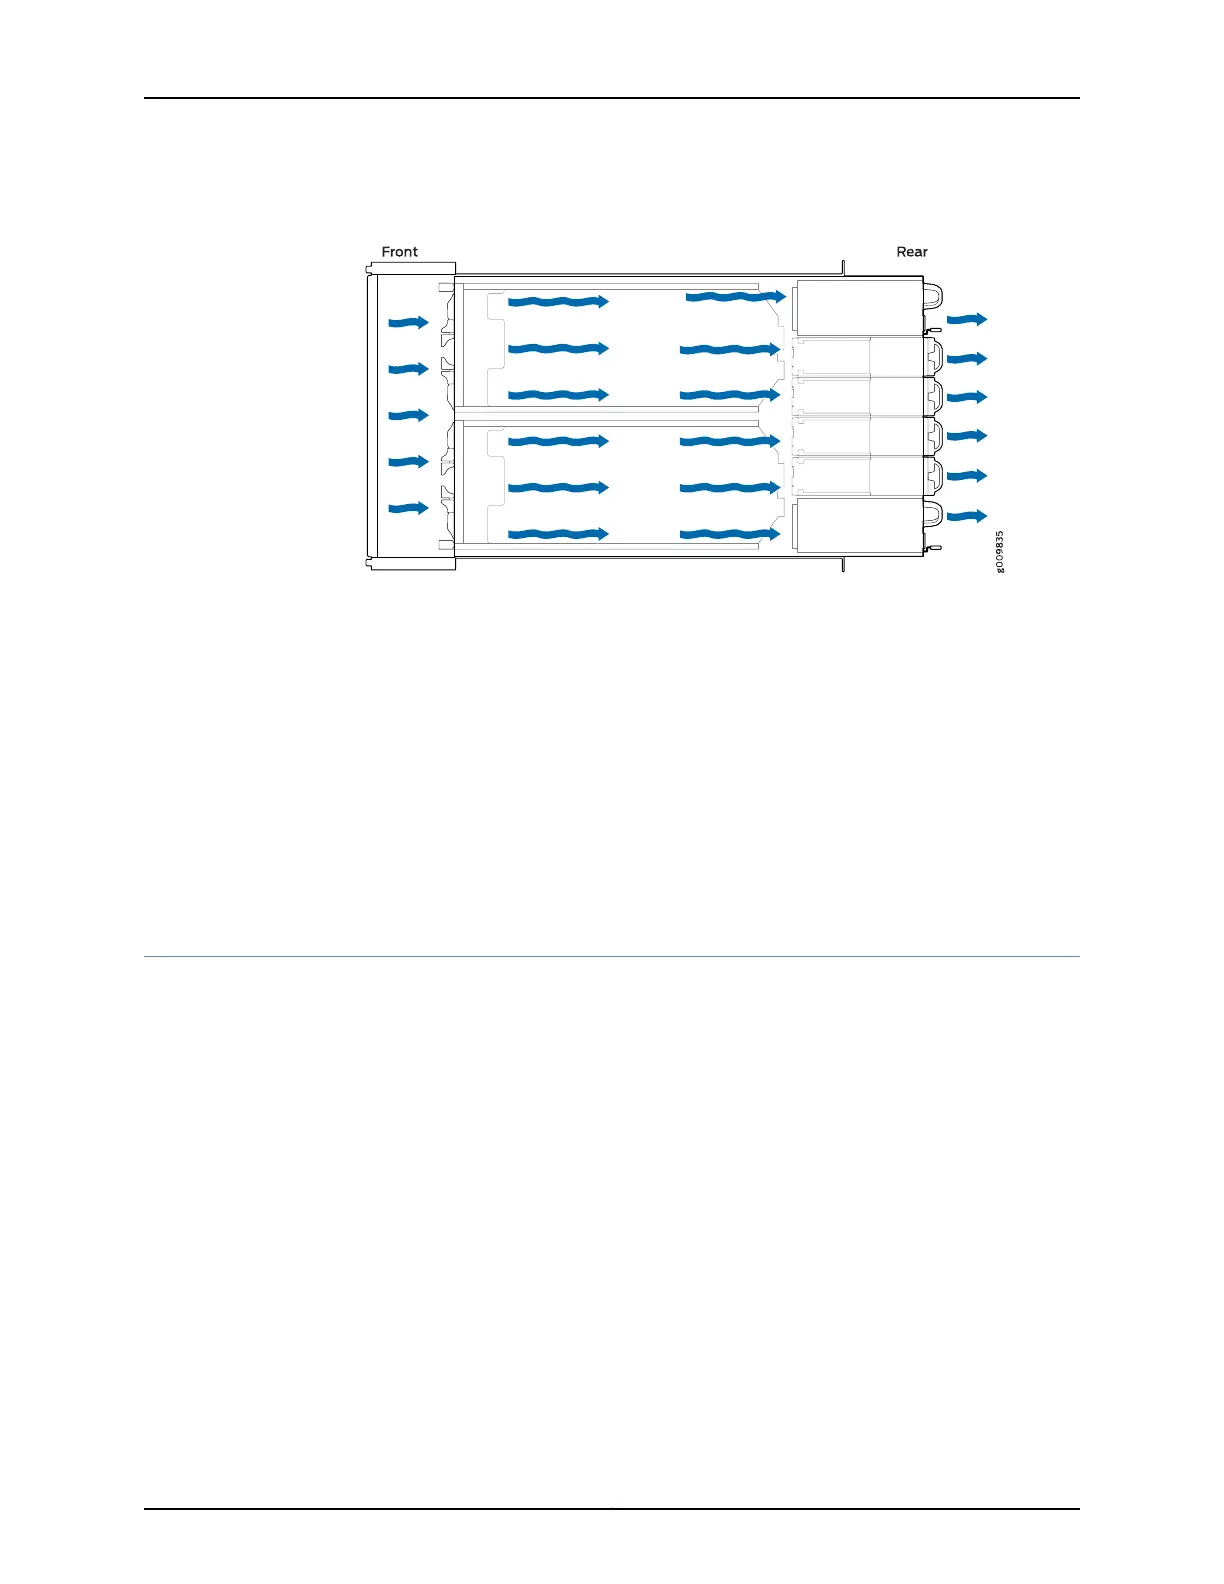
Figure 3: Airflow Through the MX10003 Router
Tools Required to Prepare the MX10003 Router for Installation
•
Blank panels to cover any slots not occupied by a component
•
Mounting brackets, supplied with the router
•
Eight screws for securing the mounting brackets to the chassis, supplied with the router
•
Phillips (+) screwdriver, number 2, not supplied
•
Four mounting screws, supplied with the router
•
Cable management bracket, supplied with the router
•
Two screws for securing the cable management bracket, supplied with the router
Step 2: Install the MX10003 Chassis in the Rack
To install the router in a rack or cabinet:
1. Position the router in front of the rack or cabinet.
2. Attach an electrostatic discharge (ESD) grounding strap to your bare wrist and to a
site ESD point.
3. Using a Phillips (+) number 2 screwdriver, remove the screw on each side of the chassis
that holds the rear-mounting brackets, and slide the brackets out of the chassis (see
Figure 4 on page 7). Keep the brackets safely to be used in later stage.
The rear-mounting brackets on each side of the chassis are movable. You can adjust
the brackets according to the depth of the rack. However, the front-mounting brackets
on each side of the chassis are fixed to the chassis.
Copyright © 2017, Juniper Networks, Inc.6
MX10003 3D Universal Edge Router Quick Start