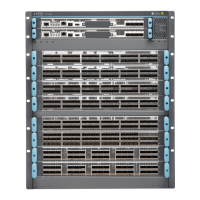
PTX10008 Installation Overview
The PTX10008 is a rigid sheet-metal router-chassis that houses the other hardware components such as
control boards, Switch Interface Boards (SIBs), power supplies, fan trays, and line cards. The router chassis
ships in a cardboard box that has a two-layer wooden pallet base. The router chassis is bolted to the pallet
base. You can install a PTX10008 router in a standard 19 in. (483 mm) equipment rack by using the supplied
rack mount kit and the flange that is attached to the chassis.
The steps to install the PTX10008 are:
1. Unpack the router following the instructions in “Unpacking the PTX10008” on page 198.
2. Mount the chassis in the rack following either the instructions in “Mounting a PTX10008 in a 4-Post
Rack Using a Mechanical Lift” on page 209 or in “Manually Mounting a PTX10008 in a 4-Post Rack” on
page 212.
Because of the weight of the chassis, mounting using a mechanical lift is preferred as the easiest and
safest method.
3. Install the line cards following the instructions in “Installing a PTX10000 Line Card” on page 338.
4. Connect the chassis to earth ground following the instructions in “Connecting Earth Ground to a
PTX10000” on page 232.
5. Connect power to the power supplies following either the instructions in “Connecting AC Power to a
PTX10000” on page 235 or “Connecting DC Power to a PTX10000” on page 235.
6. Connect to the network.
•
To connect the router to a network for out-of-band management, follow instructions in “Connecting
a PTX10000 to a Network for Out-of-Band Management” on page 237.
•
To connect the router to a management console, follow instructions in Connecting a Device to a
Management Console by Using an RJ-45 Connector.
7. Configure the router following the instructions in “Configuring a PTX10000” on page 239.
8. Install optional equipment such as the cable management system. See “Installing the PTX10000 Cable
Management System” on page 344.
RELATED DOCUMENTATION
197

 Loading...