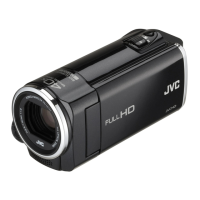
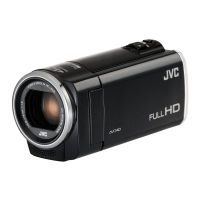
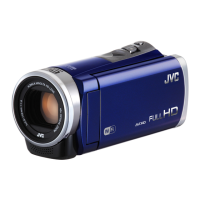
Do you have a question about the JVC Everio GZ-E10 and is the answer not in the manual?
How to charge the battery pack.
Instructions for recording videos.
Instructions for playing back recorded videos.
Basic techniques for capturing stable images.
Lists the main features of the camcorder.
Identifies included accessories and their purpose.
Step-by-step guide to charge the battery pack.
How to adjust the grip belt for secure holding.
How to use the grip belt as a hand strap.
Instructions for inserting an SD card.
Lists compatible SD card types.
How to turn the camcorder on and off.
How to set the date and time.
How to reset or adjust the clock settings.
How to change the language of the display.
Proper way to hold the camcorder to prevent shake.
How to mount the camcorder on a tripod.
Considerations for using the unit internationally.
How to charge the battery abroad.
Setting the clock for different time zones.
How to adjust for daylight saving time.
Lists optional accessories for extended use.
Simple recording using automatic settings.
Detailed instructions for manual recording settings.
Choosing preset scenes for optimal recording.
How to manually adjust focus for clear shots.
How to adjust the overall brightness of the image.
Adjusting color tone based on light source.
Correcting dark subjects due to backlight.
Using tele macro for close-up photography.
Automatically adjusts focus and brightness for faces.
Using image stabilizer to reduce shake.
Capturing scenes over time at intervals.
Automatic recording triggered by movement.
Checking available recording time and battery status.
Table showing recording times based on quality and media.
How to select and play recorded videos.
Displaying file date and duration.
Playing videos with corrupted recording data.
Finding videos using search functions.
Searching for videos by recording date.
How to connect and view videos on a TV.
Connecting for HD playback via HDMI.
Linked operations using HDMI-CEC.
Connecting for standard playback via AV cable.
Freeing up space by deleting files.
Deleting the file currently shown.
Deleting specific files from the media.
Deleting all files from the recording media.
Preventing important videos from accidental deletion.
Protecting or unprotecting the current file.
Protecting or unprotecting multiple files.
Protecting all files simultaneously.
Releasing protection for all files.
Copying videos to a DVD recorder.
Creating discs with a Blu-ray recorder via USB.
Copying files to a Windows computer.
Checking PC requirements for software.
Installing the camcorder software on a PC.
Copying all files from the camcorder to a PC.
Arranging files using labels and lists.
Copying organized files to discs.
Copying files to PC manually.
Structure of files and folders on the SD card.
Copying files to a Mac computer.
General guide to navigating the menu system.
Settings for video recording quality and options.
Brightens the subject in dark places.
Reduces noise caused by wind.
Capturing scenes over time at intervals.
Automatic recording triggered by movement.
Setting the video quality for recording.
Adjusting the zoom ratio.
Adjusting microphone sensitivity to zoom.
Setting the current time or local time.
Options for manual recording adjustments.
Options for deleting or finding videos.
Controls display of date and time during playback.
Deleting unwanted videos.
Protecting files from accidental deletion.
Refining index screen by date.
Playing videos with defective management info.
Enhances sound quality for playback.
Resets or sets local time.
Controls on-screen display icons during playback.
Adjusting display settings like brightness.
Setting date and time display format.
Adjusting the LCD monitor brightness.
Adjusting camera settings like operation sound.
Plays a demonstration of unit features.
Turns operation sound on or off.
Prevents forgetting to turn off power.
Enables quick power-on when LCD is opened.
Updates built-in PC software.
Returns all settings to default values.
Adjusting settings for TV or DVD recorder connection.
Displays icons/date/time on TV screen.
Sets aspect ratio for TV connection.
Sets video output definition for HDMI.
Controls linked operations via HDMI-CEC.
Settings for the recording media.
Deletes all files on the SD card.
Accesses mobile user guide via QR code.
Identifies parts on the front of the camcorder.
Identifies parts on the rear of the camcorder.
Identifies parts on the bottom of the camcorder.
Identifies internal parts and connectors.
Details about the camcorder's LCD screen.
Icons and indicators during video recording.
Explains indicators shown on the LCD screen.
Steps to take when the unit malfunctions.
Troubleshooting issues related to the battery.
Troubleshooting common recording problems.
Troubleshooting issues with SD cards.
Troubleshooting playback interruptions or issues.
Troubleshooting issues with editing and copying.
Troubleshooting computer connection and file transfer.
Troubleshooting image quality and display issues.
Addresses issues like grainy images or overheating.
Explains and provides solutions for error messages.
General cleaning and care for the camcorder body.
Cleaning the lens and LCD screen.
Technical specifications of the camcorder.
Details of the camcorder's input/output connectors.
Video format and quality specifications.
Specifications for the AC adapter.
Specifications for the battery pack.
