Connecting the smartphone (or computer) to the access point
(wireless LAN router)
.
0
Connect the smartphone (or computer) to the access point (wireless LAN
router) at home.
0
For details on connections, refer to the instruction manuals of the device
in use or the wireless LAN router.
0
This setting is unnecessary if the smartphone (or computer) has already
been connected to the access point (wireless LAN router) at home.
Monitoring the images by connecting the smartphone and the
camera
.
0
Install “Wireless sync.” on the smartphone in advance.
“Installing Smartphone Applications” (A p. 122)
o
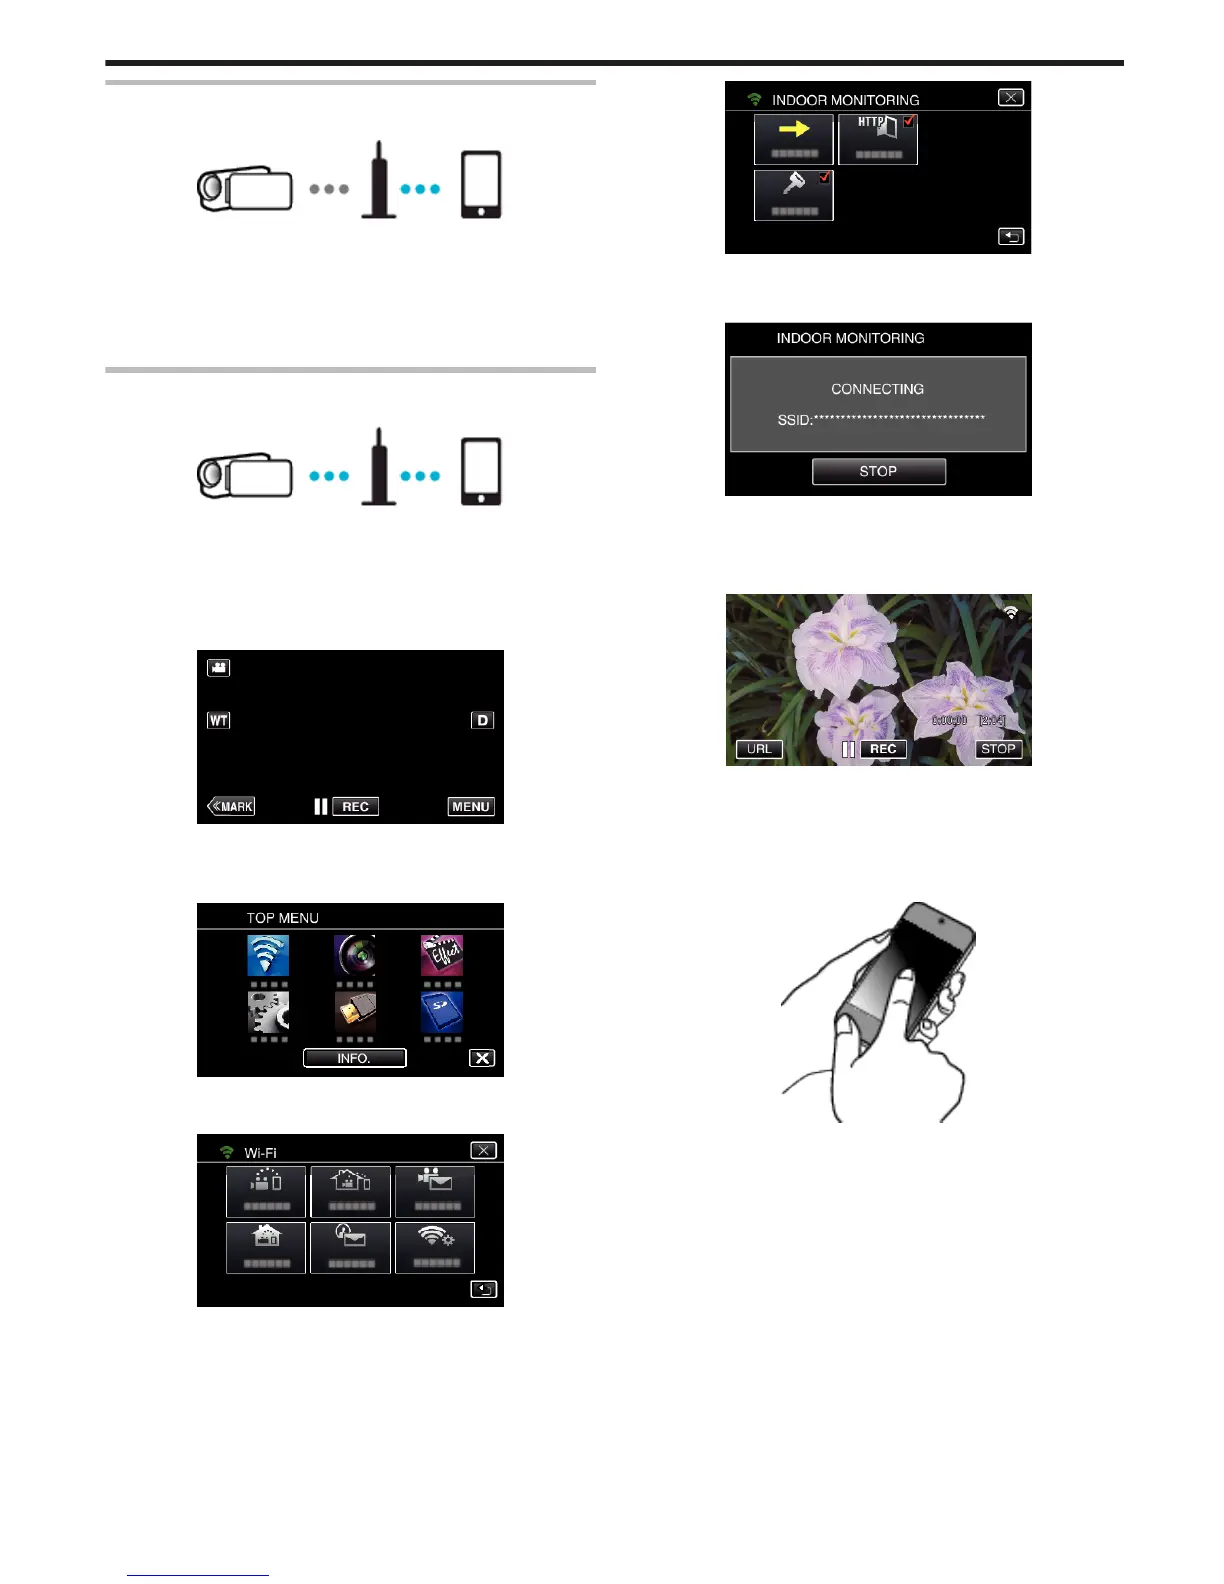
Operation on this camera
1
Tap “MENU”.
(Operation on this camera)
.
0
The top menu appears.
2
Tap the “Wi-Fi” (
Q
) icon.
(Operation on this camera)
.
3
Tap “INDOOR MONITORING” (O).
(Operation on this camera)
.
4
Tap “START” (I).
(Operation on this camera)
.
5
Start making a connection.
(Operation on this camera)
.
0
Name (SSID) of the access point (wireless LAN router) in connection
is displayed.
6
The following is displayed when the camera is connected to the access
point.
.
0
Tap “URL” to display the URL required for connecting the camera
from browser.
o
Operation on the smartphone
1
Start “Wireless sync.” on the smartphone after setting INDOOR
MONITORING.
.
0
Tap “START” in INDOOR MONITORING on the camera to start.
2
Tap “INDOOR MONITORING”.
Using Wi-Fi
93
 Loading...