Front
.
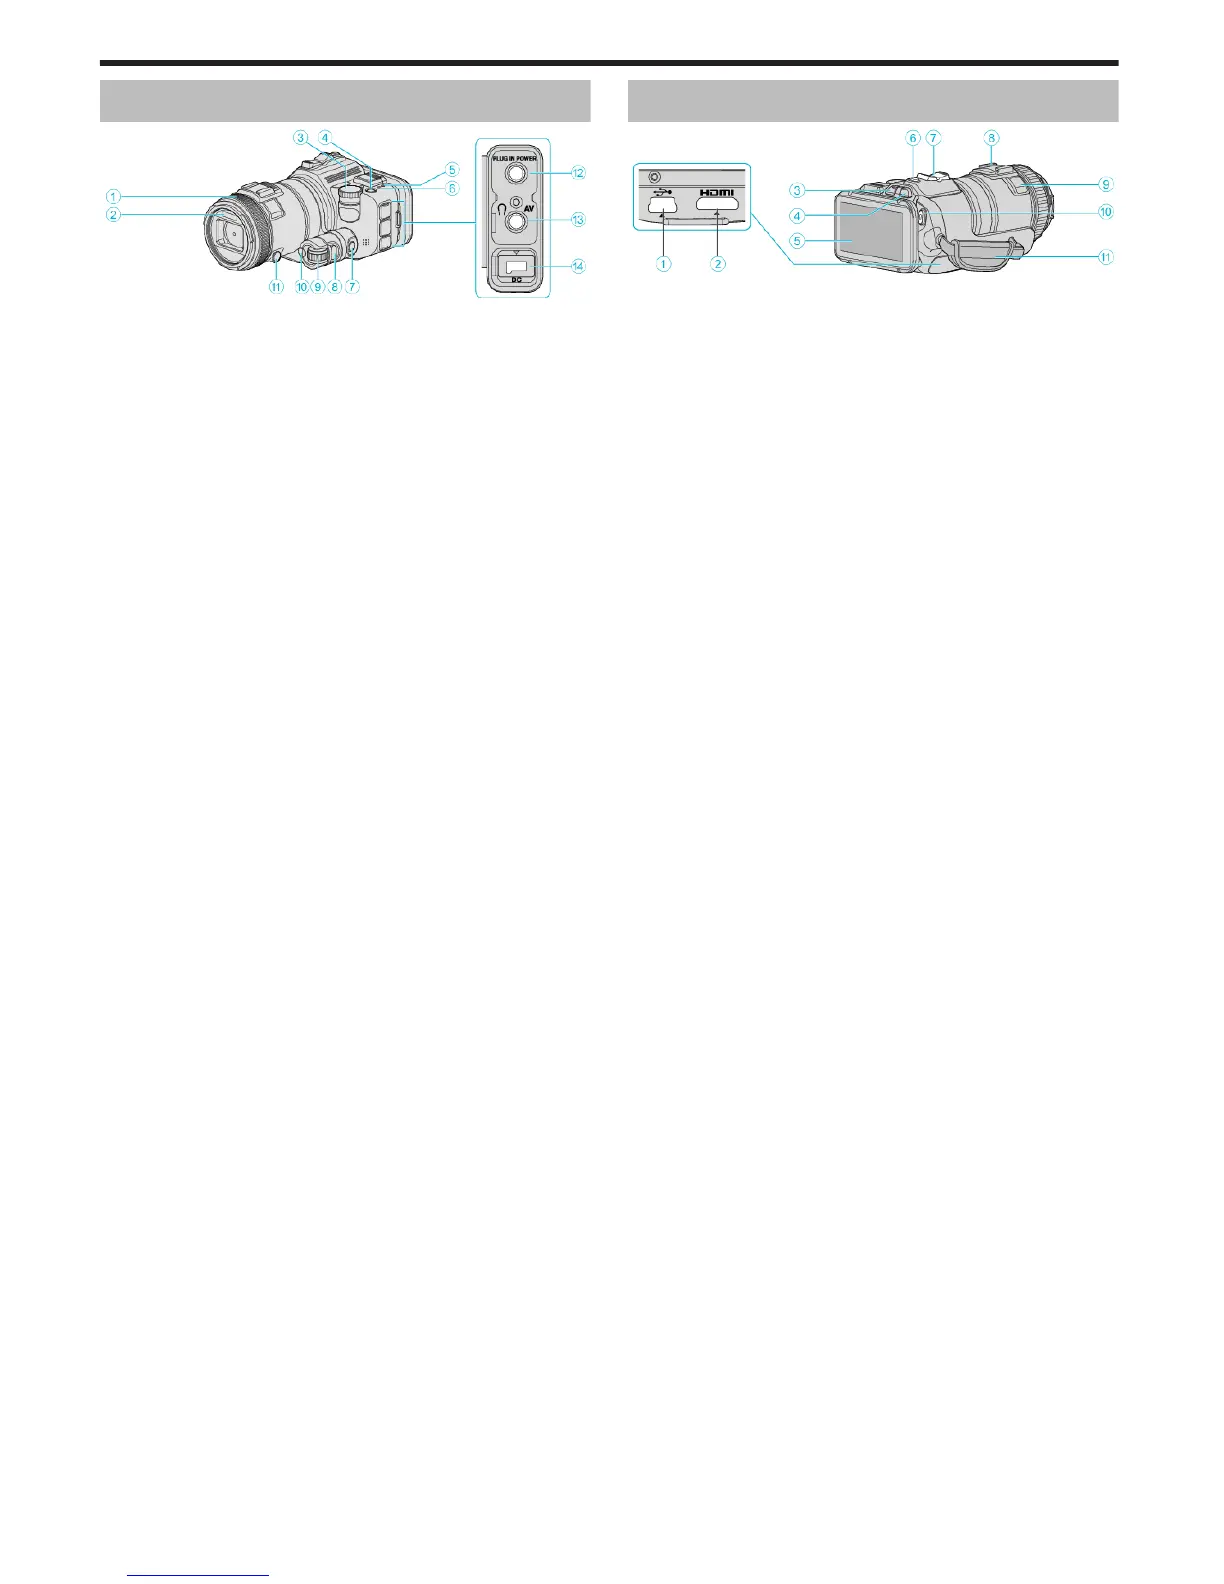
A Focus Ring
0
Adjusts focus manually.
“Adjusting Focus Manually” (A p. 37)
B Light/Flash
0
Turn on the light when shooting in dark places.
“ LIGHT ” (A p. 170)
0
Set the flash as necessary when capturing still images.
“ FLASH ” (A p. 175)
C Shooting Dial
“Shooting by Changing the Settings” (A p. 32)
D M (Power) Button
E
ACCESS (Access) Lamp
0
Lights up/blinks during recording or playback.
Do not remove the battery pack, AC adapter, or SD card.
F POWER/CHARGE (Power/Charge) Lamp
0
Lights up: Power “ON”
0
Blinks: Charging in progress
0
Goes out: Charging finished
G
Time Control Button
H Exposure Button
I Adjustment Dial
J SET Button
K Focus Button
L Microphone Connector
0
Connects to the microphone (sold separately).
M AV Connector/Headphone Connector
0
Connects to the AV connector of a TV, etc.
0
Connects to the headphone (sold separately).
N DC Connector
0
Connects to an AC adapter to charge the battery.
Rear
.
A USB Connector
0
Connects to computer using a USB cable.
B HDMI Mini Connector
0
Connects to a TV using an HDMI mini cable.
C Playback/Recording Button
D A / B (Video/Still Image) Button
E LCD Monitor
F SNAPSHOT (Still Image Recording) Button
0
Takes a still image.
G Zoom/Volume Lever
0
During shooting: Adjusts the shooting range.
0
During playback (index screen): Moves to the next or previous page.
0
During video playback: Adjusts the volume.
H Shoe (for connecting an external microphone which is sold
separately)
I Stereo Microphone
0
Do not cover the microphone with your fingers during video recording.
J START/STOP (Video Recording) Button
0
Starts/stops video recording.
K Grip Belt
0
Pass your hand through the grip belt to hold this unit firmly.
Names of Parts
188
 Loading...