3
Instructions
1. Powering and turning on the camera
1. Decide whether you want the camera to be xed at a recommended
position, xed at a different position, handheld:
1a. If you want the camera to be xed at any location, allow staff to
remove its battery pack and connect its DC power cable.
1b. If you want the camera to be handheld, allow staff to insert its battery
pack and disconnect its DC power cable.
2. Remove the lens cap from the lens:
2.1. Pinch and hold the cap’s two side-releases.
2.2. Pull the cap away from the lens.
3. Pull out/open the display panel on the left side of the camera.
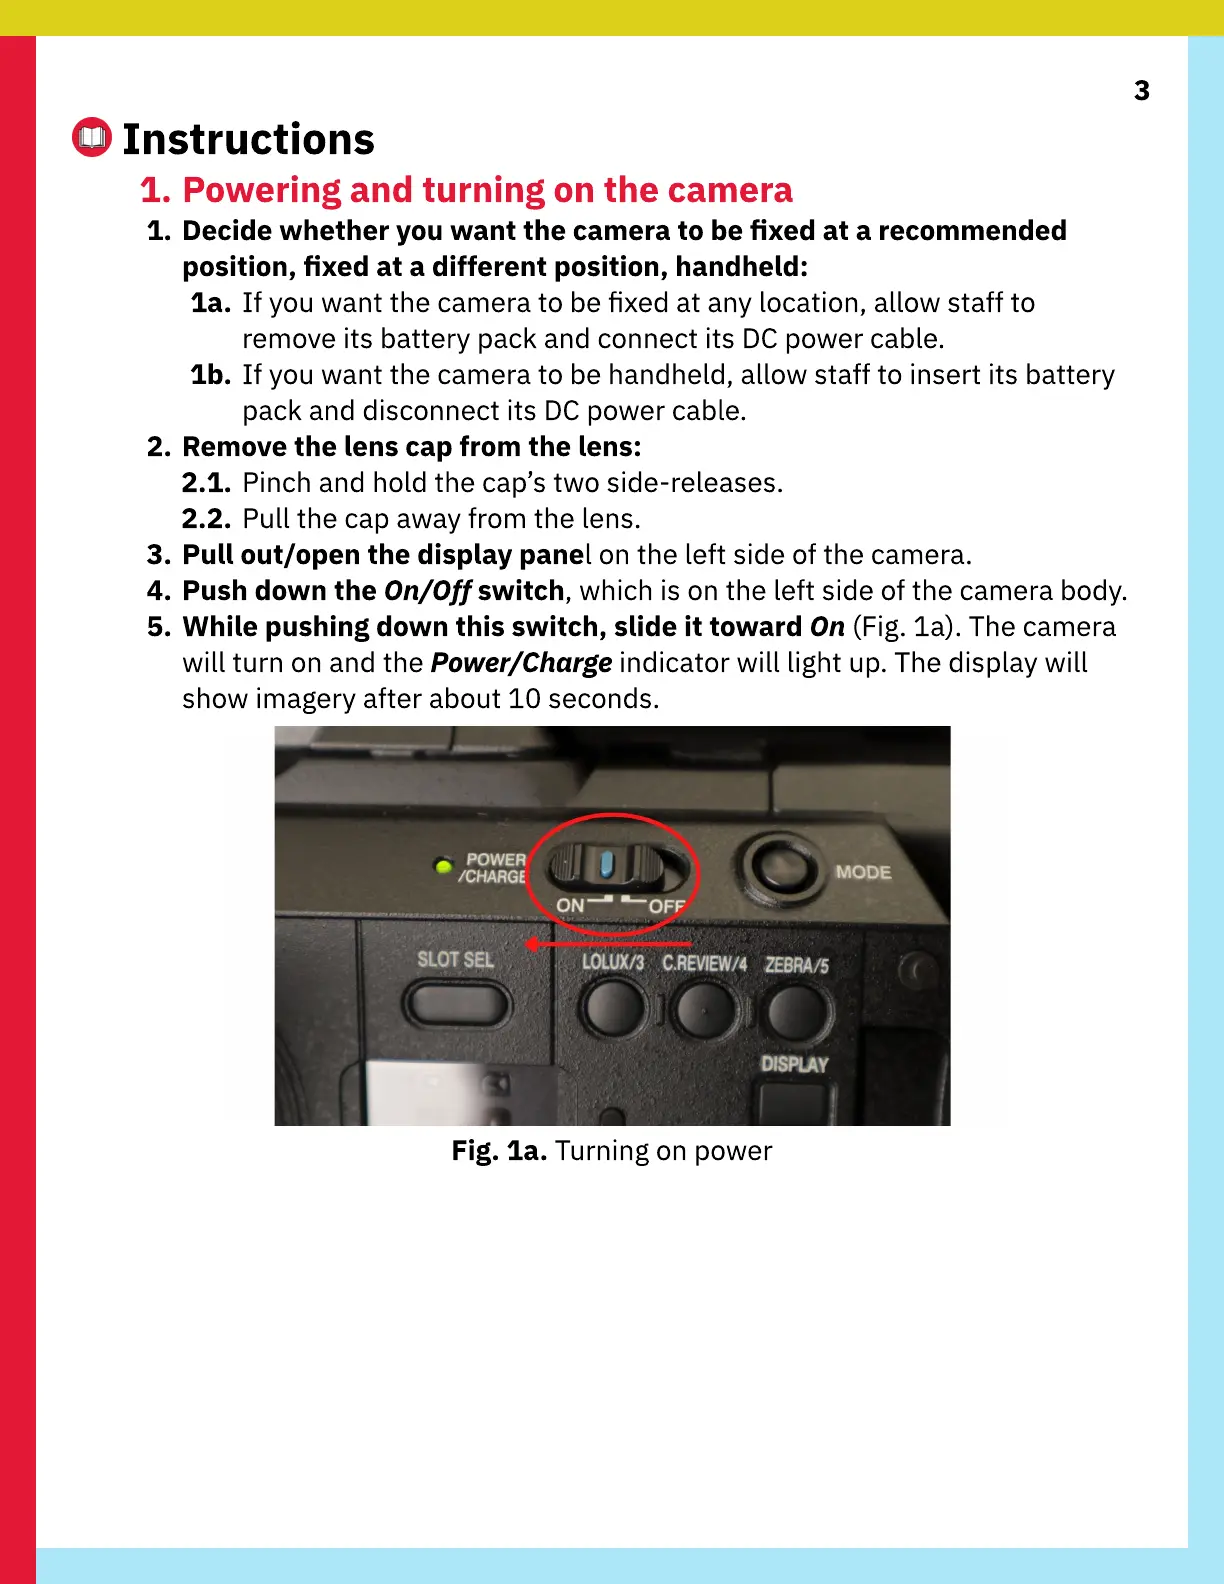
4. Push down the On/Off switch, which is on the left side of the camera body.
5. While pushing down this switch, slide it toward On (Fig. 1a). The camera
will turn on and the Power/Charge indicator will light up. The display will
show imagery after about 10 seconds.
F
ig. 1a. Turning on power
 Loading...