Masterpage:Right-FullCol
EN 75
Filename [HM-100U_Eng_05Index.fm]
Closed Caption
Many broadcasts nowadays include closed captions,
which may also include displays of additional
information in text form. This VCR enables you to access
and display this information of a digital program using
the closed caption feature.
A Digital Auto Setting
1 Access Digital Set Up menu screen
Press [DTV MENU].
2 Access Closed Caption screen
3 Select service type
•Each service type may offer a different language
or content, depending on the program being
broadcast.
4 Set auto mode
NOTES:
• Closed captioning may not work correctly if the signal being received is weak or when a videocassette is being played back.
• Most broadcasts containing closed captioning will display a notice at the start of the program.
• When viewing a digital program or during recording, the on-screen display cannot be displayed when the “SERVICE TYPE” under
the “CLOSED CAPTION” menu is set to other than “OFF”. To display the on-screen display, set “SERVICE TYPE” to “OFF”.
However, the setting of “SERVICE TYPE” does not affect the displaying of the on-screen display when viewing an analog program or
during playback.
•Turn on the VCR and the TV, and select the AV
mode on the TV.
•Set the [VCR/TV/CABLE/DBS] selector on the
Remote to [VCR].
Displaying the Closed Caption
When playing back a pre-recorded tape in ATSC
format, you can press [SUBTITLE] (‘Number’ key [6])
on the Remote to display the closed captions. Pressing
[SUBTITLE] repeatedly allows you to choose the
desired closed caption from a selectable range of CC1
~ CC5.
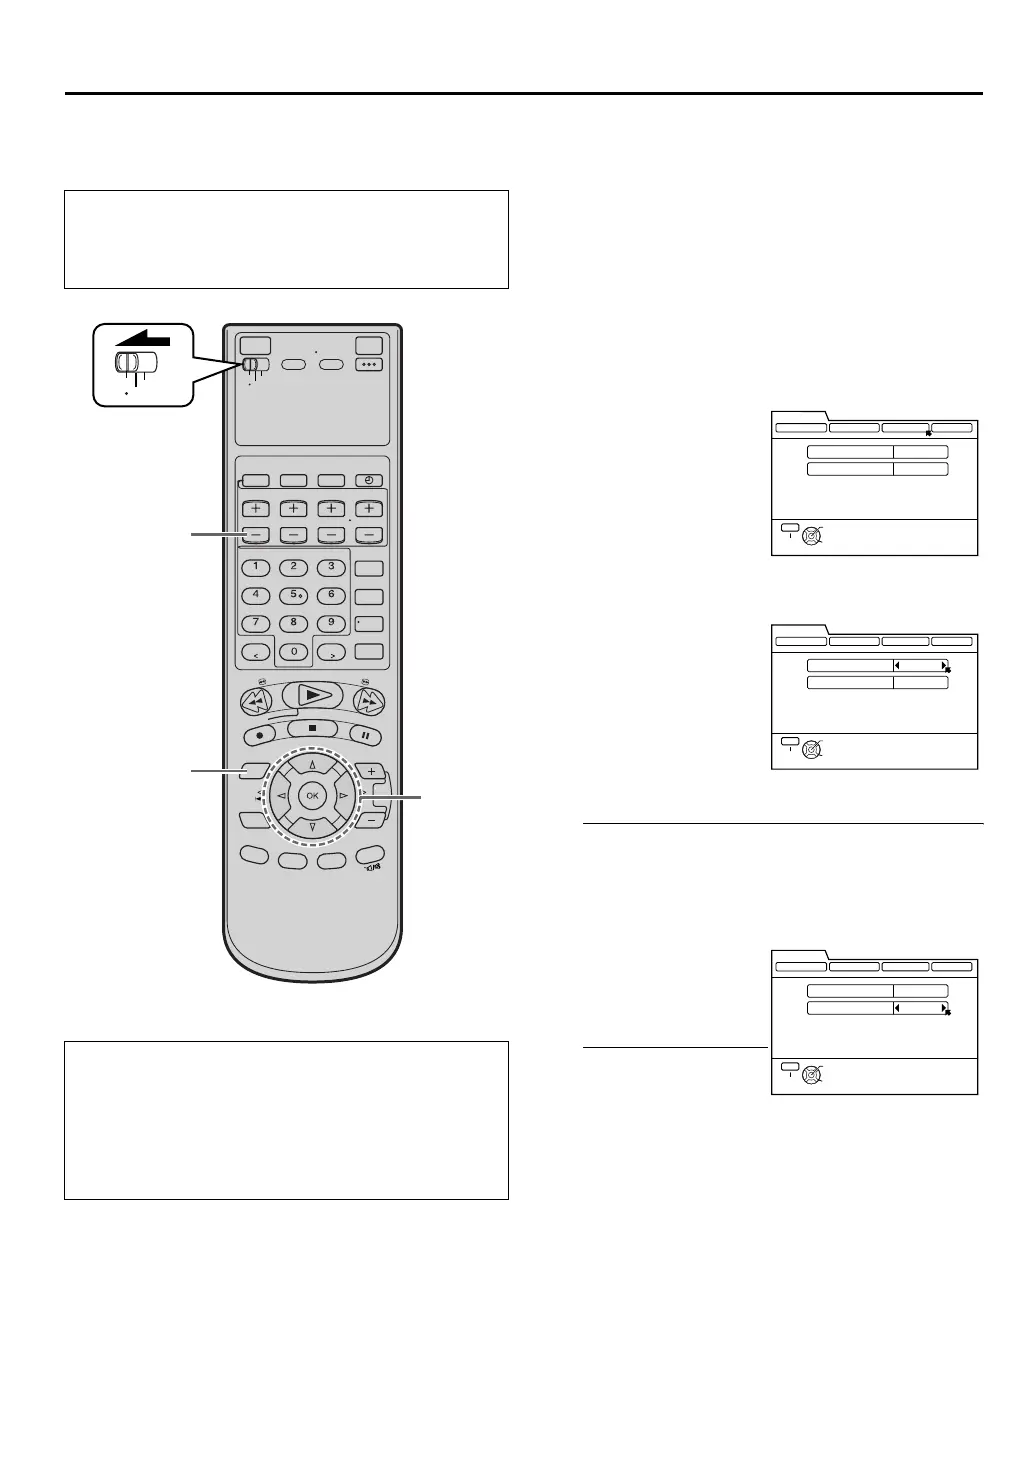
VCR
TV
CABLE
/DBS
[JKHI]
[DTV MENU]
[MENU]
[OK]
Press [D E] to move
the arrow to “CLOSED
CAPTION”, then press
[G] or [OK].
Press [D E] repeatedly
to select the desired
service type.
Each time you press the
button, the service type
changes as follows:
U “OFF” U “1” U “2”
U “3” U “4” U “5”
U “6” U “ (back to the
beginning)
Press [FG] to move the
arrow to “CC
DISPLAY”, then press
[D E] to select
“AUTO”.
•The font/type and
color will be set
automatically.
THEN PRESS [OK]
SELECT WITH ARROW KEYS
SELECT
OK
EXIT
MENU
DIGITAL SET UP
DIGITAL PROGRAM CLOSED CAPTION
TUNER PARENTAL
SERVICE TYPE
CC DISPLAY
OFF
AUTO
THEN PRESS [OK]
SELECT WITH ARROW KEYS
SELECT
OK
EXIT
MENU
DIGITAL SET UP
DIGITAL PROGRAM CLOSED CAPTION
TUNER PARENTAL
SERVICE TYPE
CC DISPLAY
1
AUTO
THEN PRESS [OK]
SELECT WITH ARROW KEYS
SELECT
OK
EXIT
MENU
DIGITAL SET UP
DIGITAL PROGRAM CLOSED CAPTION
TUNER PARENTAL
SERVICE TYPE
CC DISPLAY
1
AUTO
HM-DH100U_Eng.book Page 75 Thursday, August 5, 2004 1:54 PM
 Loading...