40 EN
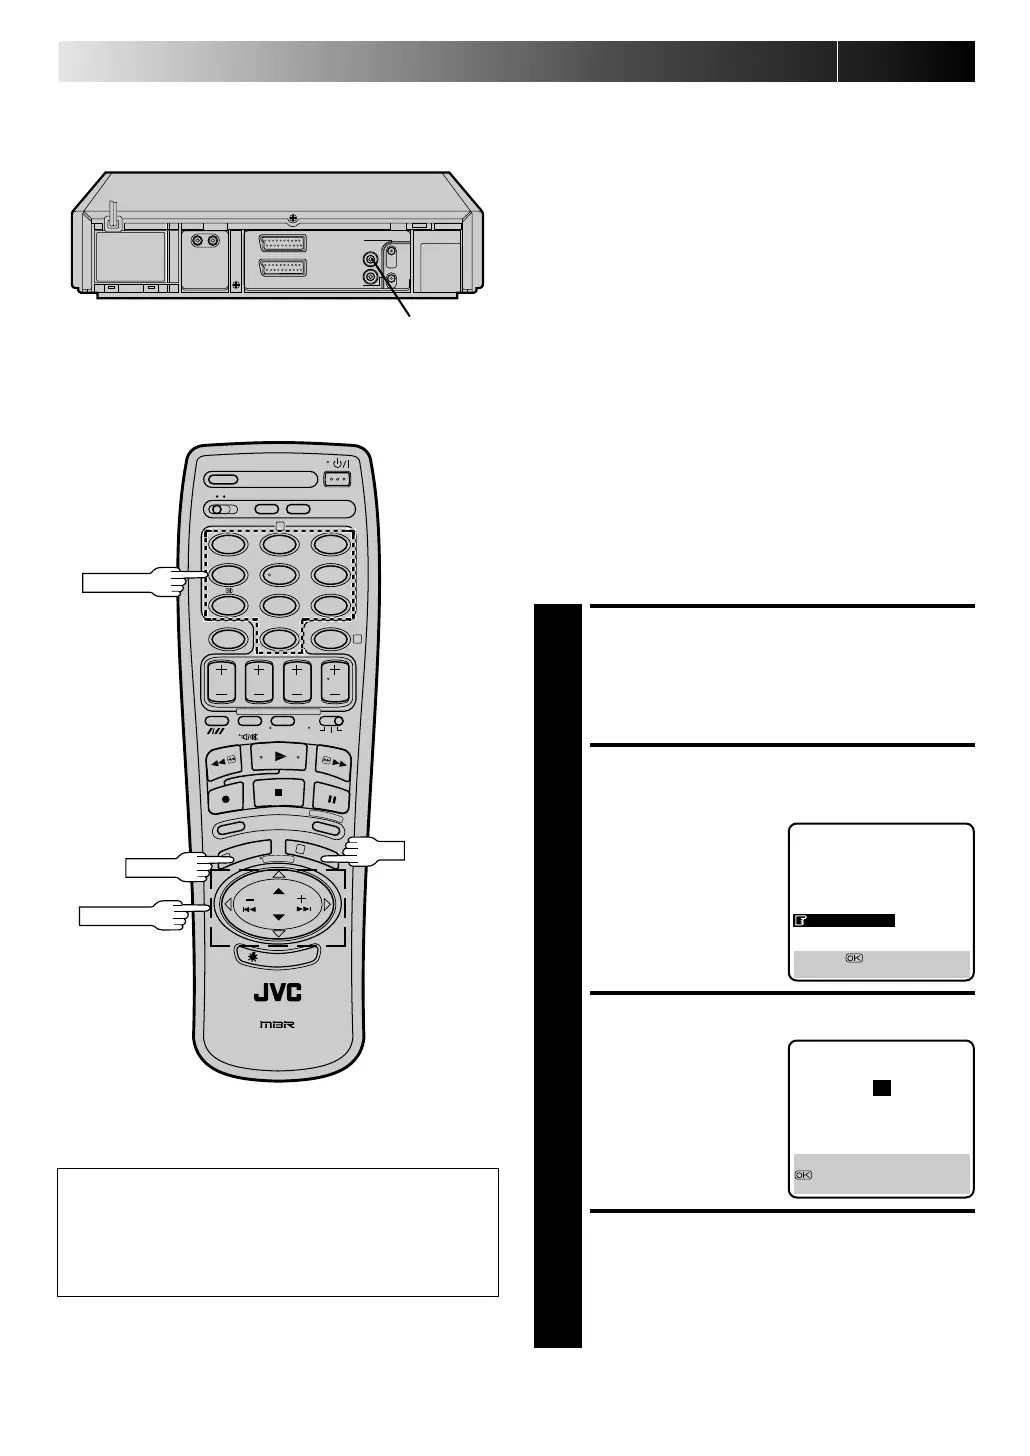
IN FORM ATIO N ON J TERM INAL
J Termina l (JLIP(Joint Level
Interfa ce Protocol) Connector)
The J Terminal is used to connect the recorder to a personal
computer or similar device to allow computerized control of the
recorder during editing and certain other operations.
Examples:
● Enables Random Assemble Editing of up to 99 segments with
the optional JLIP PLAYER PACK HS-V1EG, using this recorder
as the playback unit. (Use this recorder's PAUSE connector in
lieu of the EDIT jack.)
● Allows you to capture still images from the recorder into a
personal computer with the optional JLIP VIDEO CAPTURE
BOX GV-CB1E.
For further details consult your nearest JVC dealer. Information
(in English) is also available at one of JVC's World Wide Web
sites at http://www.jvc-victor.co.jp/
JLIP ID Number
Your recorder has its own JLIP ID number. This ID number must
be unique when your recorder is connected to another device
via its J terminal. The ID Number is preset to "1" at the factory.
You can change this number to any number between "1" and
"99". If it is necessary to change the JLIP ID number perform the
following steps.
12
45
3
6
8
0
7
9
2
4
1
3
OK
NU M BER
M EN U
J terminal
PU SH JO G
ATTEN TIO N
After you change your recorder's JLIP ID number, control
signal transmission may not work properly. If this happens,
turn off the recorder's power off once, then turn it back on
and try again.
ACCESS MAIN MENU
SCREEN
1
Press M EN U twice.
ACCESS JLIP ID NO. SET
SCREEN
2
Press PUSH JO G %
fi
and
move the highlight bar
(pointer) to "JLIP ID NO.
SET", then press OK.
SET JLIP ID NUMBER
3
Press PUSH JO G
%
fi to
enter the desired ID
number.
RETURN TO NORMAL
SCREEN
4
Press M EN U or OK.
MAIN MENU
MODE SET
AUTO CH SET
MANUAL CH SET
GUIDE PROG SET
CLOCK SET
JLIP ID NO. SET
[5
∞
] =
[MENU] : EXIT
JLIP ID NO. SET
1
CLOCK SET
[5∞] : SELECT
: OK
[MENU] : EXIT
Downloaded from:
https://www.usersmanualguide.com/