50 EN
CLO CK SET (cont.)
SET CLOCK
AUTOMATICALLY
4
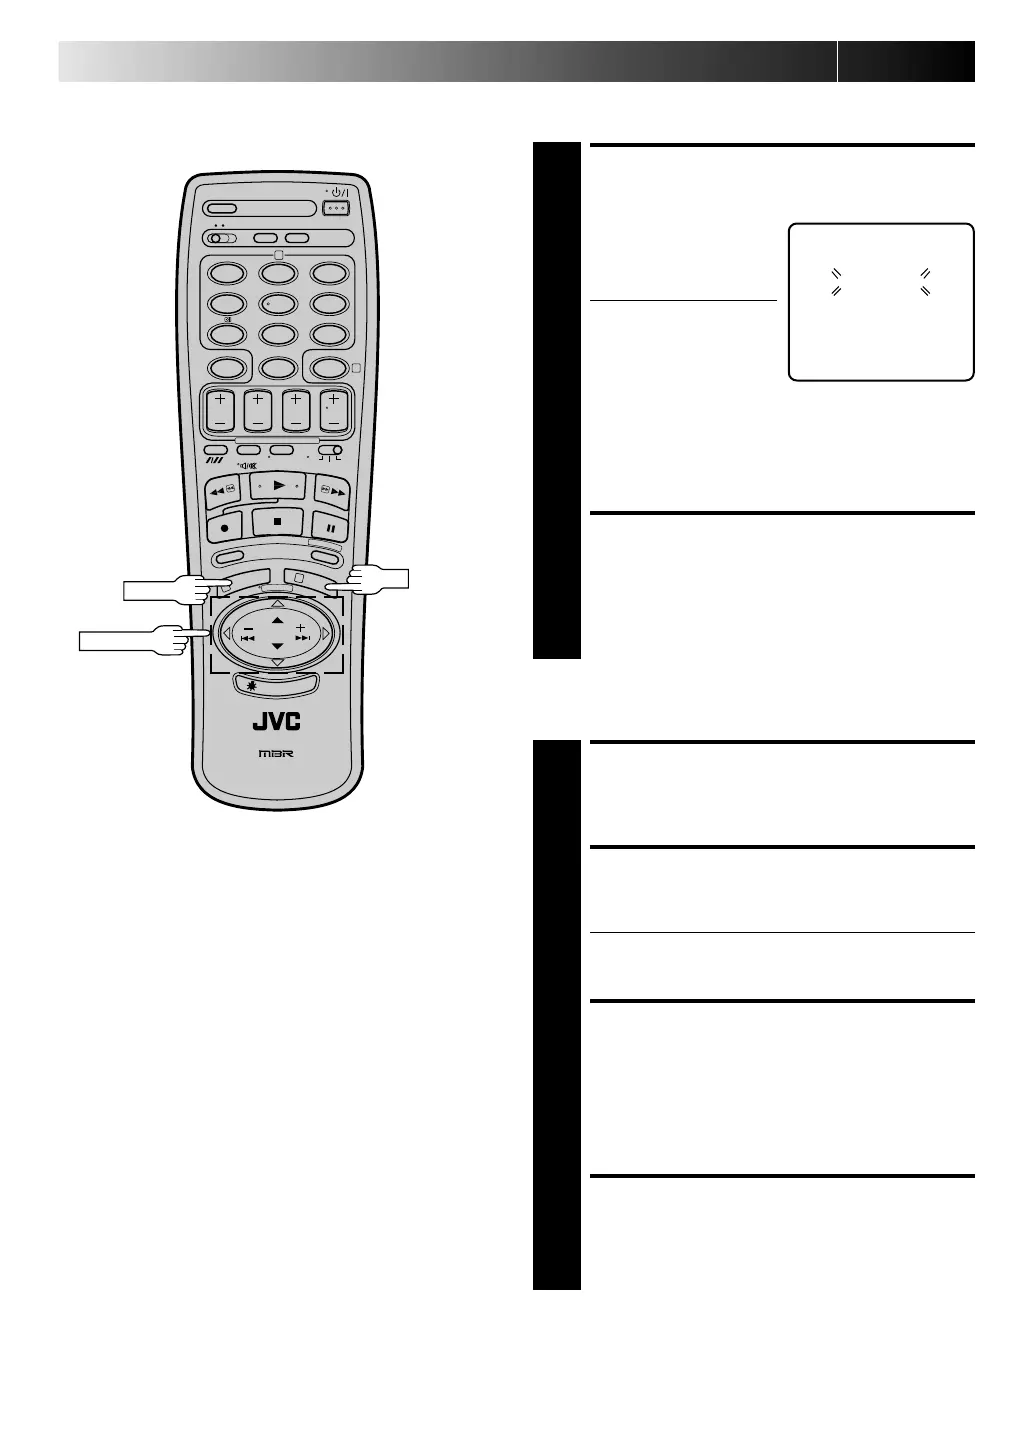
At the Clock Set screen,
press PUSH JO G . The
Auto Clock screen appears
and clock setting begins.
● If "TV PR." isn't set to the
channel position on
which Auto Clock data
is received, "ERROR"
appears, and then the
screen from step 3 reappears. To set "TV PR.", press
OK to place the pointer next to it, then cycle through
the numbers by pressing PUSH JO G%fi until the
number representing the channel position in which
the station transmitting clock setting data is stored
appears.
RETURN TO NORMAL
SCREEN
5
Once clock setting is completed, press MEN U to return
to the normal screen.
Auto Clock Set
%
N OTES:
●
Auto Clock and Just Clock require a PDC signal, and will not
operate with a VPS signal.
●
Just Clock (when set to "ON") enables adjustment of the
recorder's built-in clock every hour on the hour, except for
23:00, 0:00, 1:00 and 2:00.
●
Just Clock is not effective when . . .
– the recorder’s power is on (unless the recorder is tuned to
the same channel position selected in the Clock Set screen).
– the recorder is in the Timer mode.
– a difference of more than 3 minutes exists between the
built-in clock’s time and the actual time.
●
If Just Clock is set to "ON", the recorder’s clock is automati-
cally adjusted at the start/end of Summer Time.
●
Auto clock setting and Just Clock may not function properly
depending on the reception condition.
●
During Manual clock setting, if the day and month data are
invalid (such as 31st April), the month digits are cleared
automatically and the day digits begin blinking. Input the
correct data.
●
If, in step 4 of the Manual clock setting procedure, the year
digits are automatically cleared and the day digits begin
blinking, it is possible that you have input 29th February for a
non-leap year. Input the correct data.
12
45
3
6
8
0
7
9
2
4
1
3
PU SH JO G
OK
M EN U
AUTO CLOCK
PLEASE WAIT
JUST CLOCK : OFF
TV. PR : 1
SET DATE AND TIME
4
Press PUSH JO G%fi to set the hour, then press O K. The
“minutes” display begins blinking. Repeat the proce-
dure to set the minutes, day, month and year.
SET JUST CLOCK
5
The default setting is “OFF”. Set as desired by pressing
PU SH JO G%fi, then press O K.
● If you set to “OFF”, you can disregard the next step as
you won’t be able to receive regular clock adjust-
ments.
SET CLOCK DATA SOURCE
CHANNEL POSITION
6
The recorder is preset to receive clock setting and
adjustment data from channel position 1. Press PU SH
JO G%fi to set the channel position to the number
representing the station transmitting clock setting data,
then press OK.
START CLOCK OPERATION
7
Press M EN U .
M a nua l Clock Set
Downloaded from: https://www.usersmanualguide.com/



 To Next Page