•
.lye
GET0626-002A
[J]
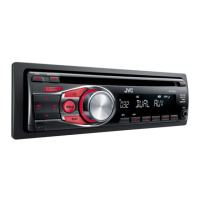
KD-A315/KD-R310
Installation/Connection
Manual
Manual
de
instalaci6n/conexi6n
Manuel
d'installation/raccordement
0909DTSMDTJEIN
EN,SP,FR
©
2009
Victor Company of Japan, Limited
ENGLISH
/
ESPANOl
/
FRAN<;:AIS
I
You
need
the installation
kits
which
corresponds
to your
car.l
Necesitani los kits de instalaci6n que corresponden con su vehiculo. /
Vous
avez
besoin
des
kits
d'inswllotion
correspondonts
0
vorre
vairure.
Check the battery system in your car I Verifique
el
sistema de bateria
de
su
vehiculo
I Verifiez
Ie
systeme
de
batterie
de
votre
voiture.
12
V
DC,
NEGATIVE
ground
112
V Cc, NEGATlVO amasa/12
Vce
masse
NtGATIVE
'--=
__
::...J
I
To
the
car
system
/
Al sistema de automovill
Au
systeme
outoradio
·
To
prevent short circuits:
-Disconnect the battery's negative terminal
and
make
all
electrical
connections before installing the unit.
-Cover
the
terminals
of
the
UNUSED
leads
with insulating
tape
•
Be
sure
to
ground
this
unit
to
the
car's
chassis
again
after
installation.
• Replace the fuse
with
one
of
the specified rating
· Connect speakers with a maximum power of more than
50
W
(impedance of
40
to 8
0)
Otherwise,
change
the
<AMP
GAIN>
setting.
(See
page
23
of the
INSTRUCTIONS.)
• The heat sink becomes very hot after use.
Be
careful not
to
touch
it
when removing this
unit
• Para evitar cortocircuitos:
- Desconecte
€I
terminal negativo de la bateria y realice todas
las
conexiones electricas antes de instalar
la
unidad.
-Cubra
los terminales de los conductores NO UTILlZADOS con
cinta aislante.
• Asegurese de volver a conectar
amasa
esta unidad
al
chasis del
automovil despues de
la
instalacion.
• Reemplace
el
fusible por uno con
la
corriente especificada.
• Conecte los altavoces con una potencia maxima de mas de
50
W (impedancia de 4 0 a 8
0).
De
10
contrario, cambie
el
ajuste
<AMP GAIN>.
(Yease
la
pagina
23
del
MANUAL
DE
INSTRUCCIONES).
•
EI
sumidero termico estara muy caliente despues del uso. Asegurese
de no tocarlo
al
desmontar esta unidad.
•
Pour
evirer
les
courts-circuits:
-Oeconnectez
10
borne
negative
de
fa
batterie
et
realiser
toutesles
connexions
avant
d'instalJer
f'appareil.
-Recouvrez
les
prises
des
fils
NON
UTILIsEs
avec
du
ruban
isofant.
•
Assurez-vous
de
raccorder
de
nouveau
fa
mise
a
10
masse
de
cel
appareil
au
chassis
de
10
voiture
apresl'inswllation.
·
Remplacer
fe
fusible
par
un
de
10
valeur
precisee.
·
Connectez
des
enceintes
avec
une
puissance
maximum
de
50
W
(impedance
de
4Da8
OJ
Sinan,
chongez
Ie
reglage
<AMP
GAIN>
(Voir
la
page
23
du
MANUEL
D'INSTRUCTIONS)
•
Le
dissipateur
de
chaleur
devient
tres
chaud
apres
uSQge.
Faire
attention
de
ne
pas
Ie
toucher
en
retirant
cet
appareil.
Heat sink I Sumidero termico /
Oissipateur
de
chaleur
The following illustration shows a typical installation.
If
you have any
questions or require information regarding installation
kits,
consult
your
JVC
car
audio
dealer
or
acompany supplying
kits.
La
siguiente ilustracion muestra una instalacion tipica.
Si
tiene alguna
pregunta
0 necesita informacion acerca de las herramientas para
instalaci6n, consulte con su concesionario de lYC de equipos de audio
para automoviles
0 a una compania que suministra tales herramientas.
L'illustrarion
suivonte
est
un
exemple
d'insrallation
typique.
Si
vous
avez
des
questions
ou
avez
besoin
d'information
sur
des
kits
d'instalfation,
consulter
vOffe
revendeur
d'autorodios
JVC
ou
une
compagnie
d'approvisionnement.
Part
list I Lista
de
componentes
I Liste
de
pieces
® Control
panel
I
Panel
de
control I
Ponneou
de
commande
(xl)
®
Sleeve
I Cubierta I
Manchan
(x
1)
©
Trim
plate / Placa de guarnicion I
Plaque
d'assemblage
(x I)
@ Power cord I Cordon de
alimentacion
I
Cordon
d'alimenration
(xl)
®
Handles
/ Manijas I
POignees
(x21
Install
the
unit at an angle of
less
than
30'
Instale
la
unidad a
un
angulo
de menos de
30'
Instaflez
/'appareil
avec
un
angle
de
mains
de
30
0
Removing the
unit
/ Extraccion de la unidad / Retrait de l'appareil
Release
the
rear section
first..
I Primero libere la seccion trasera
...
/
Ouvrez
10
section
arriere
en
premier..
Bend
the
appropriate
tabs
to hold the
sleeve
firmly
in
place.
Doble las lenglietas apropiadas para retener
firmemente la manga en su lugaL
Tordez
les
fanguettes
appropriees
pour maintenir
Ie
manchon
en
place.
Do
the
required electrical connections.
Realice las conexiones electricas requeridas.
Realisez
les
connexions
eJecrriques.
I
I When installing the
unit
without using the sleeve / Instalacion de la unidad sin
utilizar la cubierta / Lors de !'installation de l'appareil scans utiliser de manchon
Flat
head
screws-MS x 8 mm
(MS
x
3/8")
I Tornillo,
de
cabeza
plana-MS
x 8 mm
I
(MS
x
3/8
pulgada)
I
V/~'~''''~M;"mm~"",,~mo,.,
',;II::II~~;~j
~",'.::~:'D
.I~
:====~
::=::~
-.J
I Pocket I Compartimiento I
~'
~~
I
Pache
<lllUllIlX<llllIl(j
I
Bracket
I
Mensu!a
I Support'
2
IIn-dash mounting / Montaje en el tablero / Montage encastre
I'
3 D D
,
""",,~'iffiP
*1
When you stand
the
unit,
be
careful not to
damage
the
fuse
on
the
*1
Al
poner
Ia
unidad vertical, tenga cuidado de no daiiar
el
fusible
rear. provisto en la parte posterior.
*2
Not supplied
for
this unit. "2 No suministrado con esta unidad.
*1
Lorsque
vouS
mettez
I'appareil
ala
verticale.
faire
attention
de
ne
pas
endommoger
Ie
fusible
situe
sur
I'arriere.
*2
Non
fourni
avec
cet
apparel!
• The fuse blows.
~
Are
the
red
and
black
leads
connected correctly'
·
Power
cannot
be
turned
on.
~
Is
the
yellow lead connected?
•
No
sound from the speakers,
~
Is
the
speaker
output
lead
short-
circuited?
•
"PROTECT"
appears on the display and
no
operation
can
be
done.
q
Is
the speaker
output
lead short-circuited or touches
the
chassis of
the
car/head unit?; Have you reset your unit?
·
Sound
is
distorted.
q
Is
the
speaker
output
lead
grounded?;
Are
the "-" terminals ofLand Rspeakers
grounded
in
common?
· Noise
interfere
with
sounds.
c:::>
Is
the rear ground terminal
connected to
the
car's chassis using shorter and thicker cords?
, This
unit
becomes hot,
~
Is
the
speaker
output
lead
grounded' ;
Are
the U
-"
terminals of Land Rspeakers
grounded
in
common?
· This
unit
does
not
work
at
all.
~
Have you reset your unit?
•
EI
fusible
se
quema.
~
tEstan los conductores rojo y negro
correctamente conectados?
• No
es
posible
conectar
la
alimentacion.
~
tEsta
eI
cable amarillo
conectado?
• No
sale
sonido
de
los
altavoces.
q tEsta el cable de salida del
altavoz cortocircuitado?
• Aparece
"PROTECT"
en
la
pantalla y
no
se
puede realizar
ninguna
operation.
~
lEl conductor de salida de altavoz esta en
cortocircuito
0 en contacto con
el
chasis del automovil/auriculares? ;
tReinicializola unidad?
•
EI
sonido
presenta
distorsion.
~
tEsta
€I
cable de salida del altavoz
conectado
amasa?;
tEstan los terminales
"-"
de los altavoces L y R
conectados a una masa comun?
•
Perturbacion
de
ruido.
~
tEl terminal de tierra trasero esta
conectado
al
chasis del automovil utilizando los cordones mas corto y
mas grueso?
• Esta
unidad
se
calienta.
~
tEsta
el
cable de salida del altavoz
conectado
amasa?;
lEstan los terminales
"-"
de los altavoces L yR
conectados a una masa comun?
• Esta
unidad
no
funciona
en
absoluto.
~
tReinicializola unidad?
,
·
le
fusible
saute.
~
Les
ftls
rouge
et
nair
som-its
racordes
correctemem?
·
l'appareil
ne
peut
pas
etre
mise
sous
tension.
~
Le
filjauneest-
elle
roccordee?
·
Pas
de
son
des
enceintes.
~
Le
{il
de
sortie
d'enceinte
esHI
courr-
circuite?
· "PROTECT"
apparait
sur
I'affichage
et
aucune
operation
ne
peut
etre
realisee. q
Est-ce
qu'un
fil
de
sortie
d'enceinte
est
court-circuite
ou
touche
Ie
ch6ssis
de
10
voiture!appareil principol?;
Avez-vous
reinitialise
votre
appareil?
·
le
son
est
deforme.
c:::>
Le
fil
de
sortie
d'enceime
est-il
a
10
masse?;
Les
barnes
u_u
des
enceintes
gauche
et
droit
sont-elles
mises
ensemble
a
fa
masse?
·
Interference
avec
les
sons.
q
La
prise
arriere
de
mise
a
10
terre
est-elle
connectee
au
chassis
de
10
voiture
avec
un
cordon
court
et
epais?
·
Cet
appareil
devient
chaud.
~
Le
{il
de
sortied'enceinte
est-il
0
10
masse?;
Les
bornes
u_u
des
enceintes
gaucheet droit
son£-effes
mises
ensemble
a
10
masse?
·
Cet
appareil
ne
fonctionne
pas
du
tout.
q
Avez-vous
reinitialise
votre
appareif?