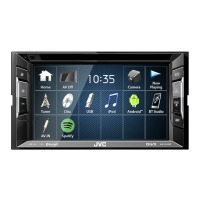
SettingsSettings
<Volume Offset>
Adjust and store the auto-adjustment volume level for
each source. If the source is a disc, the adjustment is
stored for each of the following categories:
• DVD/VCD
• CD
• DivX*/MPEG1/MPEG2/MP3/WMA/WAV/AAC/FLAC
The volume level will automatically increase or
decrease when you change the source.
• –15 to +6 (Initial: 00)
* Only for KW-V240BT Region 4.
Display settings
Display the <Display> screen.
On the Home screen, touch as follows:
Then, on the <Settings> screen, touch [Display].
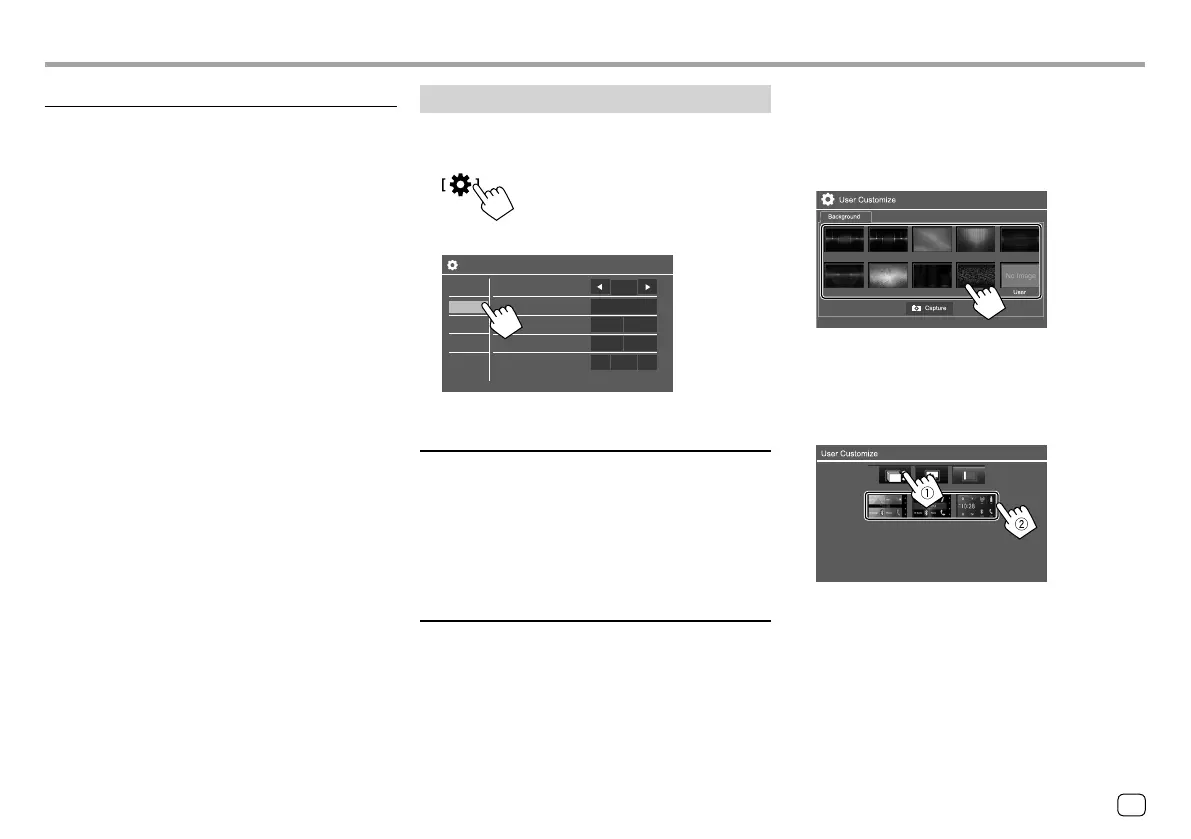
Settings
Dimmer
User Customize
OSD Clock
Demonstration
Scroll
Enter
Auto
ON
OFF
Once
ON
OFF
Input
System
Audio
Display
ON OFF
E.g. Display settings screen for KW-V240BT
<Dimmer>
• Auto (Initial): Dims the screen and button
illumination when you turn on the headlights.
– Connection to the car light control switch is
required. (Page 54)
• ON: Activates dimmer.
• OFF: Deactivates dimmer.
<User Customize>
You can change the display design. While playing a
video or picture, you can capture an image and use
the captured image as a background.
• You cannot capture copyrighted content and images
from iPod/iPhone.
• When using a JPEG file as the background, make sure
that the resolution is 800 x 480 pixels.
• The color of the captured image may look different
from that of the actual scene.
For KW-V140BT/KW-V240BT
<Background>: Changes the background design.
For KW-V340BT
1 Change the Home screen design
Display the Home screen design selection screen (1),
then select the Home screen design (2).
• The selectable background designs differ depending
on the selected Home screen design.
• When the Home screen design is changed, source
icon designs are also changed.
43
ENGLISH
ENKW-V2018STKR.indb43ENKW-V2018STKR.indb43 2017/05/259:042017/05/259:04