EasyManua.ls Logo

JVC RX-772VBK - User Manual

JVC RX-772VBK
54 pages
To Next Page IconTo Next Page
Loading...
For Customer Use:
Enter below the Model No. and Serial
No. which are located either on the rear,
bottom or side of the cabinet. Retain this
information for future reference.
Model No.
Serial No.
LET0052-001A
[J]
INSTRUCTIONS
RX-772VBK
AUDIO/VIDEO CONTROL RECEIVER
O
N
S
C
R
E
E
N
C
O
N
T
R
O
L
RM-SR772U REMOTE CONTROL
/SAT POWER
CD
DISC
CD
TRACK
SOUND
CONTROL
VCR
POWER
AUDIO
POWER
SLEEP
VIDEO TAPEVCR
TV
SOUND
TEST REAR
SEA MODE SURR MODE
FM/AM PHONOCD
546
213
87
/P
9
0
10
AUDIO/TV
/VCR
MENU
EXIT
MENU
TAPE VCR
CONTROL
VOLUME
CHANNEL
MUTE
FF / ¢
PLAY
STOP
REC
TV/VIDEO
TV VOLUME
PAUSE
4 / REW
TV/CATV
CNTRDELAY
CATV
/SAT
FM MODE/MUTE
100+
RETURN
+10
ONE TOUCH
OPERATION
RX-772V AUDIO/VIDEO CONTROL RECEIVER
STANDBY
POWER
MASTER VOLUME
–+
SEA MODE
PHONESSPEAKERS
MEMORYTUNER
SURROUND MODE
VIDEO VCR TV SOUND FM AM CD PHONO TAPE
SURROUND
ADJUST
SETTING
ONE TOUCH
OPERATION
12
SOURCE
_ON OFF
MEMORY
SEA
ADJUST
SEA Graphic Equalizer
RX-772VBK[J]_0052-001A.Cover 97.4.8, 3:22 PM1
Question and Answer IconNeed help?

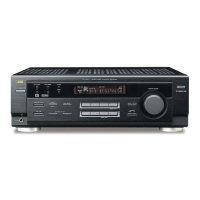
Do you have a question about the JVC RX-772VBK and is the answer not in the manual?

JVC RX-772VBK Specifications

General IconGeneral
Channels2
Input Impedance47 kΩ
Input sensitivity200 mV
Video ConnectionsComposite
Power Output100 watts per channel
Frequency Response20 Hz - 20 kHz
Signal-to-Noise Ratio100 dB
Tuning rangeFM
Speaker load impedance8 ohms
Speaker Impedance8 Ω

Summary

INSTRUCTIONS

Warnings, Cautions and Others

Getting Started

Before Installation

Guidance on installing the receiver, including general handling and location considerations.

Checking the Supplied Accessories

List of items included with the receiver to ensure all parts are present upon purchase.

Switches, Buttons and Controls

Remote Control Overview

Connecting Antennas

FM Antenna Connections

Instructions for connecting the FM antenna, including cable stripping and terminal connection.

AM Antenna Connections

Details on connecting the AM loop antenna and an external wire antenna.

Connecting the Speakers

Connecting the Front Speakers

Procedure for connecting front speakers to the receiver, including speaker selector usage.

Connecting Rear and Center Speakers

Instructions for connecting rear and center speakers to the appropriate terminals.

Connecting the Subwoofer Speaker

Guide for connecting a powered subwoofer to the receiver's subwoofer output.

Connecting Audio;Video Components

Audio Component Connections

Diagrams and instructions for connecting audio sources like CD players and turntables.

Video Component Connections

Diagrams for connecting video sources like VCRs and video disc players to the receiver.

Connecting the Power Cord

Putting Batteries in the Remote Control

Basic Operations

Turning the Power On and Off

How to power the receiver on and off using the front panel or remote control.

Selecting the Source to Play

Procedure for choosing the desired audio or video input source for playback.

Adjusting the Volume

Selecting the Front Speakers

Listening with Headphones

Muting the Sound

Recording a Source

Basic Settings

Adjusting the Front Speaker Output Balance

How to adjust the sound balance between the left and right front speakers.

Listening at Low Volume (Loudness)

Enabling the loudness function to boost bass at low listening volumes.

Using the Sleep Timer

Selecting the Center Speaker Size

Using Visual Confirmation

One Touch Operation

About the One Touch Operation

Explanation of the function to store and recall optimal sound settings for each source.

Using the One Touch Operation

Step-by-step guide to storing and recalling sound settings using the One Touch feature.

Receiving Radio Broadcasts

Tuning in Stations Manually

Instructions for manually finding and tuning into radio stations.

Using Preset Tuning

How to store and recall favorite radio stations using preset channels.

Selecting the FM Reception Mode

Assigning Names to Preset Stations

Using the SEA Modes

Selecting Your Favorite SEA Mode

Guide to choosing from preset Sound Effect Amplifier (SEA) modes for different music genres.

Creating Your Own SEA Mode

Using the Surround Processor

Using JVCs Hall Surround

Instructions for activating and adjusting JVC's original Hall Surround sound mode.

Speaker Arrangements for Dolby Surround

Preparing for Dolby Surround

Using Dolby Surround

Using the On-Screen Display to Control the Receiver

Basic Procedures

General steps for navigating and using the receiver's menu system on the TV screen.

Selecting the Source to Play

How to select the desired input source using the on-screen menu.

Adjusting the Front Speaker Output Balance

Procedure to adjust speaker balance via the on-screen display menu.

Listening at Low Volume (Loudness)

Enabling loudness compensation for low volume listening via the menu.

Using the Sleep Timer

Setting the sleep timer to automatically turn off the receiver.

Selecting the Center Speaker Size

Configuring the receiver based on the size of the connected center speaker.

Using Visual Confirmation

Activating the on-screen display for visual feedback on receiver operations.

Operating the Tuner

Selecting Your Favorite SEA Mode

Creating Your Own SEA Mode

Selecting the Surround Modes

COMPU LINK Remote Control System

AV COMPU LINK Remote Control System

FUNCTIONS:

Remote Control of TV via Receiver Sensor

Control the TV using the receiver's remote sensor for integrated operation.

One-Touch Video Play

Initiate video playback easily by inserting a cassette or pressing play.

Automatic TV Input Mode Selection

The TV automatically switches input mode based on the receiver's selected source.

Automatic Power On;Off

The TV and VCR power on and off automatically with the receiver.

Using the Remote Control for JVC Components

Operating Other Manufacturers Components

Troubleshooting

Specifications

How to Locate Your JVC Service Center

Limited Warranty

Related product manuals