1-6 (No.MB409)
SECTION 3
DISASSEMBLY
3.1 Disassembly of Right plate left plate Top cover
• Replacement of the fuses and AMP IC .THMS RES. Transistor. 7808 IC.
3.1.1 Replacing the fuses
(See Fig.1)
• Prior to performing the following procedure, remove right plate,
left plate, top cover.
(1) Replace the fuses inside.
Caution:
Be sure to use fuses with the specified
Fig.1
3.1.2 Replacing the AMP IC
(See Fig.2)
• Prior to performing the following procedure, remove the right
plate, left plate, top cover.
(1) Remove the two screws A from the heat sink between AMP
IC.
(2) Remove the solder fixing the AMP IC.
3.1.3 Replacing the THMS RES
(See Fig.2)
• Prior to performing the following procedure, remove right plate,
left plate, top cover.
(1) Remove the one screw B from head sink.
(2) Remove the solder fixing THMS RES.
3.1.4 Replacing the transistor
(See Fig.2)
(1) Remove the one screw C from head sink.
(2) Remove the solder fixing the Transistor.
Fig.2
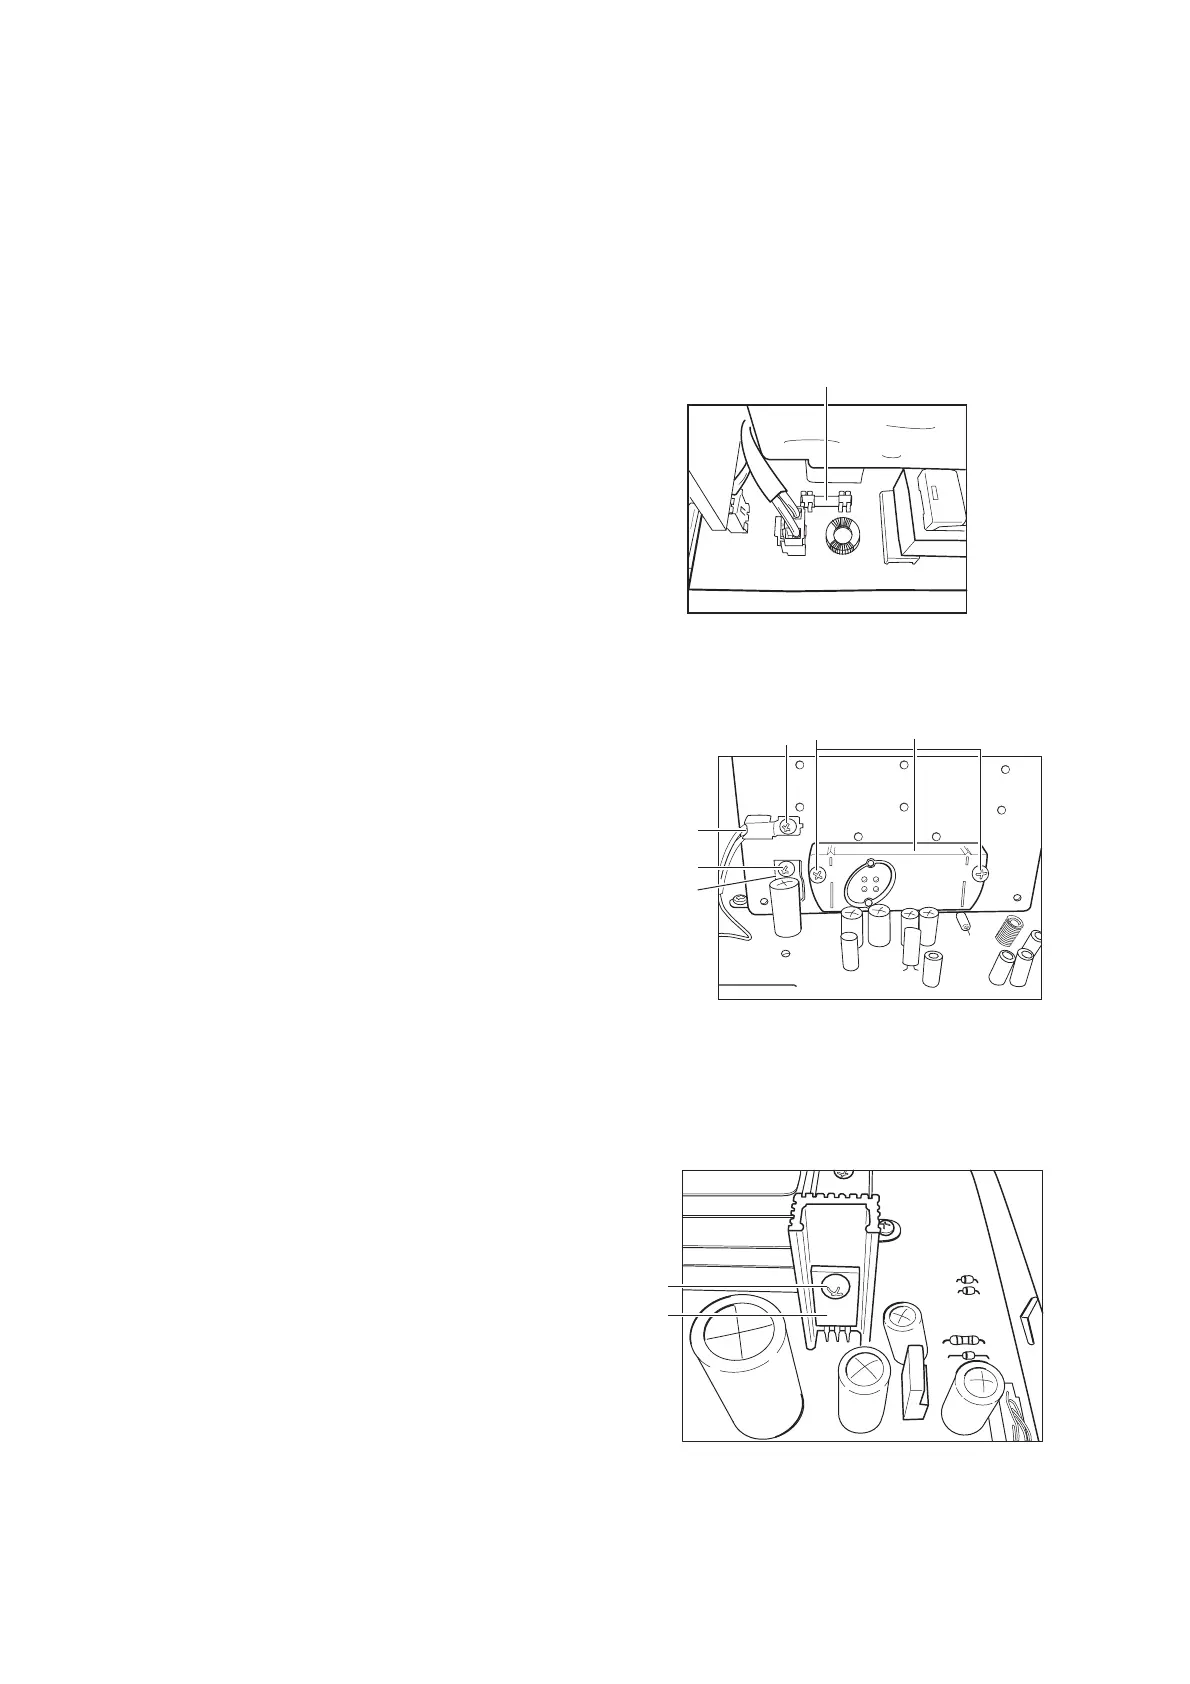
3.1.5 Replacing the 7808 IC
(See Fig.3)
(1) Remove the one screw D from head sink.
(2) Remove the solder fixing 7808 IC.
Fig.3
T1.25AL 250V
THMS RES
C
B
A
AMP IC
Transistor
D
7808 IC
 Loading...