22
W. ACTIVATE/DE-ACTIVATE LOCKOUT MODE
You may need to use Lockout Mode, for example, during a fire or fire drill when
you do not want anyone to return to his or her office. This procedure will de-
activate all regular User Access Codes that are active, including Manager
Codes, but excluding the Master Code.
Required User Level: Master
W-1 Put the lock into Pushbutton Programming Mode.
W-2 Enter Command 499# for Lockout Users Mode (except Master).
W-3 Enter 1# to activate Lockout Mode and 0# to disable it.
W-4 Example of Complete Entry: 499#1# or 499#0#.
W-5 Enter another # to indicate the end of programming.
W-6 You have now activated or de-activated Lockout Mode.
X. PERFORM MANUAL DIAGNOSTICS
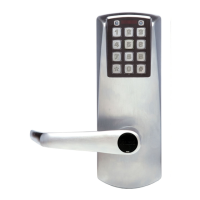
Use the Diagnostic Code to perform manual diagnostics of the lock, green LED,
red LED, buzzer, and the twelve pushbuttons - 0 through 9, * and #.
Required User Level: Master
X-1 Put the lock into Pushbutton Programming Mode.
X-2 Enter Command 500# for Diagnostics.
X-3 You will see a green LED and hear a high beep followed by a red LED and
a low beep.
X-4 Enter 123456789*0#, in that order exactly, to test each pushbutton. If
every pushbutton is working correctly, you will see a
green LED and hear a
normal beep for each pushbutton that is pressed.
X-5 Example of Complete Entry: 500#123456789*0#.
X-6 Enter another # to indicate the end of programming.
X-7 If you see a red LED at any time you are pressing a pushbutton, or at the
end of the code, there could be a problem with the pushbuttons.
X-8 Try the Diagnostic Code again, 500#123456789*0#, to be sure you
entered all the numbers correctly and in the correct order.
X-9 Enter another # to indicate the end of programming.
X-10 If you still see the red LED, the lock has a problem. Call a service person
to repair or replace the lock.
 Loading...
