7
A
E
D
F
LH - Left Hand
RH - Right Hand
LHR - Left Hand Reverse
RHR - Right Hand Reverse
A
B
C
D
C
J
K
H
G
I
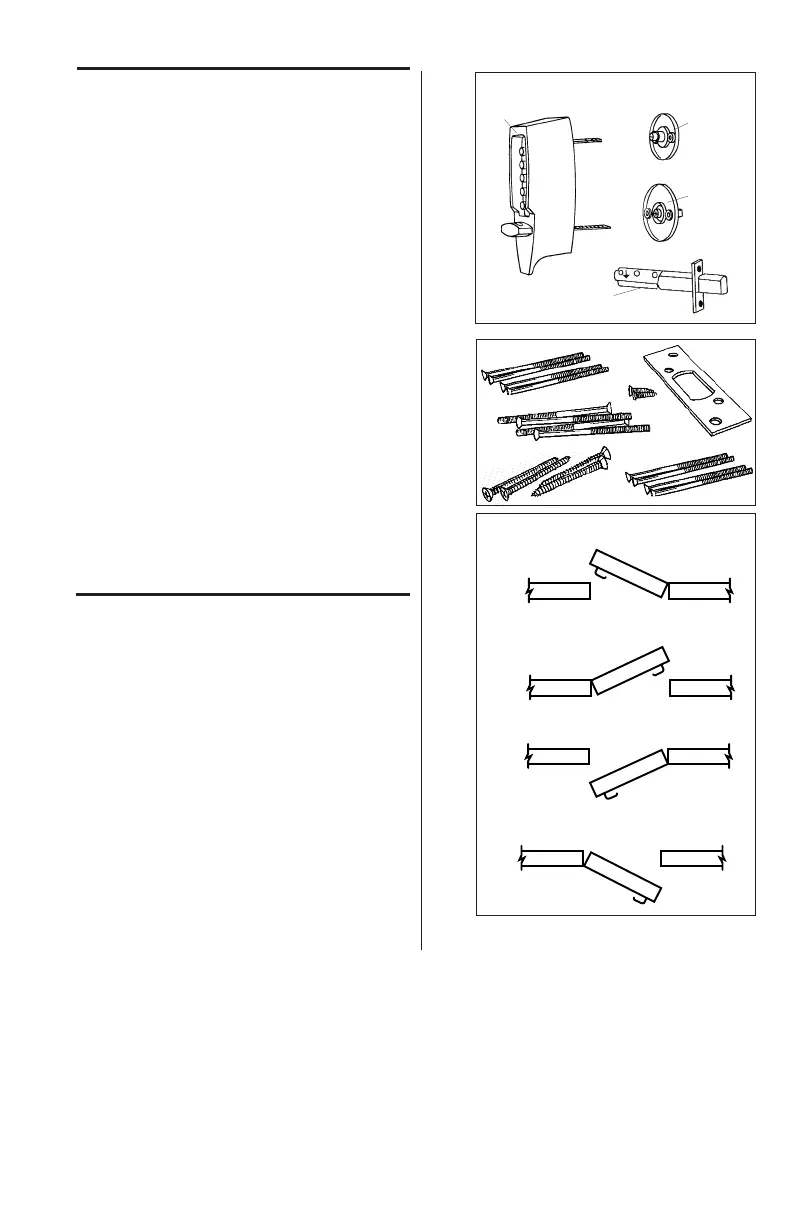
Liste de vérification
Utiliser cette liste pour s'assurer que tout est
compris.
A - Assemblage du boîtier extérieur
C - Pêne dormant 7102 (distance d'entrée
à 2 po) ou 7108 (distance d'entrée à
2 po)
D - Assemblage de la barrette tournante
intérieure
E - Assemblage du changement de
combinaison intérieur
Ensemble de vis :
F - Gâche
G - 4 Boulons traversants (3 po)
H - 2 (boulons) vis combinées pour le métal
et le bois
I - 4 Vis combinées pour le métal et le bois
J - 4 Boulons traversants (2 po)
K - 4 Boulons traversants (2 po)
Gabarits (au centre du livret)
Déterminer la main de votre porte
La plupart des instructions d'installation font
référence à la main de votre porte. On déter-
mine la main de la porte en maintenant cette
dernière en position fermée, de l'extérieur ou
du côté des boutons-poussoirs de la porte.
A) Porte avec poignée à droite. La porte
s'ouvre vers l'intérieur (pousser). Les
charnières sont sur le côté droit.
B) Porte avec poignée à gauche. La porte
s'ouvre vers l'intérieur (pousser). Les
charnières sont sur le côté gauche.
C) Porte avec poignée à droite inversée. La
porte s'ouvre vers l'extérieur (tirer). Les
charnières sont sur le côté droit.
D) Porte avec poignée à gauche inversée. La
porte s'ouvre vers l'extérieur (tirer). Les
charnières sont sur le côté gauche.