11
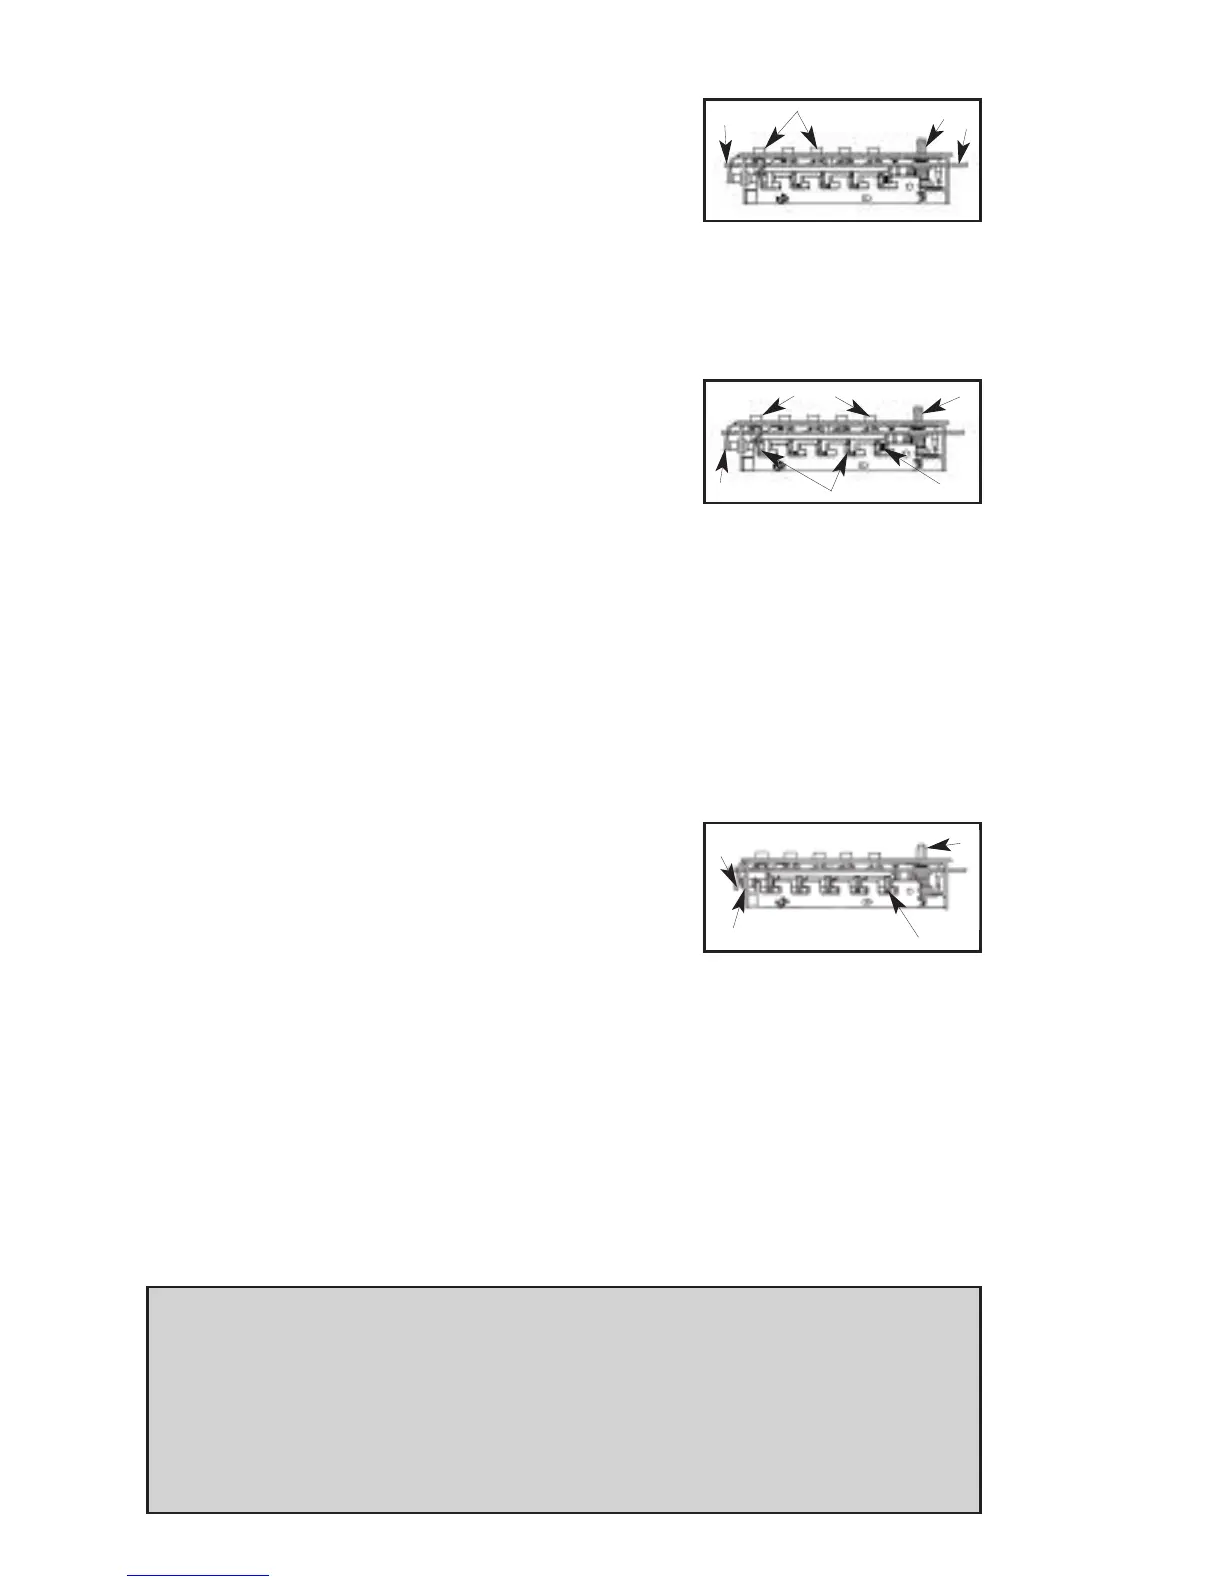
L-2 Hold the chamber in one hand by the screw
tab (b) on each end with the key-stems (c)
facing you and the control shaft (d) at the
bottom (See Figure 12-2).
L-3 Rotate the control shaft (d) counter-clockwise
and release to clear the chamber (See Figure 12-2).
L-4 Look at the 5 code gears (e). If any code gear pockets (f) are already
at the shear line (open position), ignore them. They are not used in
the combination (See Figure 12-3).
L-5 Find the code gear pocket/s (f) that is
farthest away from the shear line (open
position). Depress that key-stem/s (c) and
release (See Figure 12-3).
L-6 Find the code gear pocket/s (f) that is the next farthest away from the
shear line (open position). Depress that key-stem/s (c) and release
(See Figure 12-3).
L-7 Repeat step K-6 until all code gear pockets (f) are at the shear line
(open position).
L-8 If all the code gear pockets (f) are not lined up at the shear line
(open position), start over at step K-3.
L-9 Depress the lockout slide (g) at the top of the chamber and release.
(looks like one end of a spark plug)
(See Figure 12-4).
L-10 Rotate the control shaft (d) counter-
clockwise to clear the chamber and release.
The lockout slide (g) should pop out (button
will not move yet) (See Figure 12-4).
L-11 Depress the key-stem/s (c) that you want in your new combination,
releasing each after it is depressed (See Figure 12-2).
L-12 Once you have depressed all the digits in your new combination, turn the
control shaft (d) clockwise (See Figure 12-4). The code change button (h)
under lockout slide (g), should pop up (See Figure 12-4). Your new com-
bination is now set.
L-13 Look at the code gear pockets (f). The numbers in you new combination
should not be at the shear line (open position) (See Figure 12-3).
Reinstallation: Replace the 3-sided dust cover marked “Kaba Simplex.” Make
sure the staked joints on both end plates fit through the slots on the dust
cover. Stake the end 2 plate joints. Replace the combination chamber into the
lock using the same 2 screws removed earlier. Slip the drive cam assembly
back on the control shaft of the chamber assuring it is in the same position
as prior to removal. Re-secure the back plate, assuring the tailpieces are seat-
ed correctly using the same 2 screws removed earlier.
d
b
b
c
(5)
f
g
c
(5)
e (5)
h
g
f
d
12-2
12-3
12-4
d