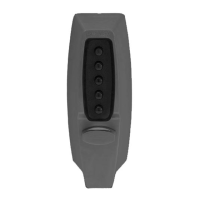
8
B
A
Determining the Lock Location
Marking the Door
NOTE: Be sure to use the correct template
(right-hand or left-hand door - 2
3
⁄8 " or 2
3
⁄4 "
backset). If the wrong template is used,
you will have to redrill the door, leaving
previously drilled holes exposed.
1) Carefully fold the template found in the
center of this booklet on 2
3
⁄8" or 2
3
⁄4"
line as indicated in (Figure 2-1.)
2) Tape the template securely to the outside
of the door so that all the indicated
folds are properly aligned with the
edge of the door.
3) Use a center punch to make the marks for
drilling the seven holes precisely at the
points indicated on the template. The
center punch mark in the edge of the
door must be centered based on the
thickness of the door.
4) Remove the template.
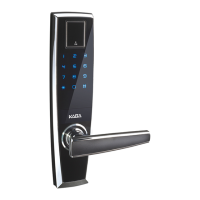
Install the lock with the exterior thumbturn
hole at least 7" (18 cm) above your primary
lockset so it is comfortable to operate and not
in the way when you turn the door knob.
*A minimum stile width of 4" (10.16 cm) is
required for mounting, (Figure 1-1.)
Determinación de la orientación
de su cerradura
Marcación de la puerta
NOTA: Asegurar que se use el patrón cor-
recto (puerta derecha o izquierda – entra-
da posterior a 2" o 2"). Si se usa el
patrón equivocado, habrá que volver a
perforar la puerta, y los orificios anterior-
mente perforados quedarán expuestos.
1) Doblar con cuidado el patrón que se
encuentra en el centro de este folleto sobre
la línea de 2" o 2" como se indica en
(Figura 2-1).
2) Fijar bien el patrón con cinta adhesiva a la
parte exterior de la puerta para que todos
los dobleces indicados estén debidamente
alineados con el borde de la puerta.
3) Usar un sacabocado para hacer las
marcas para perforar con precisión los
siete orificios en los puntos indicados en el
patrón. Se debe centrar la marca del
sacabocado en el borde de la puerta de
acuerdo con el espesor de la puerta.
4) Remove the template.
Instalar la cerradura con orificio de cierre gira-
torio exterior a una distancia de por lo menos
7" (18 cm) arriba del cerrojo principal de man-
era que resulte fácil de usar y que no quede
en el medio cuando se gira la perilla de la
puerta.
*Para el montaje se requiere un ancho míni-
mo de montante de 4" (10,16 cm)
(Figura 1-1.)