5 Installation and startup
KACO Gerätetechnik GmbH 6 Installation Instructions Powador 01xi
5. Installation and startup
5.1 Selecting the appropriate place of installation
Nevertheless the place of installation should be as dry
as possible in order to ensure long lifetimes. In addition,
the installation environment should be well air-
conditioned so as to protect against overheating and
prolongate the useful life.
The following rules should be observed when selecting
the place of installation of your inverter:
Ensure good access for assembly or service work.
Maintain a minimum clearance of 500 mm around the
device and between the device and other objects, such
as cabinets, ceiling, or similar
The device has been designed for vertical wall
installation.
Please ensure free air circulation around the device and
through the heat sink at the rear side.
If the inverter is installed in a switch cabinet or similar,
please provide forced ventilation to ensure that heat is
dissipated adequately.
The heat sink may reach a temperature of max. 90°C.
Therefore, only mount the inverter on walls that are
made from a heat-resistant material.
Ensure that the wall has an adequate load-bearing
capacity and only use the appropriate installation
material.
In areas with a special risk of flooding, always make
sure to install the inverter in a sufficiently elevated
place.
Installation at eye level makes it easier to read the
display.
5.2 Installing the inverter
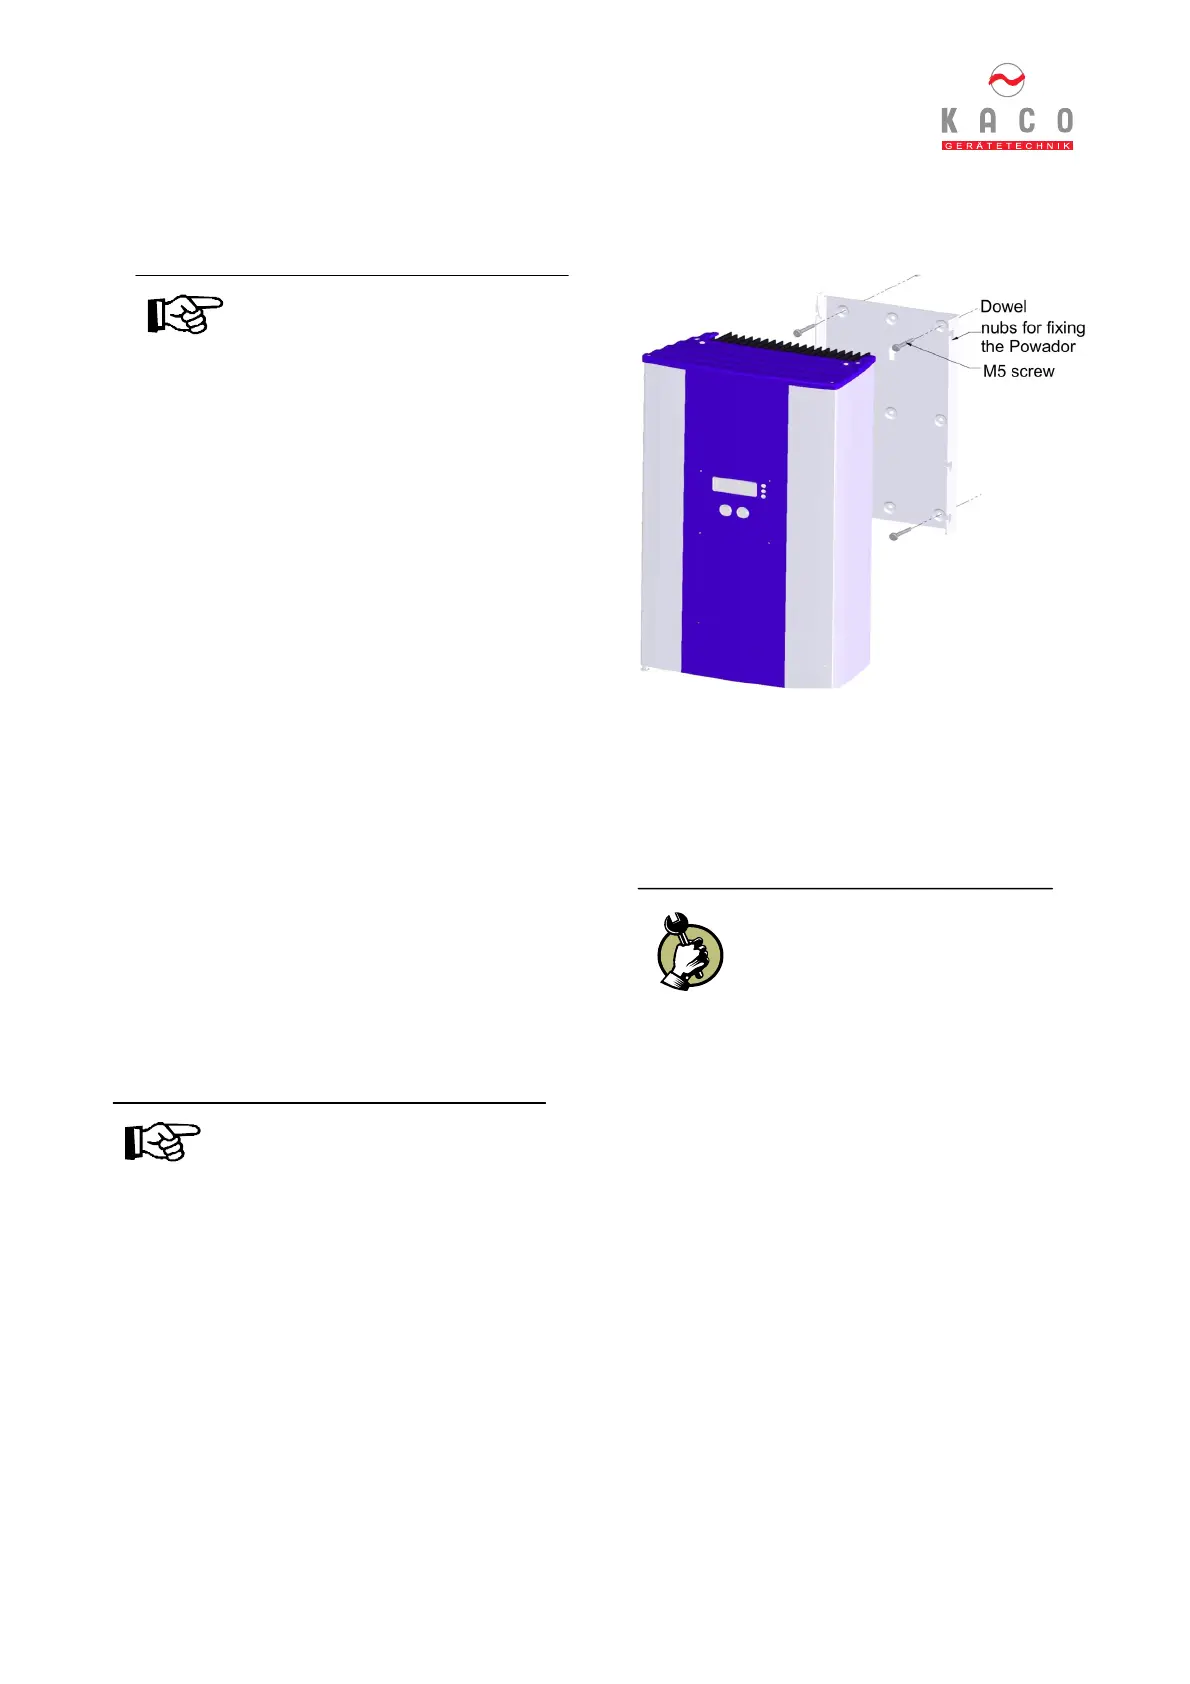
Figure 5.1: Wall installation of Powador
The inverter is shipped together with an installation kit
consisting of four dowel pins and four 70 mm Philips-
type screws. Prior to installation the condition of the
mounting wall has to be checked. If necessary, use a kit
other than the one shipped with your inverter.
- Drill the holes for the dowel pins
according to the positions indicated
on the mounting plate.
- Place the dowel pins into the holes.
- Using the Philips-type screws, fasten
the mounting plate to the wall. Make
sure that the arrow shown on the
mounting plate is directed upwards.
- Suspend the inverter in the
suspension fixture. Ensure that the
bars rest on the appropriate
lugs/noses in the heat sink.
- Lock the safety catch. To do, this,
slide the upper end of the catch
towards the wall until the groove is
parallel to the wall (see Figure 5.2)
Powador inverters will meet the
requirements of protection class IP54,
if all cable connections are allocated
or closed accordingly.
Important!
Due to the high system voltage,
less current may flow on the DC
voltage side than on the AC
voltage side. Given the same cable
cross-sections, losses are
therefore higher on the AC voltage
side than on the DC voltage side.
For this reason and for thermal
reasons, the inverter should
therefore be placed in the vicinity
of a metering station.
 Loading...