English 13
Symbols on the appliance
Type plate
Further important device specifications are
provided on the type plate. The type plate is
located on the rear of the device casing.
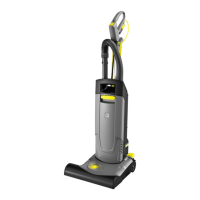
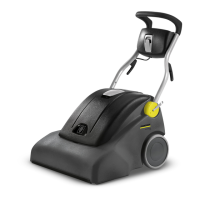
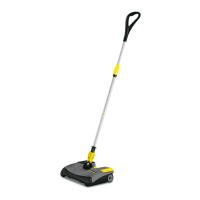
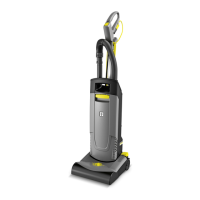
Device elements
1 Mains cable
2 Mains power cable connection
3 Suction pipe/suction hose
4 Brush head lock
5 Fibre height selection button
6 Filter cover
7 Filter cover lock
8 Main switch
9 Handle
10 Brush cover rotary lock
11 Side section bow
12 Side section
13 Filter bag lock
14 Filter bag
15 Motor protection filter
16 Filter casing
17 Exhaust filter
18 Suction hose at brush head
19 Handle adjustment
20 Cable hook, rotating
21 Cushion nozzle
22 Crevice nozzle
23 "Filter" indicator lamp
24 Indicator tuft
25 Roller brush
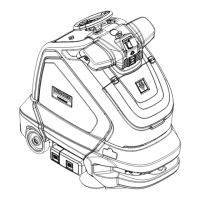
Installation
Install the loose parts for handle provided
with the device before using the device for
the first time.
See page 4 for illustrations
1 Handle with mains power cable
2 Handle metal tube
3 Suction pipe and suction hose
1. Open the handle adjustment.
2. Push the metal pipe of the handle into
the mount all the way to the lowest latch-
ing position (latches audibly twice).
3. Insert the handle into the metal pipe and
latch into place. Take care to ensure that
the mains cable is not jammed or twist-
ed.
4. Pull the handle to the first (uppermost)
latching position.
5. Close the handle adjustment.
6. Insert the suction hose into the connec-
tion nozzle.
7. Insert the suction pipe into the mount on
the device
Startup
Installing the filter bag
1. Unlock and remove the filter cover.
2. Turn the filter bag lock to the right to un-
lock.
3. Insert the filter bag and turn the filter bag
lock to the left to lock.
4. Fit and lock the filter cover.
Connecting the mains power cable
to the device
1. Open the cable holder at the handle.
2. Plug the mains cable provided into the
socket on the device.
3. Secure the plug connection against un-
intentional unplugging using the cable
holder on the handle.
Use only the mains cable provided and only
replace it with an equivalent cable in the
case of damage (see "Technical data").
Setting for long pile carpets
Setting for short pile carpets
Filter status indicator (see
"Troubleshooting -Remove the
blockage")
Identifies the access to the roll-
er brush in the side section (see
"Replacing the roller brush")
 Loading...