4.3 Operation 4.3
INSERTING AND ALIGNING THE MATERIAL
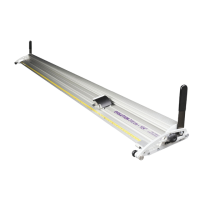
Pull either of the two Lift & Hold Levers forward to raise the Cutter Bar and slide the
material to be cut underneath it use the position of the cutting groove in the Base to get
an approximate position, lower the Cutter Bar pushing either Lift & Hold Lever away from
you. Align the sight edge with your cutting marks by slightly raising the Cutter Bar and
adjusting the position of the board at each end. The cutter will cut within 0.5 to 1mm
[0.02” to 0.04”] of the sight edge; this small gap allows easier alignment when cutting to
the edge of an image.
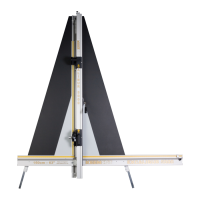
Check that the width of the Cutter Bar is laying flat on the surface of the material, if not
loosen both Tilt Adjustment Knobs, lift the Cutter Bar and lower it down again to settle it in
position and tighten both Tilt Adjustment Knobs. The cutter is now set for cutting all types
of material of that thickness.
The flip over Material Stop can be introduced to prevent heavy materials sliding when
taking deep cuts.
➤
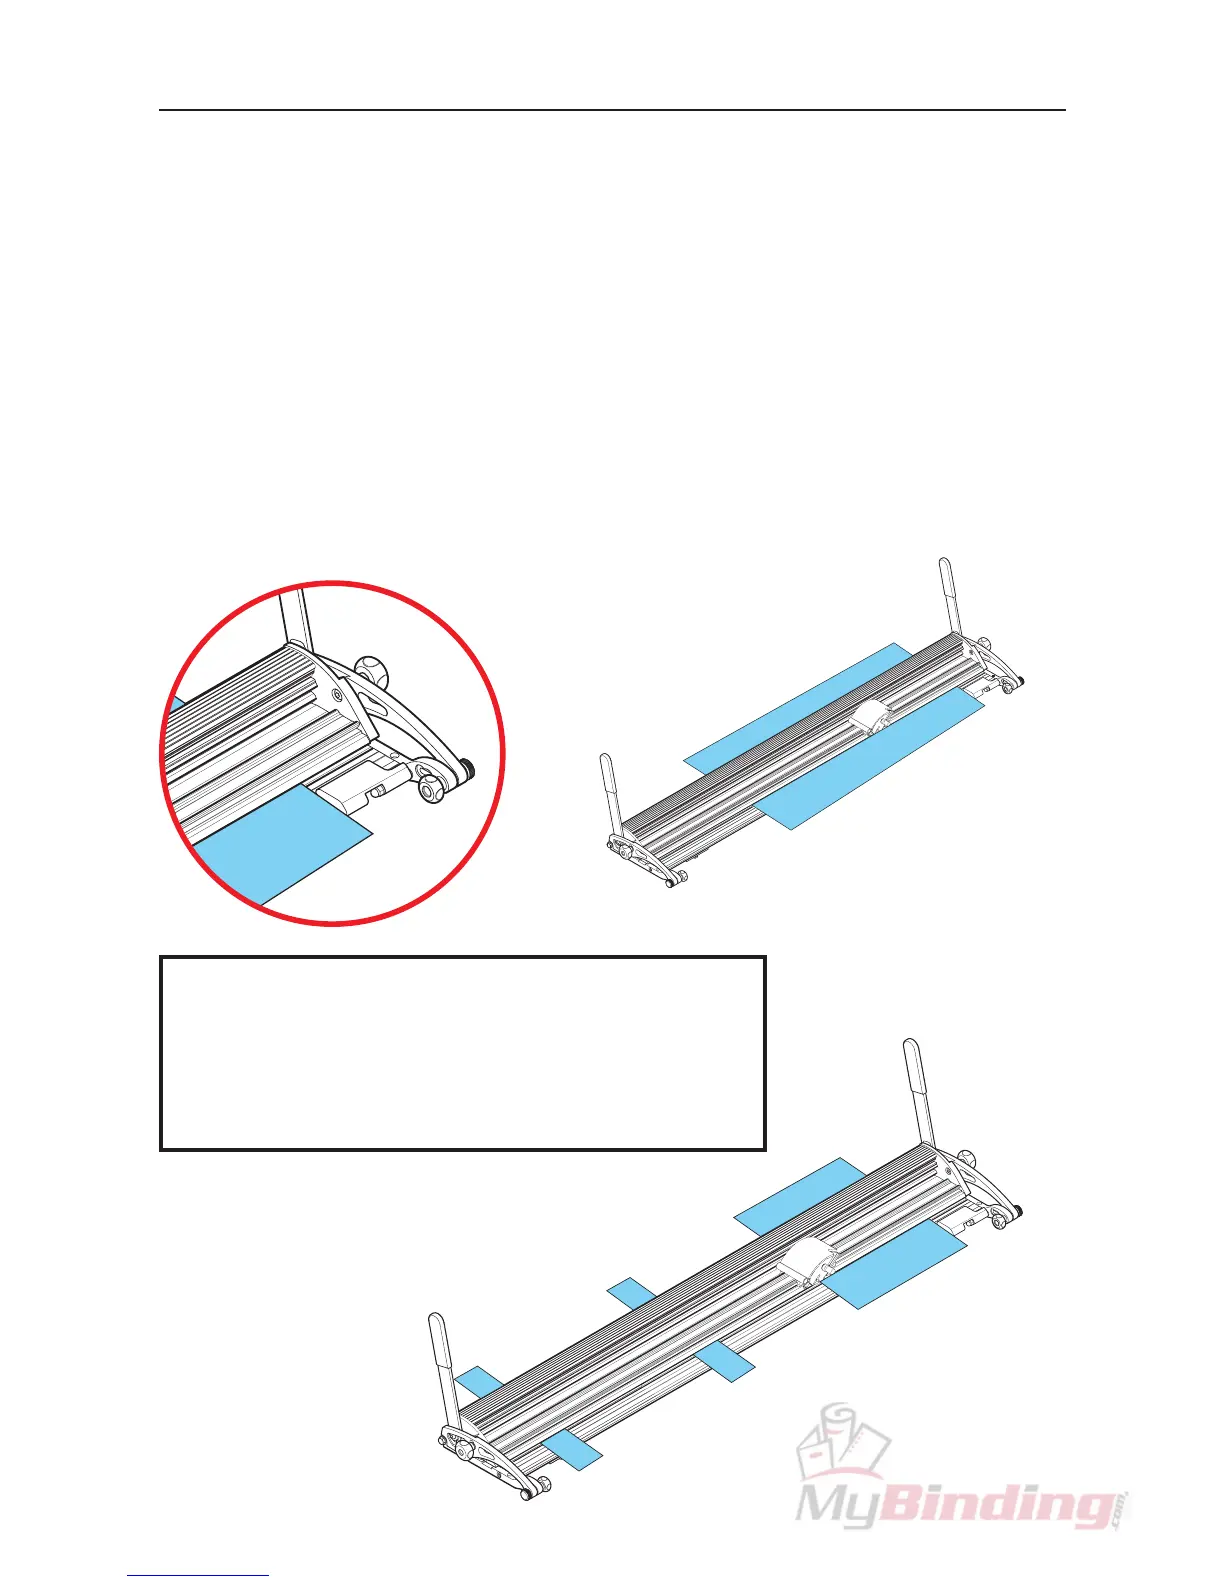
NOTE: If you are cutting small pieces of board place
it at right hand end of the Cutter Bar against the
Material Stop and place scraps of the same thickness
material under the remaining bar to support it and
prevent sagging.