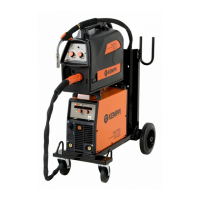
2. INSTALLATION
2.1 POSITIONING OF THE MACHINE
Place the machine on a sturdy, level surface that is dry and does not release dust or other
impurities to the suction air through the fan grill.
Notes for positioning of the machine
• Preferably,situatethemachinesomewhataboveoorlevel.
• Thesurfaceinclinationmaynotexceed15degrees.
• Theremustbeatleast20cmoffreespaceinfrontofandbehindthemachineforcooling
air circulation.
• Protectthemachineagainstheavyrainanddirectsunshine.
• Ensurethefreecirculationofthecoolingair.
Theprotectionclassofthemachine,IP23S,allowswaterspraytohitthemachine’souter
coveringatamaximumangleof60degrees.
NOTE! Never aim the spray of sparks from a grinding machine toward the device.
2.2 CONNECTION TO MAINS
FastMig™ KM power sources are connected to the 400-V three-phase network using the mains
cable supplied with the machine.
The machine is equipped with a ve-metre mains cable that does not have a plug. Before use,
check the mains cable and install a mains plug. If the cable does not comply with the local
electricalregulations,replaceitwithacompliantcable.See’Technicalspecications’.
NOTE! The mains cable or plug may be installed or replaced by only an electrical contractor or
installer authorised to perform such operations.
Replacement of the mains cable
1. Unscrew the mounting screws on the top and sides of the machine, and remove the case
by lifting it.
2. Disconnect the phase leads from connectors L1, L2, and L3, and disconnect the protective
earth lead.
3. Pass the cable to the machine through the inlet ring at the rear of the machine, and secure
the cable with a cable clamp.
4. Connectthecable’sphaseleadstoconnectorsL1,L2,andL3.
5. Connect the yellow-green protective earth lead to its connector .
NOTE! Do not connect the zero lead if you are using a ve-lead cable.
EN
7
FastMig KM 300, 400, 500 / © Kemppi Oy /0901
FI
SV
NO
DA
EN
DE
NL
FR
ES
PL
RU
 Loading...