CHECKING
AND ADJUSTMENT PRIOR TO MEASUREMENT
In
order to
operate
the oscilloscope at its optimum performance
level,
carry
out
the
following
checks and adjustment before doing your measurements. The
instructions
which
follow
concerning basic operation techniques and applications
assume that the checks and adjustment described here have been completed.
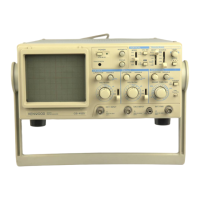
1.
Adjust
the control panel to the
following
settings.
MODE AUTO
SOURCE
VERT
MODE
ffiaHJMMMODE
CHI
(INV:OFF)
SLOPE
+
LEVEL
12
O'CLOCK
CHI
(Y);
CH2 (X)
^ POSITION
12
O'CLOCK
VARIABLE
CAL
VOLTS/DIV
5V/DIV
AC-GND-DC
GND
HORIZONTAL
<
•
POSITION
12
O'CLOCK
VARIABLE
CAL
SWEEP
TIME/DIV
0.2ms/DIV
X10MAG
OFF
Next,
after checking the power source voltage ratings,
switch
the
POWER
control
on. The pilot lamp
will
light up, and a trace
line
will
appear in 10 to 15
seconds.
Check
to see that rotating the
INTENSITY
control to the right
increases
trace brightness, and rotating it to the
left
decreases brightness.
Then
rotate
the
INTENSITY
control all way to
left
and extinguish the trace
line
to being preheating. For the most accurate measurement results, it is
necessary
to preheat the oscilloscope for about 30 minutes. However, if you
intend
only to display waveforms, preheating is not necessary.
2.
After
preheating, adjust the
INTENSITY
control so that the trace
line
is easy
to see, and adjust the
FOCUS
control to attain the clearest display image
possible.
Then
use the
TRACE ROTA
control to bring the trace
line
parallel
with
the horizontal graduation
lines.
16
 Loading...