Installation and ConnectionInstallation and Connection
Installation procedure
1 Remove the key from the ignition and
disconnect the
· battery.
2 Make the proper input and output wire
connections for each unit.
3 Connect the speaker wires of the wiring
harness.
4 Take Connector B on the wiring harness
and connect it to the speaker connector in
your vehicle.
5 Take Connector A on the wiring harness
and connect it to the external power
connector in your vehicle.
6 Connect the wiring harness to the unit.
7 Install the unit in your car.
Make sure that the unit is installed securely in place.
If the unit is unstable, it may malfunction (eg., the
sound may skip).
8 Reconnect the · battery.
9 Initialise the unit (page44).
10 Configure <Initial Setup> (page4).
Parts list for installation
Note: This parts list does not include all the package
contents.
¥ Wiring harness (× 1)
ø Extension wire, 2 m (× 1)
π Microphone, 3 m (× 1)
[ Trim plate (× 1)
“ Mounting sleeve (× 1)
] Extraction keys (× 2)
‘ GPS aerial, 3.5 m (× 1)
\ Metal plate (× 1)
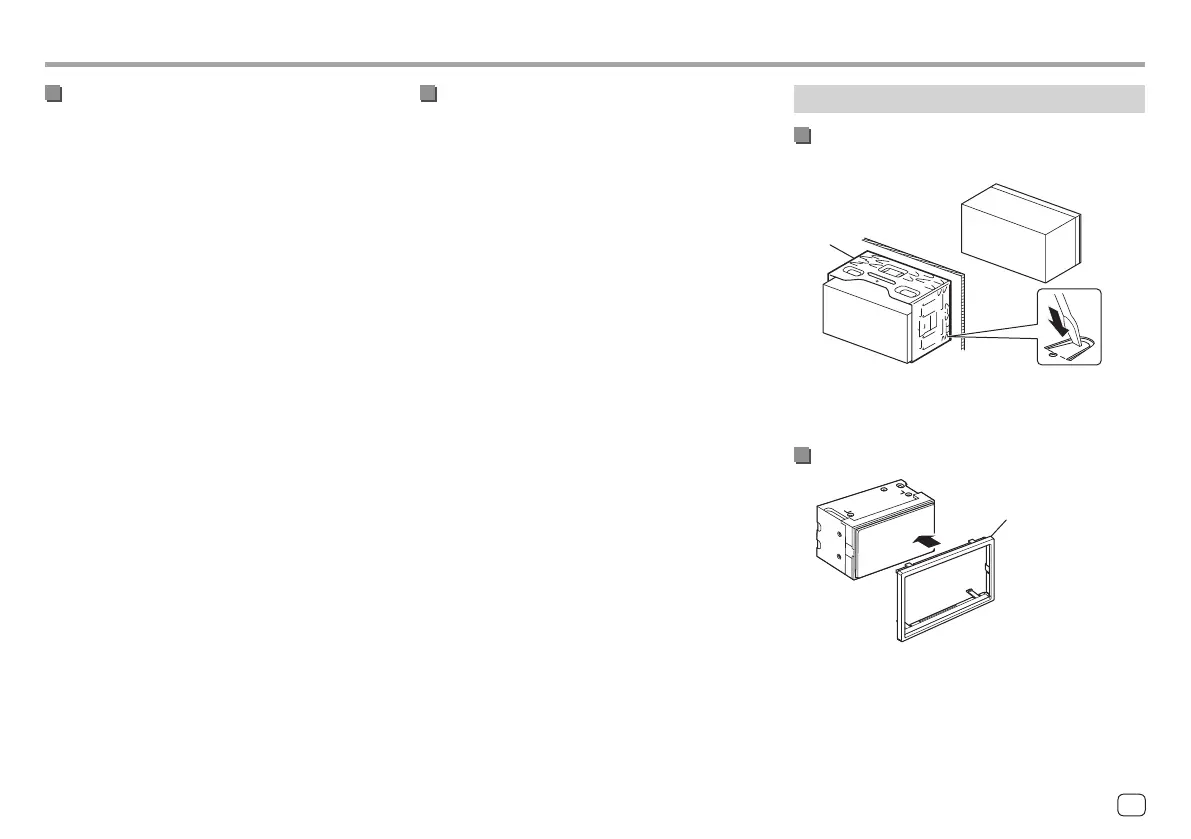
Installing the unit
Installing the unit using the mounting
sleeve
“
Bend the tabs of the mounting sleeve with a
screwdriver or similar utensil and attach it in place.
Installing the trim plate
[
49ENGLISH
00DMX7722DABSE.indb4900DMX7722DABSE.indb49 2022/10/1716:202022/10/1716:20