Do you have a question about the Keysight N6700C Series and is the answer not in the manual?
Provides legal notices, copyright, edition, and warranty information for the product.
Outlines general safety precautions and specific warnings for operating the instrument.
Emphasizes the importance of reviewing safety warnings before installation or operation.
Details the procedures for installing the mainframe, including module installation and rack mounting.
Explains how to install power modules and filler modules into the mainframe.
Provides instructions for mounting the mainframe in a 19-inch EIA rack cabinet.
Explains how to connect the power cord, including safety precautions and ferrite core installation.
Guides on connecting outputs, including output wiring, wire sizing, and specific module wiring.
Describes how to properly connect wires and straps to the terminal blocks for output wiring.
Explains how to connect for remote sensing to improve voltage regulation at the load.
Details the wiring procedure for remote sensing, emphasizing short wire pairs and separation from load leads.
Describes how to connect multiple outputs in parallel or series for increased current or voltage capability.
Explains how to connect power supplies in parallel for greater current capability.
Details how to connect outputs in series for greater voltage capability.
Guides on turning on the unit, using front panel controls, and navigating menus.
Explains the procedure for powering on the instrument and the self-test process.
Guides on enabling the output using the On/Off key and interpreting status indicators.
Explains how to navigate the front panel command menu to access instrument functions.
Demonstrates how to navigate the menu to program the over-voltage protection function.
Explains how to configure the remote interfaces: GPIB, USB, and LAN.
Describes primary LAN configuration functions via front panel menus, including saving changes and DHCP.
Guides on manually configuring LAN settings such as IP address, hostname, DNS, and WINS.
Guides on controlling the instrument directly from a web browser over LAN.
Explains how to enable or disable the USB, GPIB, and LAN interfaces from the front panel.
Covers essential steps for programming the output, including setting voltage, current, and enabling the output.
Explains how to toggle between single-channel and multiple-channel views using the Meter key.
Details how to select an output channel for programming using the Channel key.
Describes methods for setting the output voltage using navigation keys or the Voltage key.
Explains how to set the output current using navigation keys or the Current key.
Details how to program the output resistance, primarily for battery testing applications.
Explains how to program the input power limit for N679xA load modules.
Guides on enabling the output using the On/Off key and configuring the key's behavior.
Covers programming output sequences of current, voltage, power, or resistance settings.
Explains list control for generating complex output sequences with precise timing.
Explains how the arbitrary waveform generator can modulate output for DC bias or waveform generation.
Describes waveform generation with variable dwell periods and point assignments.
Covers how to make basic DC measurements and select measurement ranges.
Explains how output voltage and current are measured by sampling and averaging.
Details how to use various protection functions like Over-Voltage and Over-Current protection.
Guides on setting the over-voltage protection level and its tracking function.
Explains how to enable and program the over-current protection delay.
Guides on clearing latched protection status and restoring normal operation.
Explains the power-on self-test and how to initiate it manually.
Guides on password-protecting Admin menu functions for security.
Details how power is allocated across modules and the mainframe's power ratings.
Lists the power ratings for N6700C, N6701C, and N6702C mainframes.
Explains what happens when combined power exceeds mainframe rating and how power allocation limits it.
Explains the different operating modes such as Single-Quadrant, Multi-Quadrant, and Load Module operation.
Describes operating in constant voltage (CV) or constant current (CC) modes.
Provides fundamental information about the SCPI language, including command types and syntax.
Explains SCPI command types: common and subsystem commands.
Provides a detailed description of the individual registers and register groups for instrument status monitoring.
Details the parameters that are set to indicated values at power-on or after *RST.
Lists and explains SCPI error messages, including device-dependent and command errors.
Lists required test equipment and recommended models for verification and adjustment procedures.
Details the specific instruments and their requirements for performance verification.
Outlines procedures to verify that the system operates normally and meets published specifications.
Explains the purpose of verification procedures and types of tests available.
Shows diagrams for verification test setups, detailing lead connections.
Details tests for verifying voltage programming, readback accuracy, load effect, source effect, ripple, noise, and transient response.
Outlines tests for verifying current programming, readback accuracy, load effect, and source effect.
Explains the closed-case electronic calibration process for power modules.
Describes the calibration process, correction factors, and password requirements.
Provides figures for calibration test setups and general recommendations.
Details the process of downloading, installing, and running the firmware update utility.
Explains the function and location of switches that control access to calibration commands.
Provides step-by-step instructions for accessing the calibration switches.
Provides procedures for disassembling the instrument for troubleshooting and repair, including ESD precautions.
Outlines guidelines to prevent ESD damage during service operations.
Lists required tools and general procedures for disassembling the instrument covers.
Provides guidance on troubleshooting common issues with the instrument.
Outlines initial checks to perform when the instrument is inoperative or the display is not working.
Presents a flowchart for troubleshooting common instrument problems.
| Model Series | N6700C Series |
|---|---|
| Number of Slots | 4 |
| Transient Response Time | < 50 μs |
| Power Rating | 300 W |
| Maximum Power | 300 W |
| Number of Outputs | Up to 4 (module dependent) |
| DC Voltage | Up to 100 V (module dependent) |
| DC Current | Up to 50 A (module dependent) |
| Programming Interface | GPIB, LAN, USB |
| Current Programming Accuracy | 0.05% + 5 mA |
| Voltage Measurement Accuracy | 0.05% + 10 mV |
| Data Logging Rate | Up to 50, 000 readings/second |
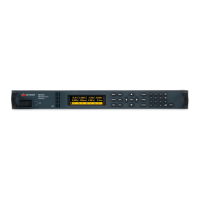
| Display | Color graphical display |