Assemble units as described herein only. To do otherwise
may result in instability. All screws, nuts and bolts must be
tightened securely and must be checked periodically after
assembly. Failure to assemble properly, or to secure parts
may result in assembly failure and personal injury.
3
WorkUp
®
Adjustable Table - Model CB
Assembly Instructions
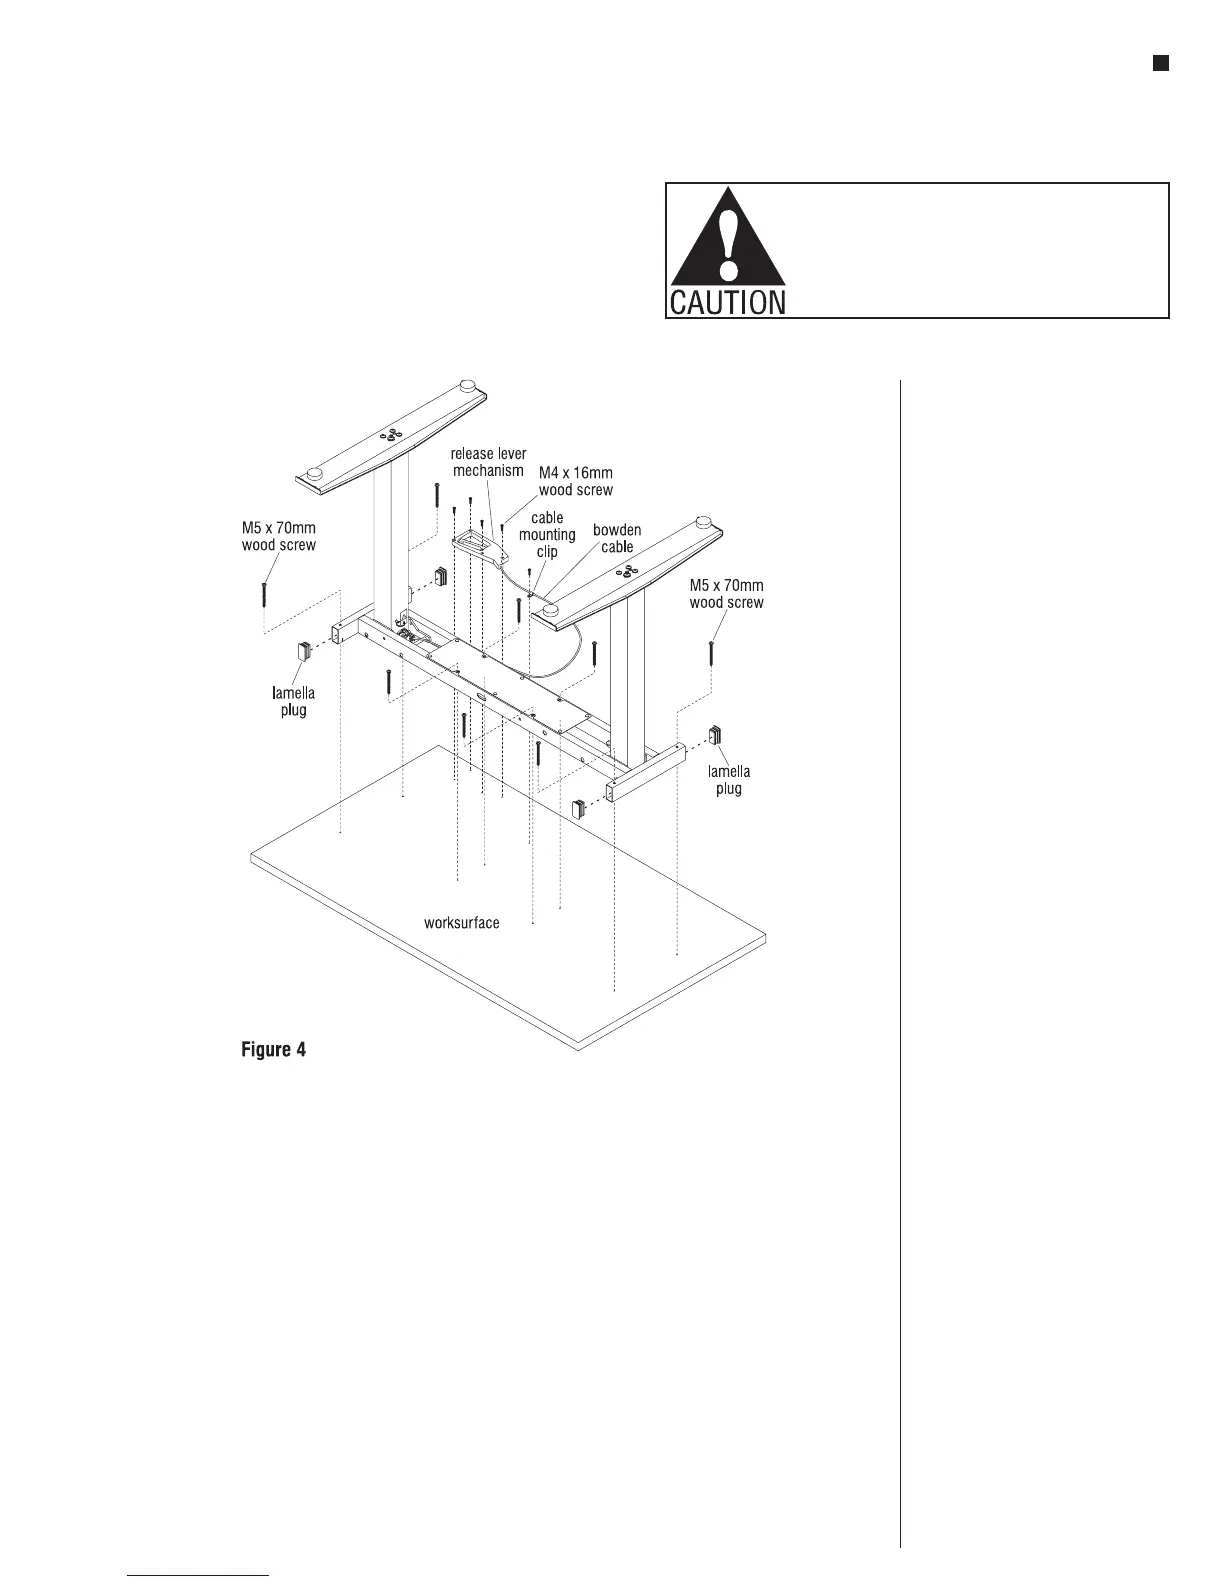
Note: Install the bowden cable with
as large of radius as possible, to
assure smoother releasing of lever.
Never kink the cable.
Worksurface Assembly
1. To avoid scratching the worksurface
place it with the top side down on a
soft protective material (Figure 4).
2. Place the base on the drilled face of
the worksurface so the eight holes in
the base line up with the pre-drilled
holes in the worksurface (Figure 4).
3. Attach the base to the pre-drilled
holes in the worksurface using eight
M5 x 70mm screws (Figure 4).
4. Locate the four pre-drilled holes at
the user-side of the worksurface, then
align the release lever mechanism
holes to them. Attach the release
mechanism to the worksurface using
four M4 x 16mm screws (Figure 4).
5. Position a cable mounting clip onto
the bowden cable at a location
midway along the cable and secure
with screw provided to the underside
of the worksurface (Figure 4).
6. Press four lamella plugs into the
open ends of the frame near the
columns as illustrated (Figure 4)
Final Assembly
1. Carefully invert the table to its upright
position. Caution: The table is very
heavy. Use two or more people.
2. Move the table to it’s final location
and adjust the leveling glides to level
the table.
3. Remove safety pin (ring) and warning
tag only after table is standing
upright.