Assemble units as described herein only. To do otherwise
may result in instability. All screws, nuts and bolts must be
tightened securely and must be checked periodically after
assembly. Failure to assemble properly, or to secure parts
may result in assembly failure and personal injury.
5
WorkUp Adjustable Table - Model HF
Assembly Instructions
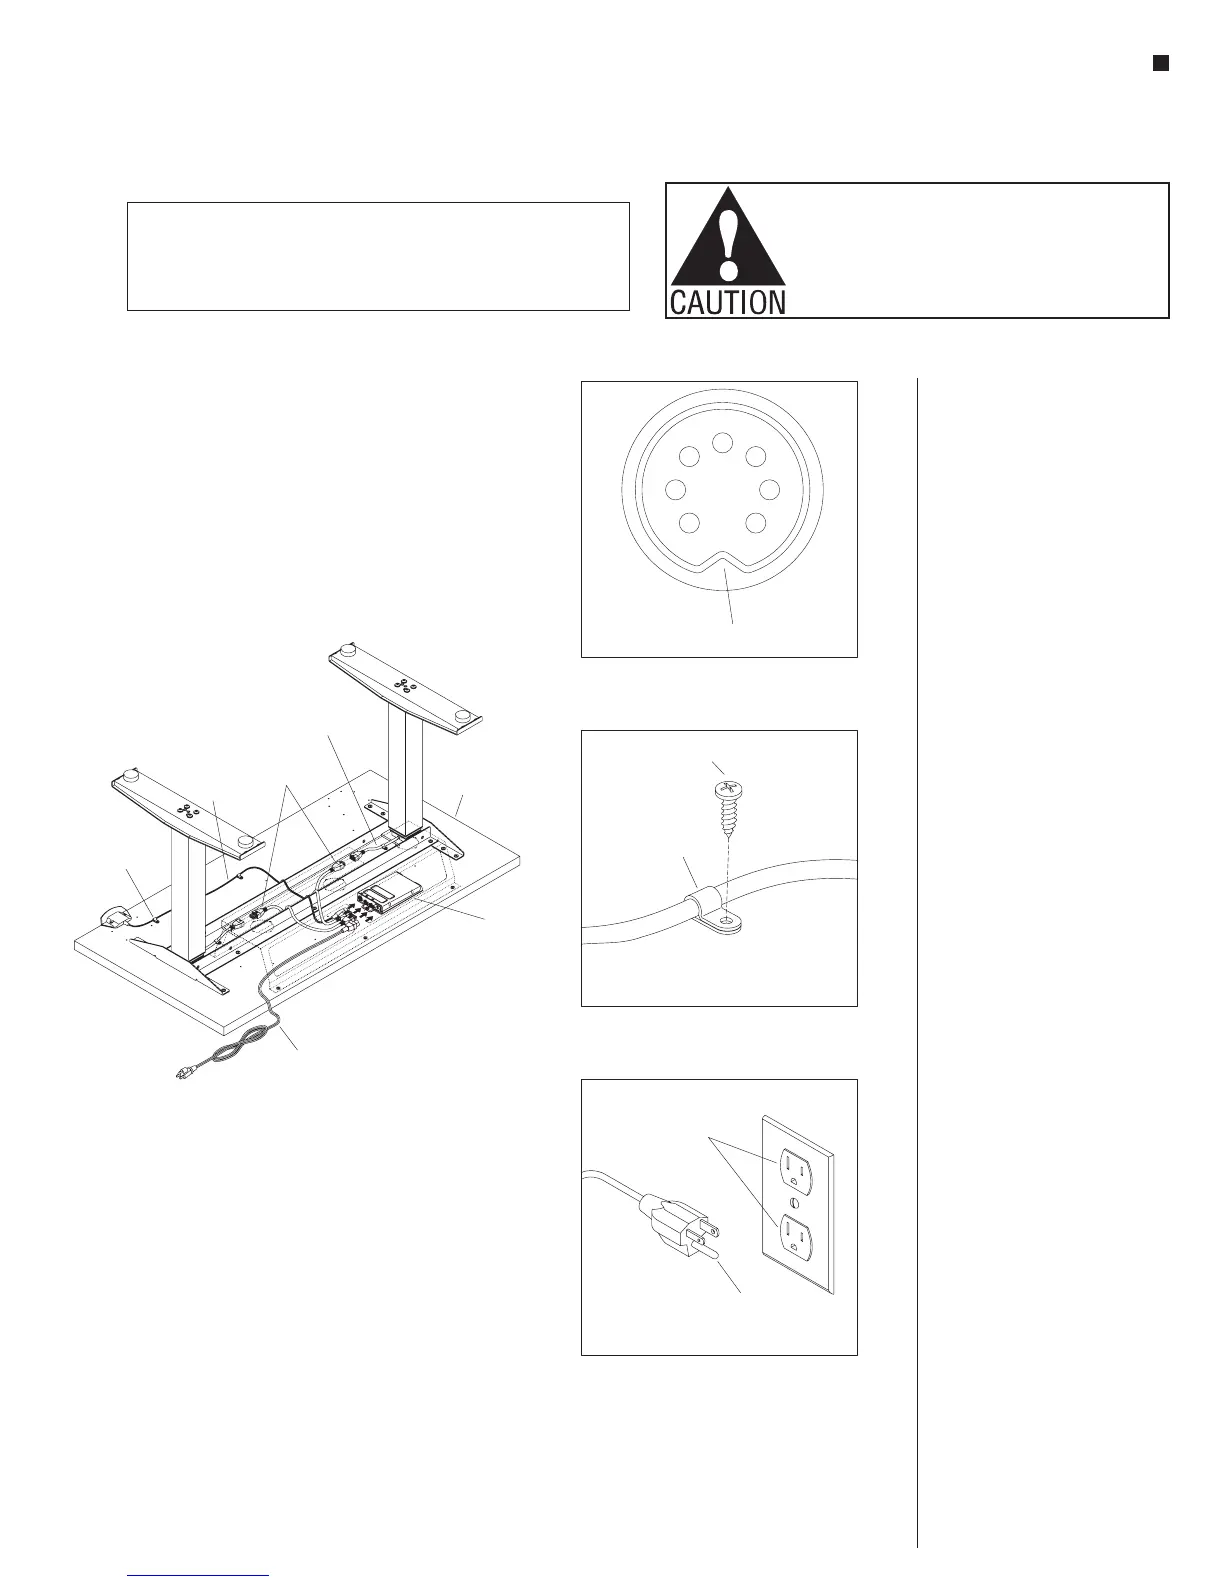
Electrical Cables
Note: Control cables can be
routed differently than shown.
Your configuration may vary.
Note: The wire trough is an
optional part that may be ordered
separately. Your configuration
may vary.
1. Connect the extension cables
to the leg cables, then connect
cables to the M1 and M2 sockets
on the control box (Figure 6).
Note: Be sure the keypad cable
end is properly aligned before
pushing it into the socket
(Detail D).
2. Connect the keypad cable to the
HS socket on the control box
(Figure 6).
3. Using the “P” shaped cable
clamps and #10 x
3
/
4
” self-drilling
screws provided, secure the
column and keypad cables to the
worksurface. Be sure to position
a cable clamp within 8” of where
the cable connectors plug into the
control box (Detail E).
Note: No cable clamps are
required for the power cord.
table top
box
6
power
cord
extension
cables
column
cable
keypad
cable
cable
clamp
Detail D - Keypad Cable End
alignment feature
#10 x /
3
4
”
screw
cable
clamp
F
grounding
pin
grounded
outlet
This product is for use on a nominal 120-volt circuit and has a grounding plug
that looks like the plug illustrated in Detail F. Make sure that the product is
connected to an outlet having the same configuration as the plug. No adapter
should be used with this product.
GROUNDING INSTRUCTIONS