19
Assemble units as described herein only. To do otherwise
may result in instability. All screws, nuts and bolts must be
tightened securely and must be checked periodically after
assembly. Failure to assemble properly, or to secure parts
may result in assembly failure and personal injury.
Seminar
TM
Tables with 4-Wire Power System - Modesty Panels
Assembly Instructions
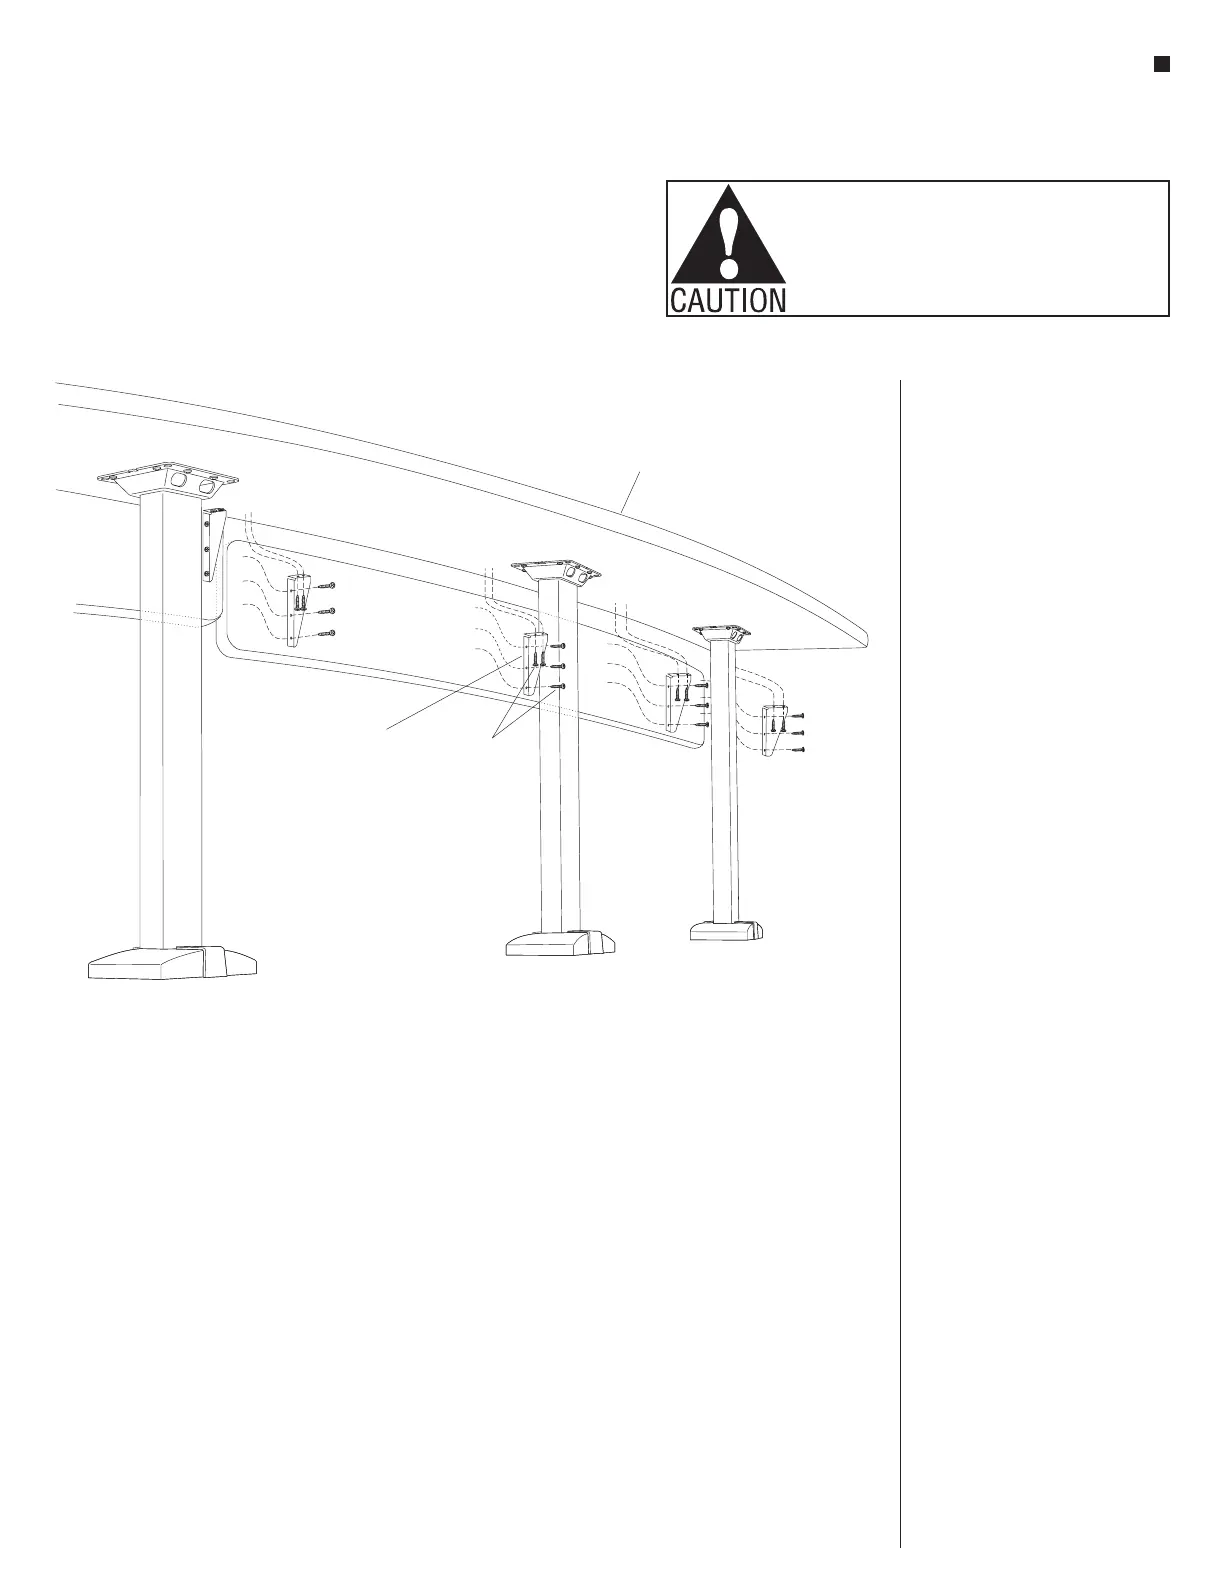
tabletop
modesty panel
bracket
#10 x /”
3
4
screws
(12.0160)
Figure 19
Figure 20
7
/”hole
8
tightening nut
draw bolt
locking sleeve
modesty panel
(back side)
7
/”hole
8
hardwood spline
KV joint fastener
Optional Laminate or Wood
Modesty Panel
38. Per the space-planning layout
and the identification numbers
on the back sides of the modesty
panels, lay the modesty panels out
where they will be installed to the
tabletops. Modesty panel lengths
are undersized on each end, thereby
creating a
1
/
2
” gap at the modesty
panel joints, and a
3
/
4
” to 2
1
/
2
”
space at the end-of-run. Refer to the
chart on the space-planning layout
for the number of brackets required
per modesty panel, and equally
space the brackets along the panel.
The two end brackets should be 2”
from the edge of the panel. Begin
assembly by installing the bracket
to the tabletop first (Figure 19).
Note: Care must be taken when
positioning the brackets to
ensure they do not interfere with
the tabletop mounting flanges.
When the bracket is installed to
the underside of the tabletop, the
shorter flange of the bracket must
be secured to the tabletop with two
#10 x
3
/
4
” screws torqued to
50 in/lb. Mounting holes under
tabletop must be pre-drilled with
an
1
/
8
” drill bit to maximum depth
of
1
/
2
”. Be sure that the longer
edge (which will be secured to
the modesty panel) is set back 1”
from the front edge of the tabletop.
After all brackets are secured to the
tabletop, carefully lift the modesty
panel into place and pre-drill holes
in modesty panel with an
1
/
8
” drill
bit to a maximum depth of
1
/
2
”.
Secure each installed modesty
panel bracket to the modesty panel
with three #10 x
3
/
4
” screws torqued
to 50 in/lb (Figure 19).
Note: To help support continuous
wood and segmented wood panels
during attachment, bar clamps may
be used.
 Loading...


