20
Assemble units as described herein only. To do otherwise
may result in instability. All screws, nuts and bolts must be
tightened securely and must be checked periodically after
assembly. Failure to assemble properly, or to secure parts
may result in assembly failure and personal injury.
Seminar
TM
Tables with 4-Wire Power System - Modesty Panels
Assembly Instructions
39. For Continuous Laminate or
Wood Modesty Panels, the
following steps must be completed
before mounting the panel to the
table, described in step 38.
Modesty panels are to be joined
together from behind with two KV
joint fasteners per pair of modesty
panels (Figure 20. First join both
modesty panels together, aligning
the hardwood spline (installed in
one modesty panel at the factory).
Check to make sure hardwood
spline fits snug in both modesty
panels. If it does not, lightly sand
down the spline so it does fit. If this
is not done, it may be difficult to
get a tight fit on the modesty panel
seam. The spline joint and modesty
panels seam are to be glued using
the adhesive supplied with the KV
fasteners. Do not use a wood glue
for seam gluing as the working
time for that adhesive is too short.
Then, thread each draw bolt a few
turns into each tightening nut and
press each pair up into a
7
/
8
” hole
and slot. The flat end of each draw
bolt will be visible in the
7
/
8
” holes
of the modesty panel being joined.
Insert locking sleeves into the
7
/
8
”
holes so that the slotted sleeve
engages the rounded collar on the
bolt (Figure 20). Tighten the nut
with a tightening tool or nail set.
Check the front side of the joint for
proper alignment. The joint should
be smooth and level with no gaps.
Adjust as necessary to achieve a
“seamless” look. Once the seam is
glued, use the C-clamps to clamp
either end of the seam. Allow one
hour for glue to set before attaching
panels to top.
Note: Each pound of pressure
on the tightening tool exerts 500
pounds of force on the joint.
Overtightening the KV fasteners will
cause the panels to delaminate.
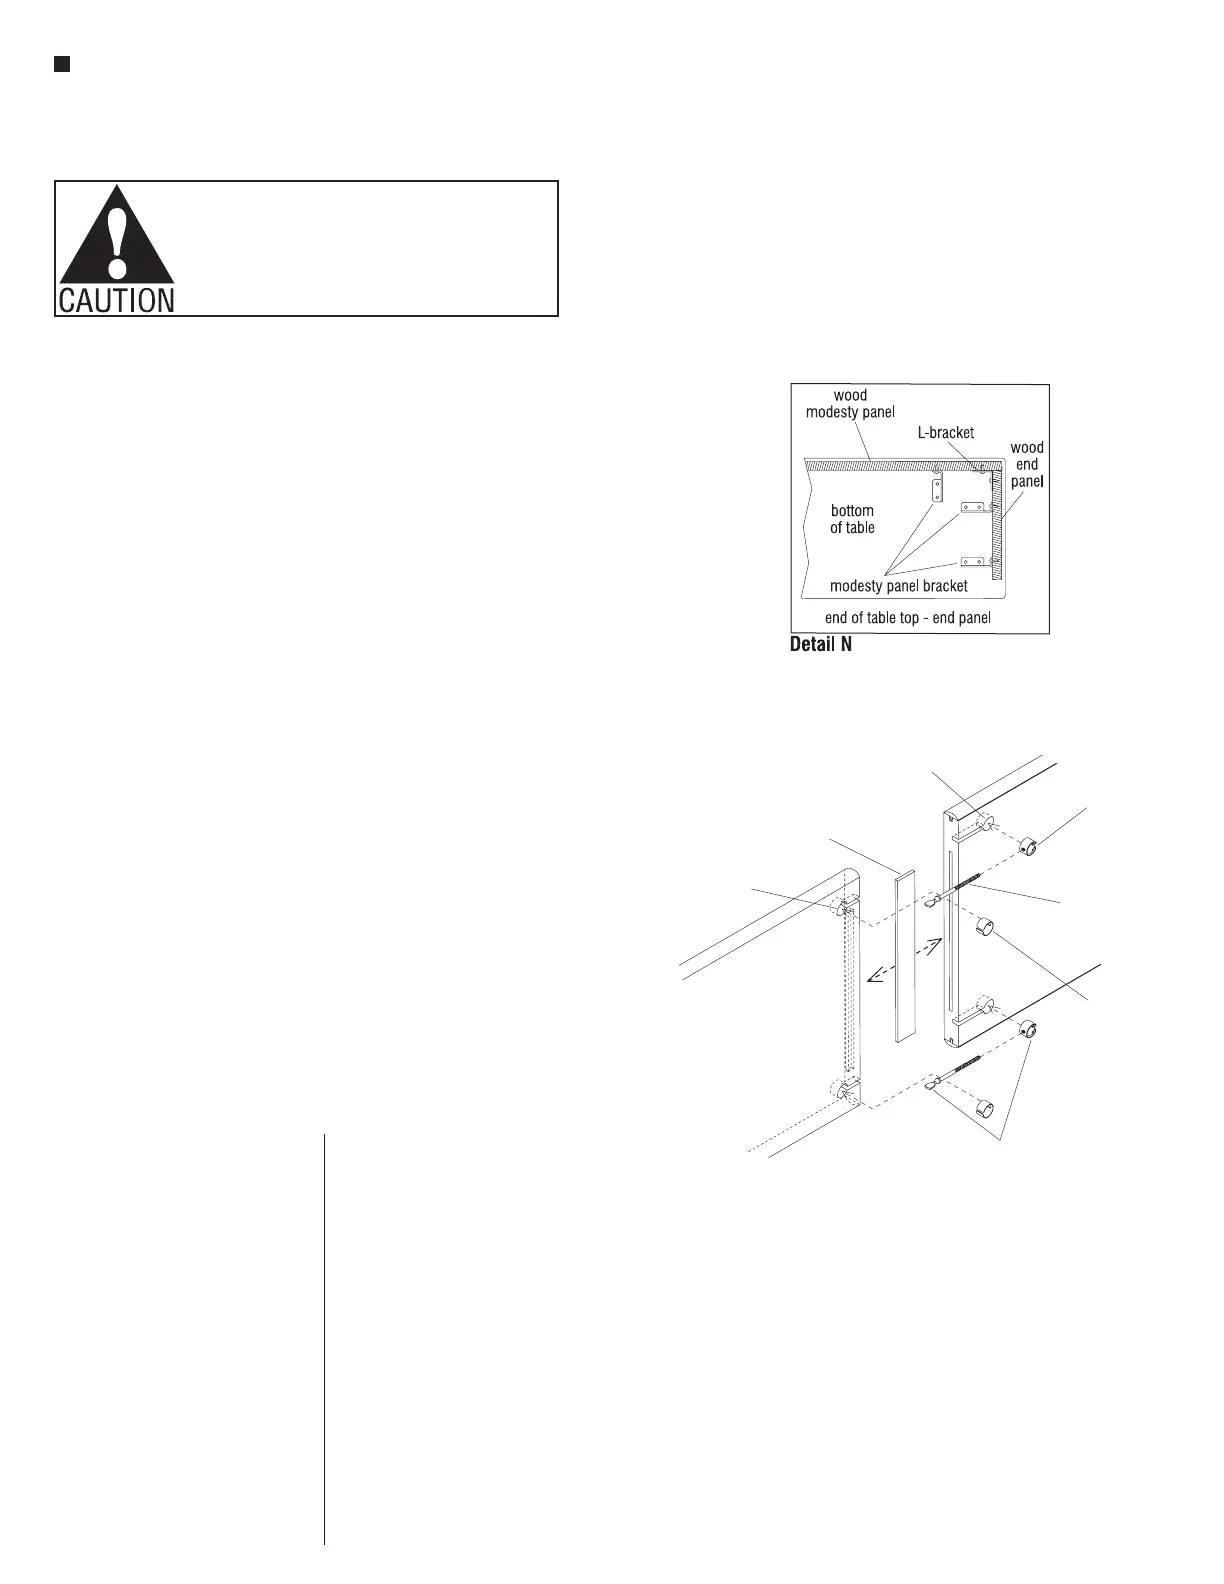
40. For Laminate or Wood
Modesty Panels with End
Panels, the end panels are to be
installed after modesty panels are in
place. End panels use two modesty
panel brackets and an L-bracket
in the corner where the two panels
meet (Detail N). Place the end
panel into position, then using
the L-bracket as a template, mark
the six mounting hole locations,
three to the modesty panel and
three to the end panel. Carefully
pre-drill mounting holes in each
panel to a depth of
1
/
2
” with an
1
/
8
”
drill bit, taking care to not pierce
through the end panel or modesty
panel. Use bar clamps to hold the
end panel in position and install
L-bracket with six #10 x
3
/
4
”
screws torqued to 50 in/lb
(Detail N). Adjust the clamped
end panel for desired reveal at
the end. Position the modesty
panel brackets at their installation
location and mark their mounting
hole locations. Using a
1
/
8
” drill bit,
pre-drill to a depth of
1
/
2
”, taking
care to not pierce through the end
panel. Mount two modesty panel
brackets to the end panel and
bottom of the tabletop using five
#10 x
3
/
4
” screws torqued to
50 in/lb at each bracket (Detail N).
Note: For full-height end panels
joining with full-height modesty
panels, two L-brackets are required.
tabletop
modesty panel
bracket
#10 x /”
3
4
screws
(12.0160)
Figure 19
Figure 20
7
/”hole
8
tightening nut
draw bolt
locking sleeve
modesty panel
(back side)
7
/”hole
8
hardwood spline
KV joint fastener
 Loading...


