22
Assemble units as described herein only. To do otherwise
may result in instability. All screws, nuts and bolts must be
tightened securely and must be checked periodically after
assembly. Failure to assemble properly, or to secure parts
may result in assembly failure and personal injury.
Seminar
TM
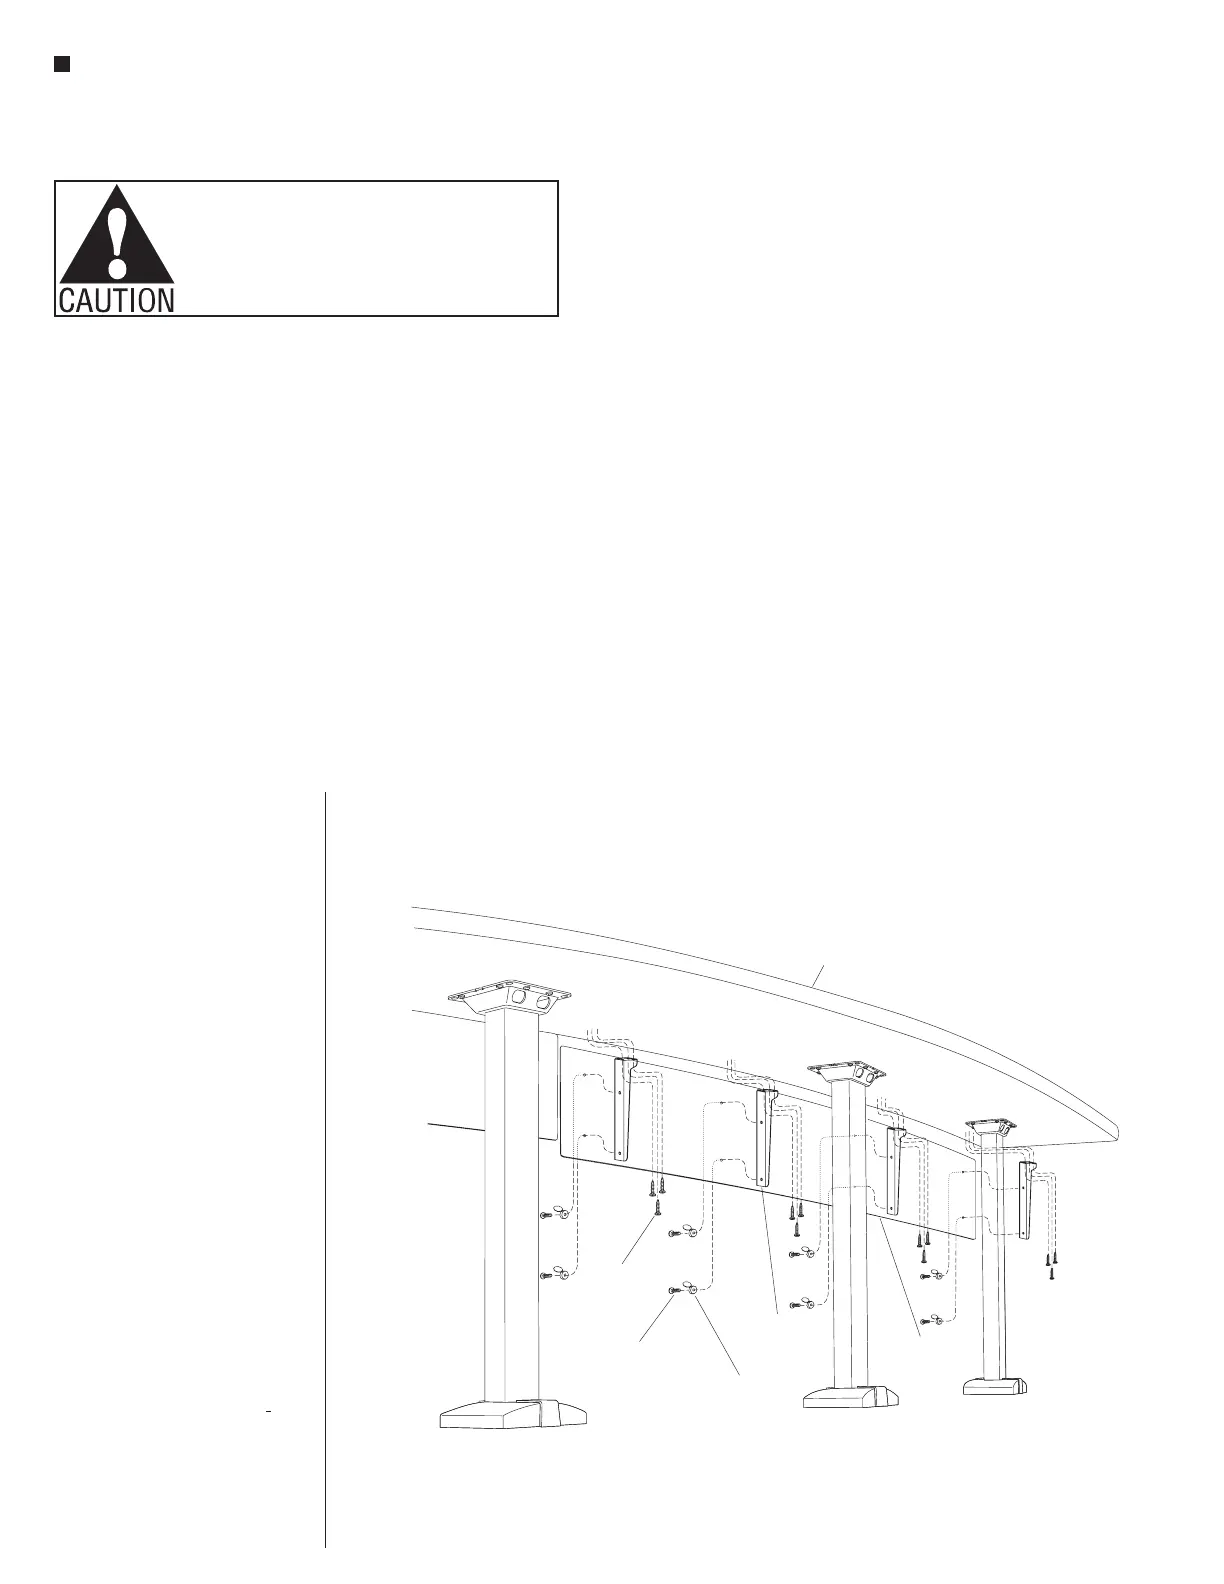
Tables with 4-Wire Power System - Modesty Panels
Assembly Instructions
Figure 22
tabletop
acrylic
modesty panel
modesty panel
bracket
#10 x /”
3
4
screws
(12.0160)
#12-24 x /”
1
2
Taptite screw
(12.2712)
screw cap
(47.0632.XX)
Acrylic Modesty Panel
Installation
Note: Read all instructions below
before proceeding.
46. Per the space-planning layout and
the identification numbers on the
back side of each modesty panel,
carefully set the acrylic modesty
panels out at the location they will
install to the tabletops.
Important: Preliminary set-up is
important, so “equal gap spacing”
between modesty panels and
appropriate end-of-run spacing is
achieved. A nominal
1
/
2
” gap is to
be left between installed modesty
panels, although that gap may vary.
Care must be taken when locating
the final installation position of
acrylic modesty panels to underside
of tabletops to achieve a clean,
flush final look (Details S, T, U & V).
47. Begin assembly by installing
the modesty panel brackets to
the acrylic modesty panels first.
Properly align the mounting holes
of the bracket to the pre-drilled
holes in the modesty panel.
Note: At ends-of-run, right- &
left-hand modesty panel brackets
will be specified for the appropriate
side (Detail V). Place #12-24 x
1
/
2
”
(12.2712) Taptite screws through
un-capped screw covers
(47.0632.BL) as illustrated. Then
route the screw threads through the
face of the panel and into the holes
in the bracket, torqued to 35 in/lb.
Do not over-tighten. Snap screw
cover caps closed at this time
(Figure 22).
Note: Once panel brackets are
attached to the acrylic modesty
panels, it is recommended that
end-of-run modesty panels be
correctly positioned and installed
first, such that end straight
modesty panels have the
1
/
4
”
spacing back from the front as well
as even spacing at each end
(Detail S). Installation spacing
is especially important for end
modesty panels with return
which must be positioned and
installed
1
/
4
” back from the front
and
1
/
4
” in from the side at the
end/return (Detail U). After
end-of-run modesty panels are
secured, installation of the
center-most modesty panel is
important, as it must be
positioned/installed at the very
center of the run of tabletops to
further aid in achieving equal
spacing. Lastly position and install
panels between the center and the
end acrylic modesty panels. The
noted process above makes
it easier to achieve equal
spacing of acrylic modesty
panel gaps between all panels
being installed.
 Loading...


