23
Assemble units as described herein only. To do otherwise
may result in instability. All screws, nuts and bolts must be
tightened securely and must be checked periodically after
assembly. Failure to assemble properly, or to secure parts
may result in assembly failure and personal injury.
Seminar
TM
Tables with 4-Wire Power System - Modesty Panels
Assembly Instructions
48. After all brackets are secured to the
acrylic modesty panels, carefully lift
the panel up into position, and one
bracket at a time, mark and pre-drill
1
/
8
” diameter mounting holes to
3
/
4
” depth maximum. Take care to
not drill too deep and damage the
tabletop. Install each bracket to
the underside of the tabletop using
three #10 x
3
/
4
” screws (12.0160)
(end-of-run panels first, then
center).
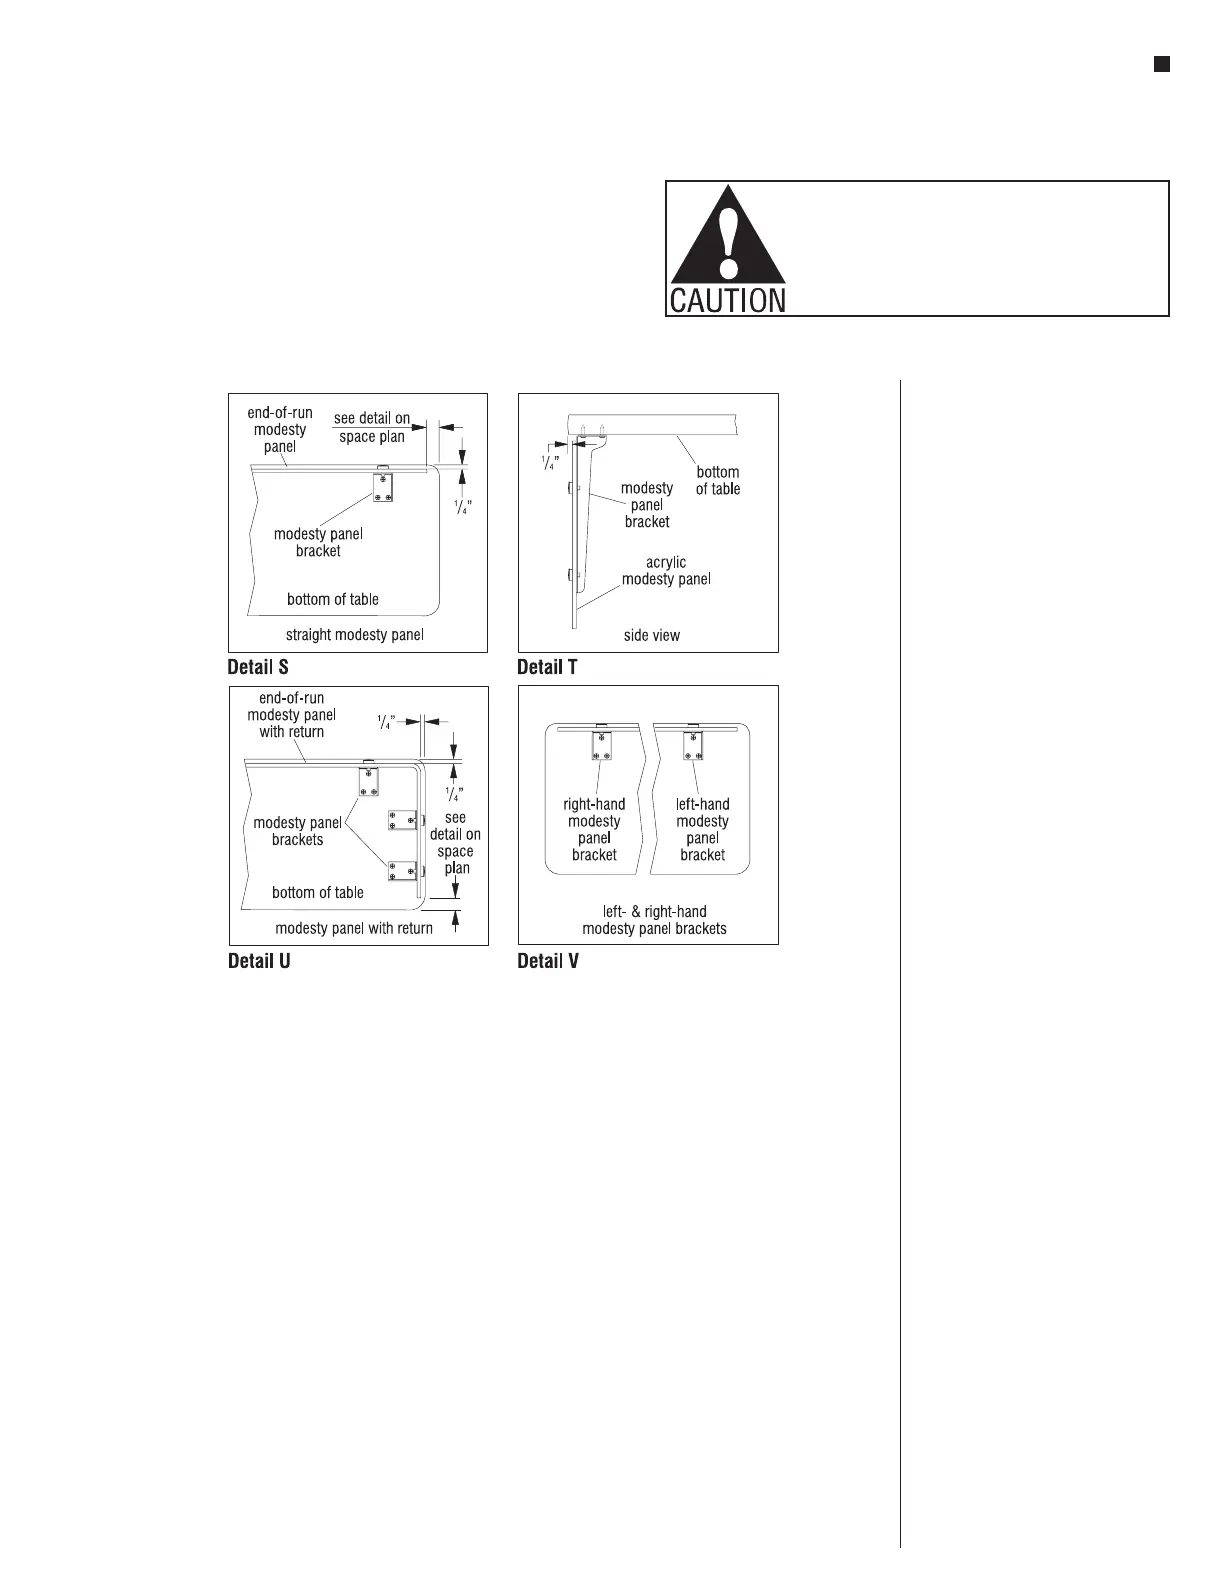
49. Panels with a return at the end will
require two modesty panel brackets
at the end of the acrylic modesty
panel as illustrated (Detail U). The
modesty panel face must be
mounted back
1
/
4
” from the front
edge of the tabletop, and as
noted above,
1
/
2
” nominal, equal
gap spacing must be maintained
between installed panels.
Important: Take care to keep the
faces of installed acrylic panels
“flush” to each other at the gaps
when installing. If any installed
shroud interferes with the mounting
of brackets to the underside of the
tabletop, trimming away of shroud
material may be required. Some
adjustments may be necessary
(Figure 22, Details S, T, U & V).
 Loading...


