17
ASSEMBLY
NOTE: To install the clutch controls and the rotation
arm support on a vehicle which has a plastic rack
(item 1), you must purchase the optional kit "Control
support" (item 2).
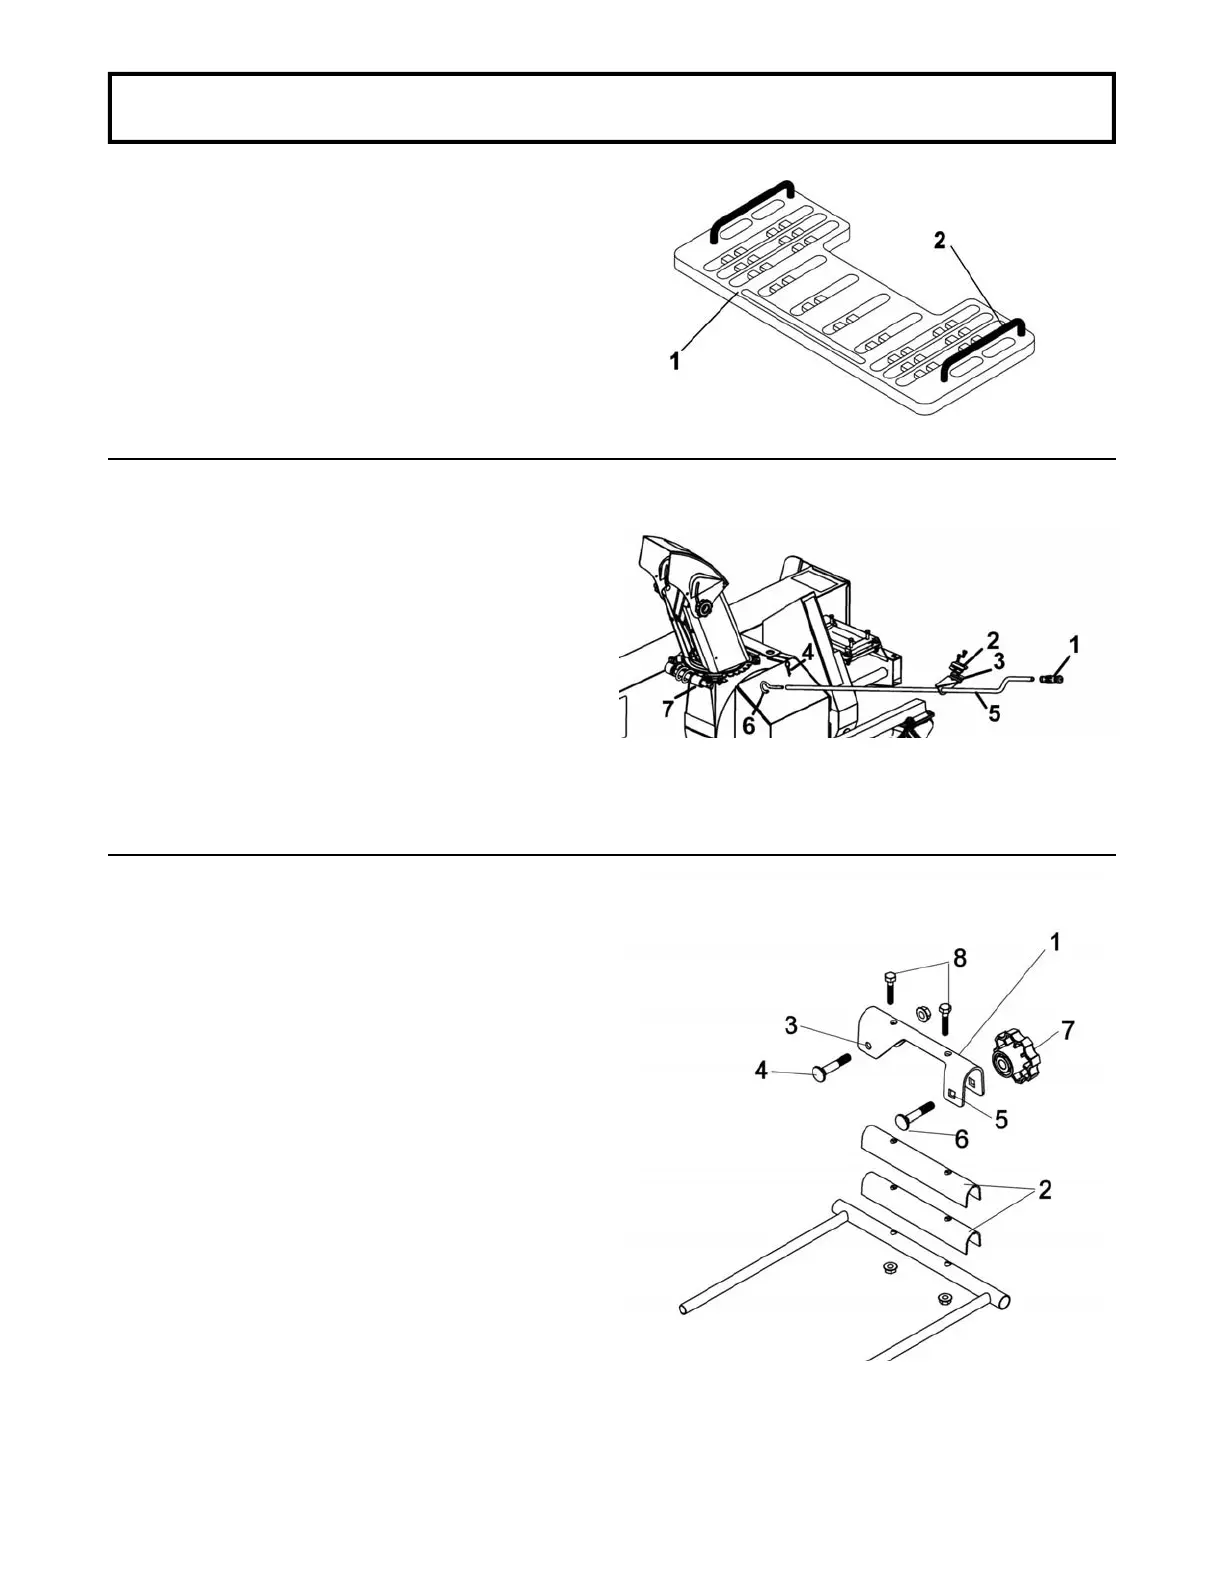
Install the handle support (item 3) with the support
bracket (item 2) using the 1/4 x 3/4" hex. bolts and
nuts on the left hand side of the vehicle’s rack.
Choose the ideal place and make sure the hand
crank is easily accessible and does not interfere with
the steering handlebars.
Install the 1/2 x 3" handgrip (item 1) on the handle
(item 5).
Insert the handle through the hole in the handle
support (item 3).
Install the handle hook (item 6) on the rotation worm
(item 7).
Insert the hook on the rotation handle and lock in
place with a 2.5 mm hair pin (item 4).
Install the clutch holder (item 1) on the right hand side
of the vehicle’s front rack.
Identify where is the best place, making sure the
driver has easy access to the controls.
Wrap the rubber pads (item 2) over the tube if
necessary.
Install the clutch holder (item 1) on the tube over the
rubber pads with the round hole (item 3) towards the
front.
Secure with a 5/16 x 1 3/4" carriage bolt (item 4), in
the front hole. Secure with nut and tighten lightly.
The space between the bolt head and the brace is
intentional and is designed to attach the clutch
support. Install a 5/16 x 1 3/4" carriage bolt (item 6) in
the rear square hole (item 5) and secure with the
knob (item 7).
The clutch holder should be exactly 90° parallel with
the ground.
Using the support as a template, drill through the tube
and secure with two 1/4 x 1 1/4" hex bolts (item 8)
and nuts.
Tighten firmly.
Install handle
Install clutch holder
Control support