Select to enter hard disk initialization menu. Please stop recording
before entering this menu. Enter the menu, system will show all the
data (model/ volume) of HDD that is installed in the DVR. Check the HDD
you’d like to initialize, then press “Start”. HDD initialization is successful
when the status shows “Succeed”.
Clean up all data on USB. Enter USB initialization and press “YES” to clean
up all data on your USB. The initialization is done when it shows “Succeed”.
Restore system default values.
Reset all the recording events in the DVR.
Copy configuration to a USB device. There will be a file named
“sdvr.config” on your USB.
Download configuration from a USB device into DVR.
Upgrade DVR through USB.
Please stop recording and backup setup configuration before upgrading.
System will reboot automatically when the upgrade is completed.
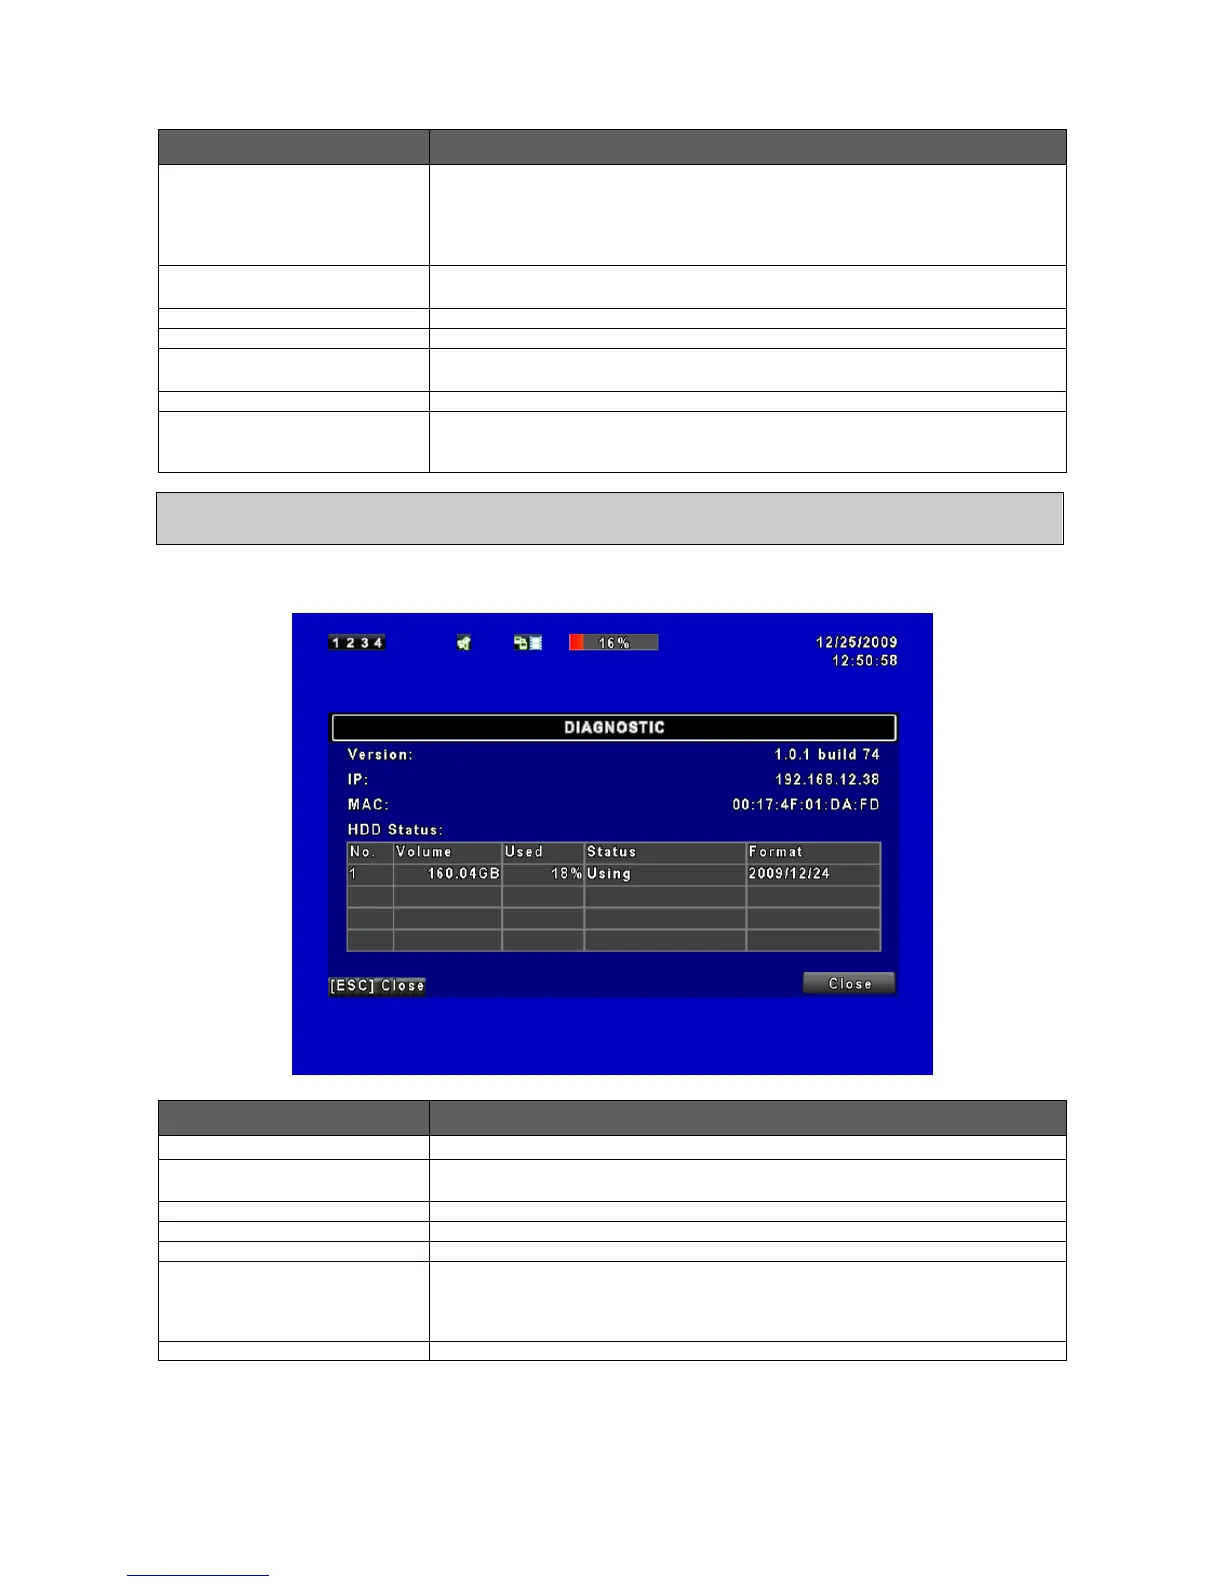
The current firmware version of DVR
The connected IP address of DVR. If disconnected from network, the
screen will display” NETWORK DISCONNECT”.
Percentage of space used on HDD.
Shows HDD status. USING means the HDD is now used for recording.
GOOD/ BAD means the HDD has a known/ unknown format for the
DVR. (Note: Please initialize your newly-installed HDD before using it,
otherwise it can be recognized as BAD by the DVR).
The latest format time of HDD
NOTE! DO NOT TURN OFF POWER OR UNPLUG USB DEVICE DURING THE UPGRADE as it
may cause incomplete firmware upgrade and damage to the DVR.