If you attempt to close the window again within 10 seconds of the window be-
ing moved down for the second time, even though the obstacle was not yet
been removed, the closing process is only stopped. During this time, it is not
possible to automatically close the window. The force limiter is still switched
on.
The force limiter is only not operational if you attempt to close the window
again within the next 10 seconds – the window will now close with full force!
If you wait longer than 10 seconds, the force limiter is switched on again.
WARNING
Variant 1 of the power window » fig. 27 on page 35has no force limiter. The
windows should be closed carefully – risk of injury!
Operational faults
Read and observe and on page 35 first.
Repeatedly opening and closing the window can cause the window mechanism
to overheat and become temporarily blocked. You will be able to operate the
window again as soon as the operating mechanism has cooled down.
For Variant 2, the windows may not operate automatically after disconnecting
the battery. After connecting the vehicle battery, the system is activated as
follows.
›
Switch on the ignition.
›
Pull the top edge of the relevant button and close the window.
›
Release the button.
›
Pull up the respective button and hold for 1 second.
Lights and visibility
Lights
Introduction
Unless otherwise stated, the lights only work when the ignition is switched on.
For the basic position of the light switch, use position .
Notice
The headlights may mist up temporarily. When the light is switched on, the
light-emitting surface demists after a short period of time.
Operating the lights
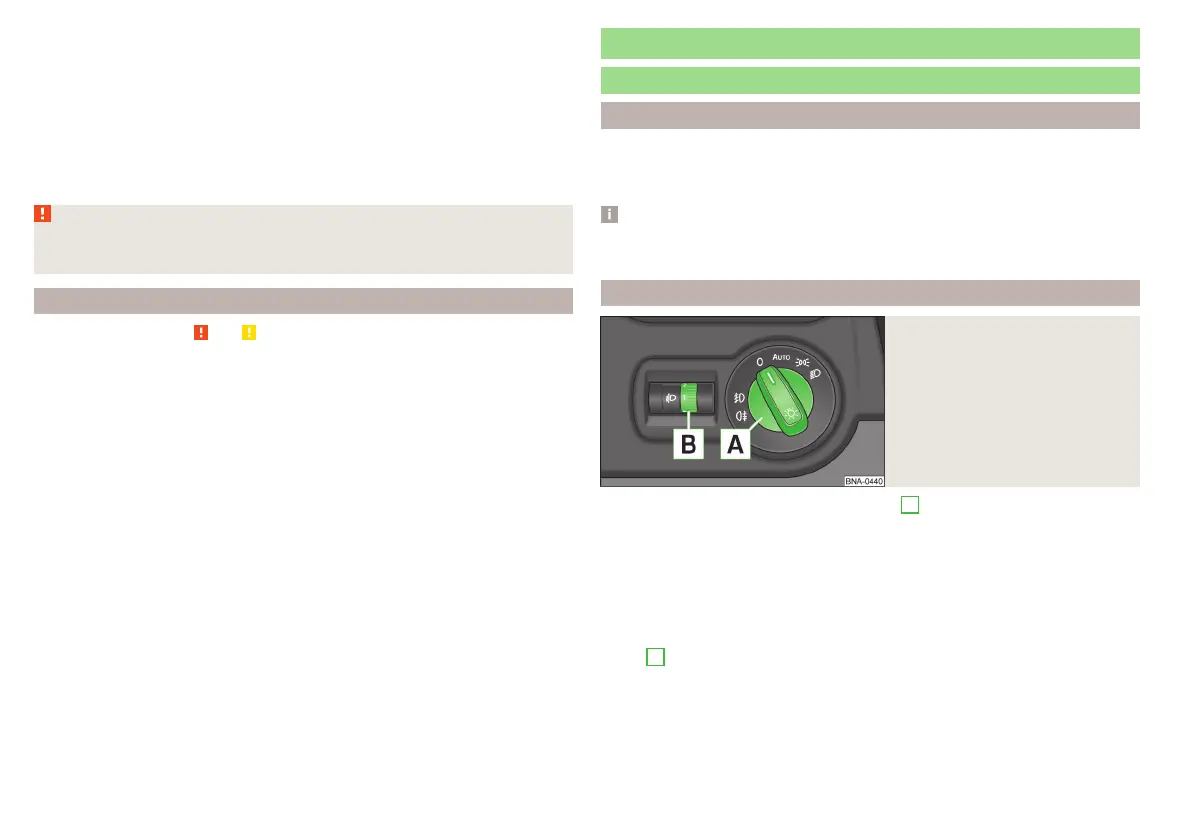
Fig. 28
Light switch and control dial for
the headlight beam range regu-
lation
To switch the light function on / off, switch
A
» fig. 28 should be turned to
one of the following positions.
Switching off lights (except daytime running lights)
Switching the light on/off automatically » page 38
Switching on the parking lights or parking lights on both sides » page 38
Turn on the low beam
Depending on the vehicle load, adjust the headlight range by turning the con-
troller
B
» fig. 28 to the following positions.
Front seats occupied, boot empty
All seats occupied, boot empty
All seats occupied, boot loaded
Driver seat occupied, boot loaded
36
Usage