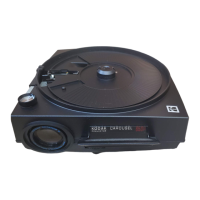
SLIDE
TRAY
Furnished with your new projector is the
KODAK
CAROUSEL
140
Slide Tray. It holds
140
slides in 2 x 2-inch cardboard
or thin plastic mounts
(not
glass or metal mounts) up
to
J.i'6
inch thick. Sin ce
this
tray was designed
to
hold
as
many
slides
as
possible, the slide compartments in the
tray
are
quite
narrow. For
this
reason, your slide mounts should
be
in good condition. Mounts which are warped or bent may
fail
to
drop from the tray into the projector.
(If
this
hap-
pens, straighten the mount with your fingers or place the
slide in a new
mount
, such as a
KODAK
READy
-
MoUNT.)
Clip
off
all
mount
corners
that
are
frayed
. Do
not
at-
tempt
to
project
slides
mounted
with
loose
or
sticky
tape.
As
the
tray revolves, the
number
of the slide being pro-
jected will
be
opposite the gate index on the projector.
(Additional slide trays can
be
obtained from your
dealer;
see
page 14.)
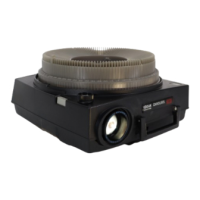
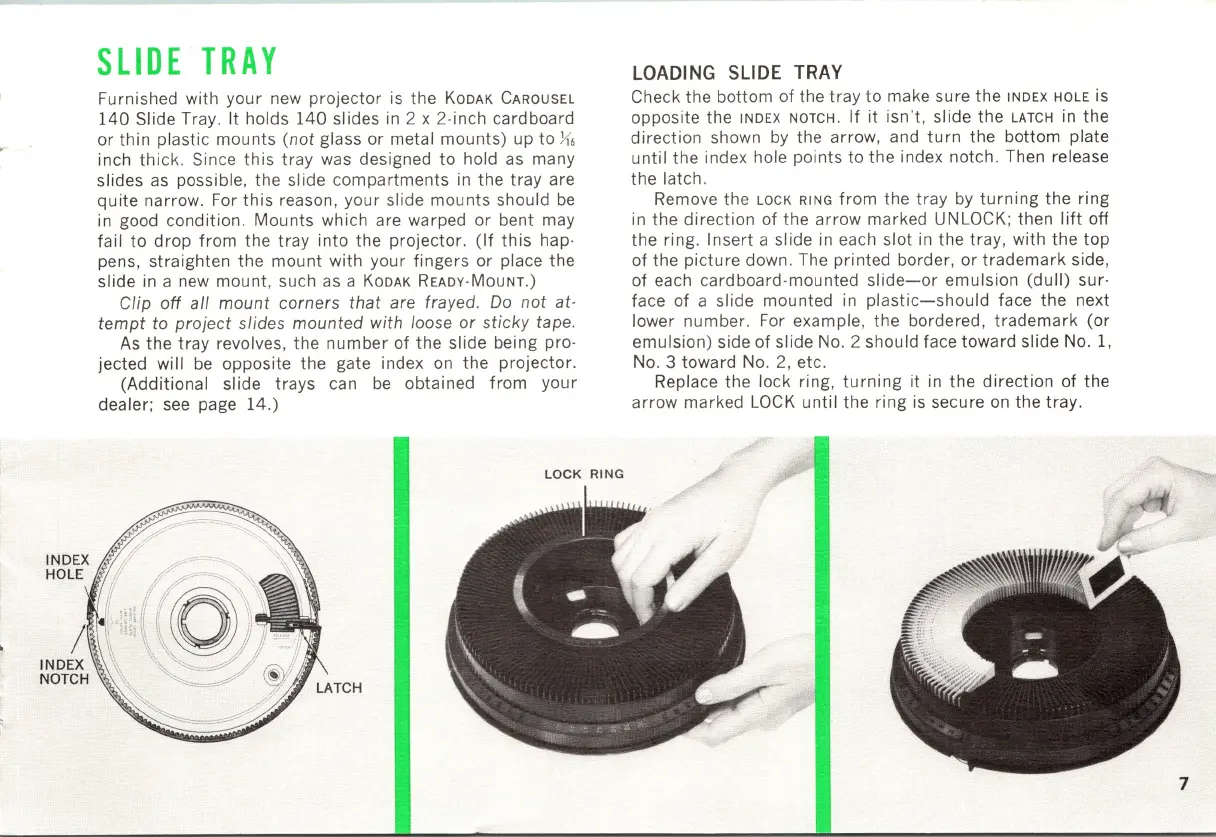
LOCK
RING
LOADING
SLIDE
TRAY
Check the bottom of the tray to make sure the
INDEX
HOLE
is
opposite the
INDEX
NOTCH
. If
it
isn't
, slide the
LATCH
in
the
direction shown by the arrow, and
turn
the bottom plate
until
the index hole points to the index notch. Then release
the latch.
Remove the
LOCK
RING
from the tray
by
turning
the ring
in
the
direction of the arrow marked UNLOCK; then
lift
off
the ring. Insert a slide
in
each slot in the tray, with the
top
of the picture down. The printed border, or
trademark
side,
of each cardboard-mounted
slide-or
emulsion
(dull)
sur-
face of a slide mounted in
plastic-should
face the next
lower number. For example, the bordered,
trademark
(or
emulsion) side of slide
No
. 2 should face toward slide
No.1,
No. 3 toward
No.2,
etc.
Replace the lock ring,
turning
it in the direction of the
arrow marked
LOCK
until the ring
is
secure
on
the
tray
.
7