8
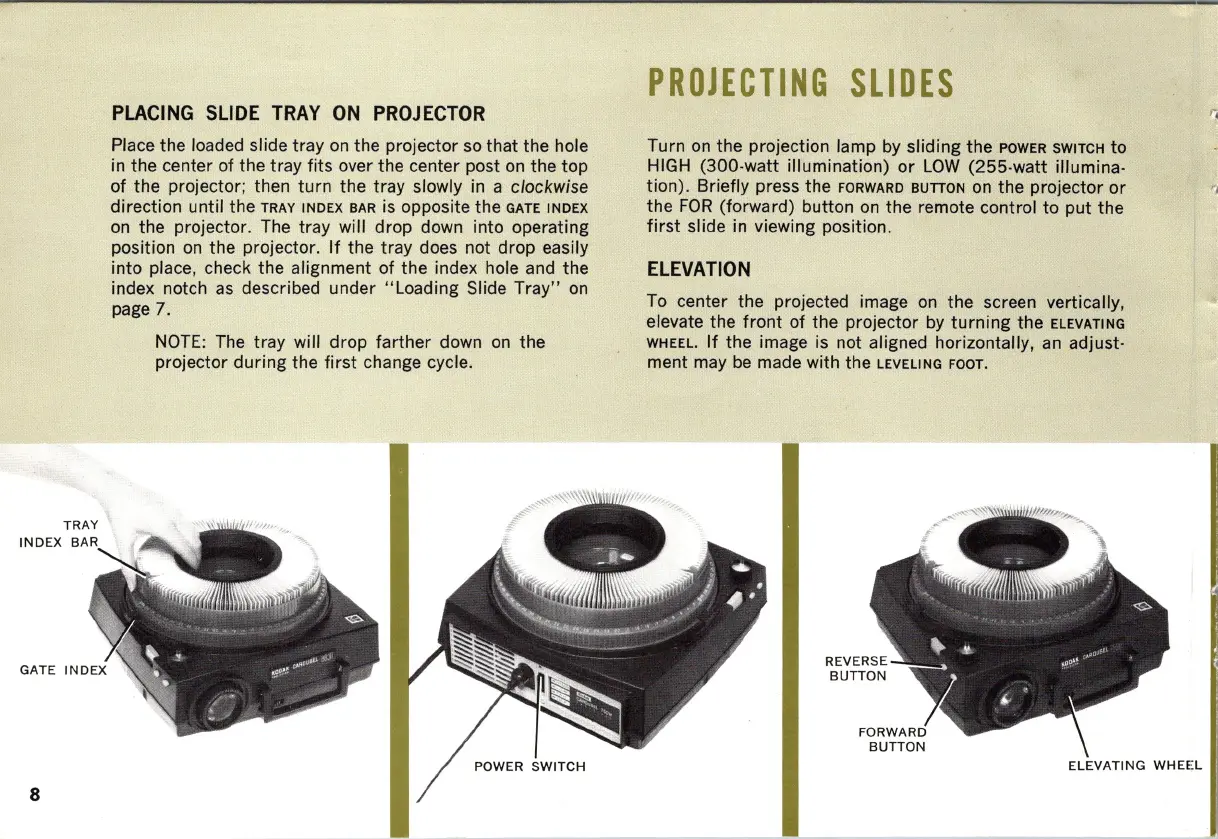
PLACING
SLIDE
TRAY
ON
PROJECTOR
Place the loaded slide tray
on
the projector
so
that the hole
in the center of the tray fits over the center post
on
the top
of the projector; then turn the tray slowly in a
clockwise
direction until the TRAY INDEX BAR is opposite the GATE INDEX
on
the projector. The tray will drop down into operating
position
on
the projector.
If
the tray does not drop
eas
ily
into place, check the alignment of the index hole and the
index notch
as
described under " Loading Slide
Tray"
on
page 7.
NOTE
: The tray will drop farther down
on
the
projector during the
first
change cycle.
POWER SWITCH
PROJECTING
SLIDES
Turn
on
the projection lamp
by
sliding the
POWER
SWITCH to
HIGH (300·watt illumination) or
LOW
(255
-watt illumina-
tion). Briefly press the
FORWARD BUTTON
on
the projector
or
the
FOR
(forward) button
on
the remote control
to
put the
first
slide in viewing position.
ELEVATION
To
center the projected image
on
the screen vertically,
elevate the
front
of the projector
by
turning
the ELEVATING
WHEEL.
If
the image is not aligned horizontally,
an
adjust-
ment may
be
made with the LEVELING FOOT.
ELEVATING WHEEL
 Loading...