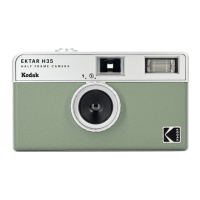
FLASH
PICTURES
When the low-light signal in the viewfinder
indicates that there isn't enough light for
pictures
without
flash, use a flipflash to take
flash pictures
of
subjects from 4 to 10 feet
from the camera.
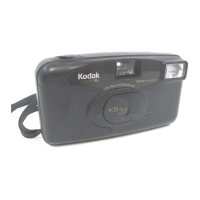
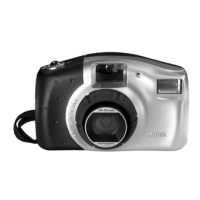
1. Firmly insert a flipflash into the
FLASH
SOCKET
on the top of the camera, with the
bulbs facing forward and
with one
or
more
fresh bulbs
at
the top
half
of
the flash
array-
the half farthest from the camera. The flip-
flash will
"lock
" on the camera; to remove
it, simply
"rock
" it to one side.
VIEWFINDER FLASH SOCKET
2.
Check the distance and focus the camera
carefully.
Camera-to-subject distance is very
important for proper flash exposure. If you
are farther than 10 feet from your subject,
it will appear too dark (underexposed);
closer than 4 feet, your subject will be too
light (overexposed) and unsharp. The
print
control will have no effect on flash pictures
outside the 4- to 10-foot range. The blue
bands on the distance scale show the flash
range in feet and meters.
3.
Frame your subject in the viewfinder.
Hold the camera steady and press the shut-
12
ter release smoothly
to
flash
the
bulb and
take
the
picture. The
color
in the
dot
on the
back
of the flipflash will disappear as the
corresponding
bulb
flashes. The camera
motor will eject the
print
as you allow the
shutter release to return.
You can remove and reinstall a flipflash
at any time. When you replace a partially
used flipflash, make sure that the
top
half
of
the flash array (farthest from the camera)
contains
one or more unused bulbs.
NOTE: The
low-light
signal will
not
appear
in the viewfinder when a flipflash is installed
on the camera.
4. After you have taken four flash pictures,
remove the flipflash from the
socket
by
" rocking" it to one side. Turn the flash over
to
position fresh bulbs at the
top
half of the
array.
If at any time a bulb should fail
to
flash,
remove the array and install a new one. Then
take a flash picture. If the bulb flashes, the
camera is operating properly; refer
to
the
lamp
manufacturer
's warranty. If the
bulb
still fails to flash, the camera may require
service; see the warranty in this manual. If
a bulb fails to flash, any remaining
good
bulbs in that half
of
the array won 't flash .
NOTE: To prevent wasting a flash, no bulb
will flash if you press the shutter release
when the exposure
counter
is in the "[!]
,,
position.
t
•
FLASH
PICTURES
When the low-light signal in the viewfinder
indicates that there isn't enough light for
pictures
without
flash, use a flipflash to take
flash pictures
of
subjects from 4 to 10 feet
from the camera.
1. Firmly insert a flipflash into the
FLASH
SOCKET
on the top of the camera, with the
bulbs facing forward and
with one
or
more
fresh bulbs
at
the top
half
of
the flash
array-
the half farthest from the camera. The flip-
flash will
"lock
" on the camera; to remove
it, simply
"rock
" it to one side.
VIEWFINDER FLASH SOCKET
2.
Check the distance and focus the camera
carefully.
Camera-to-subject distance is very
important for proper flash exposure. If you
are farther than 10 feet from your subject,
it will appear too dark (underexposed);
closer than 4 feet, your subject will be too
light (overexposed) and unsharp. The
print
control will have no effect on flash pictures
outside the 4- to 10-foot range. The blue
bands on the distance scale show the flash
range in feet and meters.
3.
Frame your subject in the viewfinder.
Hold the camera steady and press the shut-
12
ter release smoothly
to
flash
the
bulb and
take
the
picture. The
color
in the
dot
on the
back
of the flipflash will disappear as the
corresponding
bulb
flashes. The camera
motor will eject the
print
as you allow the
shutter release to return.
You can remove and reinstall a flipflash
at any time. When you replace a partially
used flipflash, make sure that the
top
half
of
the flash array (farthest from the camera)
contains
one or more unused bulbs.
NOTE: The
low-light
signal will
not
appear
in the viewfinder when a flipflash is installed
on the camera.
4. After you have taken four flash pictures,
remove the flipflash from the
socket
by
" rocking" it to one side. Turn the flash over
to
position fresh bulbs at the
top
half of the
array.
If at any time a bulb should fail
to
flash,
remove the array and install a new one. Then
take a flash picture. If the bulb flashes, the
camera is operating properly; refer
to
the
lamp
manufacturer
's warranty. If the
bulb
still fails to flash, the camera may require
service; see the warranty in this manual. If
a bulb fails to flash, any remaining
good
bulbs in that half
of
the array won 't flash .
NOTE: To prevent wasting a flash, no bulb
will flash if you press the shutter release
when the exposure
counter
is in the "[!]
,,
position.
t
•
 Loading...