EasyManua.ls Logo

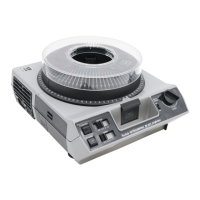
Kodak KODASCOPE EIGHT 70 - img005

Kodak KODASCOPE EIGHT 70
19 pages
To Next Page IconTo Next Page
To Previous Page IconTo Previous Page
Loading...
The
PLUG
on
the
end
of
the
cord
must
be
attached
to
the
prongs
of
the
Kodascope,
behind
the
name-
plate.
Connect
the pl
ug
at
the
other
end
of
the
cord
with
the
electric
service socket.
If
there
is
a switch
in the service socket,
turn
it
on.
The
LAMP
SWITCH
should
now
be
turned
to
the
third
position
marked:
Lamp.
With
the
lamp
turned
on,
ad-
just
the distance
between
the
screen
and
Kodascope.
Set
up
the screen so
that
its
center
is
on
a line
with
or
a little
higher
than
the
lens
of
the
Kodascope.
On
account
of
the
different sizes
of
the
screens used, the
distance
between
the
screen
and
the
lens
of
the
Kodascope
will vary.
The
correct
distances
are
given in the table:
Size oj Scre
en
Distaru:e
Size
oj
Screen
Di
stan
ce
16
1
2
x 22 inches
11
feet
30 x 40 inches
19
Y2
feet
22
x 30 inches
14
Y2
feet
39
x 52 inches
25
feet
If
the
light
does
not
fill
the
area
of
the screen,
change
the
distance
between
the
Kodascope
and
screen.
The
closer the screen
is
to
the
Kodascope, the
smaller
the size
of
the
lighted
area.
Turn
the
lens
bar-
rel
until
the
margins
of
the
l
ighted
area
are
sharp;
then
increase the
distance between
the
Kodascope
and
screen
unti
l the li
ghted
area
is
a trifle
larger
than
the screen.
Before using a
new
lamp
it
may
be advisable
to
check
the
screen
brightness.
Turn
the
LAMP
CENTER-
I G
SCREW
a trifle
either
way,
with
a coin
or
screw-driver,
noting
the
brightness
and
uniformity
of
the
light
on
the
screen.
Vertical
adjustment,
to
center
the
light
area
on
the screen,
is
made
by
loosening the
VERTICAL
ADJUSTMENT
3

Related product manuals