14 Customer Support: http://www.pandigital.net/kodaksupport
Use the plastic sheath when scanning originals that are sized or shaped other than the standard 3.5”x5”, 4”x6”, or 5”x7”.
Depending on the shape, you may want to perform additional manual cropping on the scanned image, using your own
photo editing software, to achieve your desired final image.
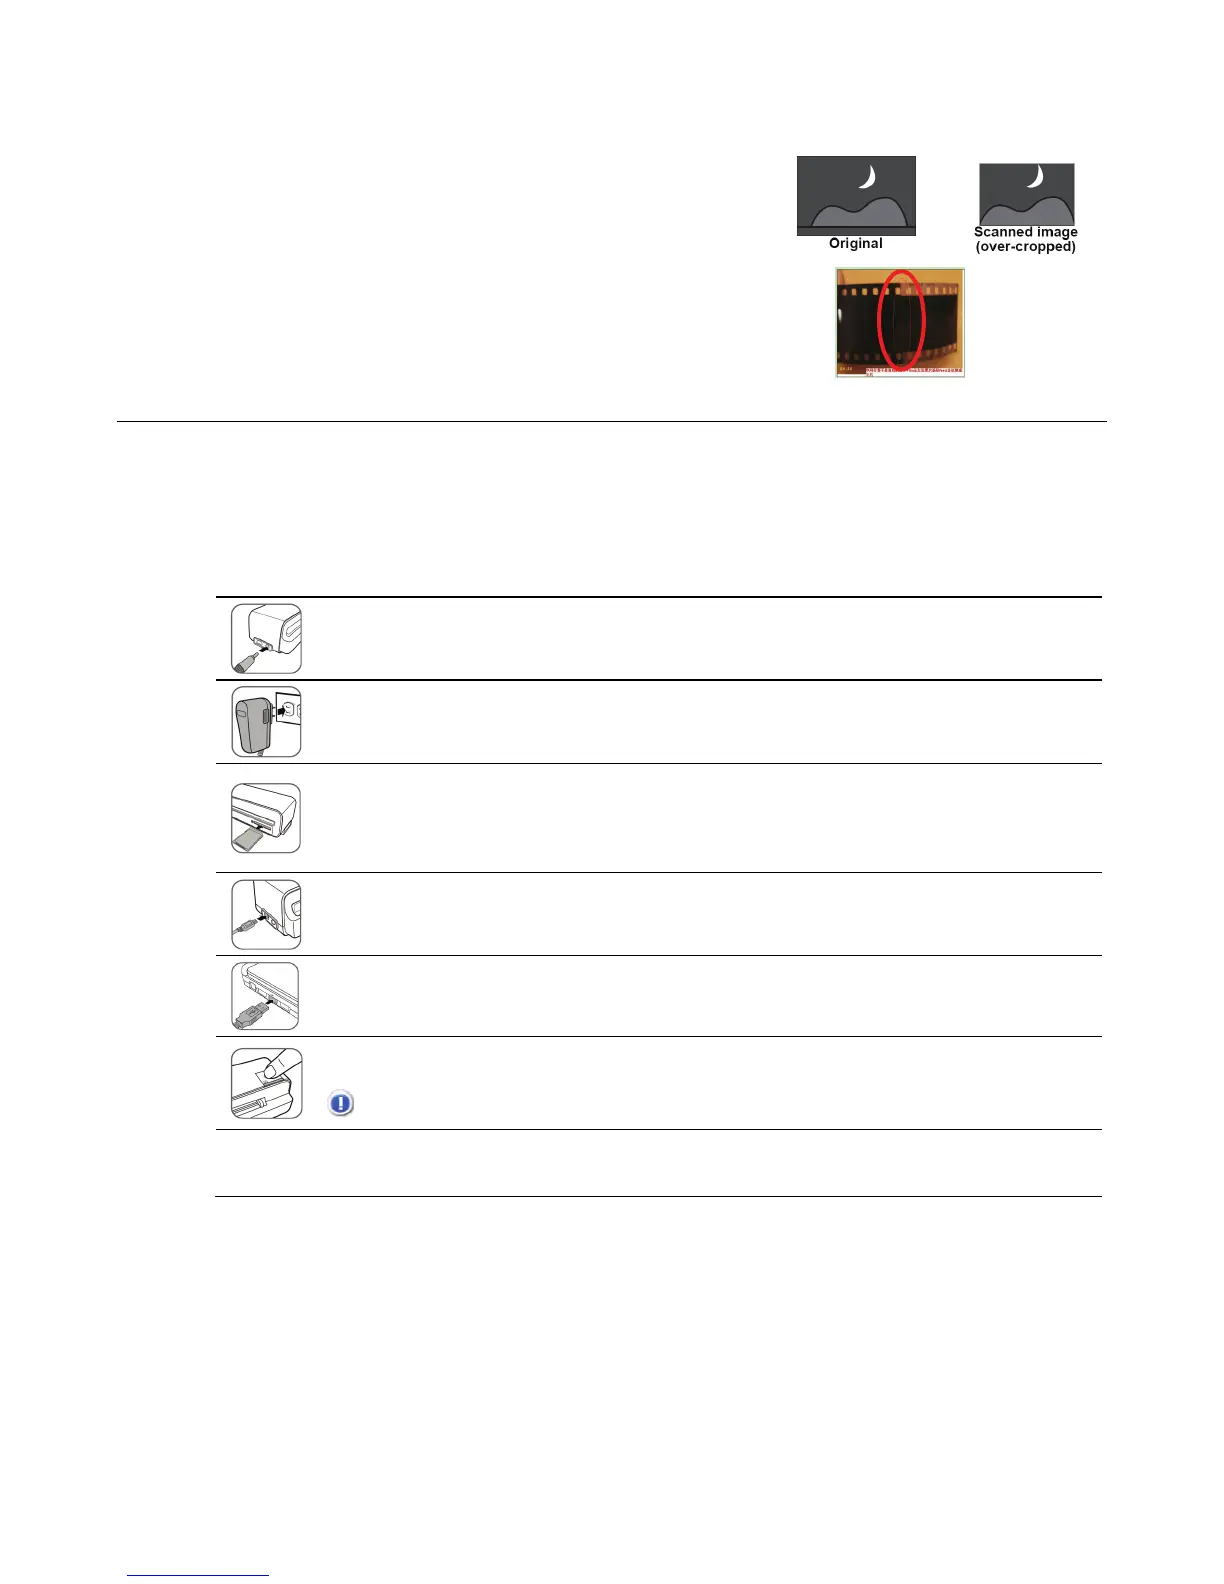
When scanning darker originals (for example, a photo of the night sky),
over-cropping may occur.
When scanning over-exposed, older or lighter color (faded) filmstrip originals,
an irregular auto-cropping may occur. Cut the filmstrip into individual films and
rescan them.
Connect Scanner to a PC
By connecting the scanner to a computer, you can access the scanned pictures on the memory card directly, or use the scanner
as a memory card reader, so that you can freely copy, paste or delete files to and from the memory card using the PC.
PC System Requirements
Operating system: WINDOWS XP, WINDOWS VISTA, WINDOWS 7 or later - 32 bit
MAC OS 10.5, 10.6 or later
USB Port Supported: USB 1.1 or 2.0 port
1. Connect the plug on the power adapter cord to the power connector on the scanner.
2. Plug the power adapter into an electrical outlet.
The type of power plug and socket illustrated may differ from that of your region.
3. Insert the SD Memory Card (included) or any unlocked (writable) memory card into the memory card
slot.
Memory card is required. The scanned picture files are stored on an inserted memory card, and
then you can access the scanned pictures with WINDOWS EXPLORER or VISTA Photo Import
Wizard.
4. Connect the mini end of the USB cable (included with scanner) to the Mini USB connector on the
scanner.
5. Turn on your PC, and then connect the large end of the USB cable to a USB port on your PC.
6. Press the Power button; the power indicator light blinks. (For more information, refer to “Indicator Lights”
on page 7.)
CAUTION: Do not remove the memory card while the computer is accessing the files on it.
The scanner is recognized by the computer as a removable disk (WINDOWS system). Now you are ready to view or edit
the files on the memory card.