TP-6079 3/0030 Section 7 Generator Disassembly/Reassembly
7.2 Collector Ring and Bearing
Replacement
1. Unsolder the collector ring leads from the collector
ring terminals.
2. Remove the collector rings with a 3-jaw puller.
3. Remove the bearing with a 3-jaw puller.
4. Press the new bearing onto the rotor shaft.
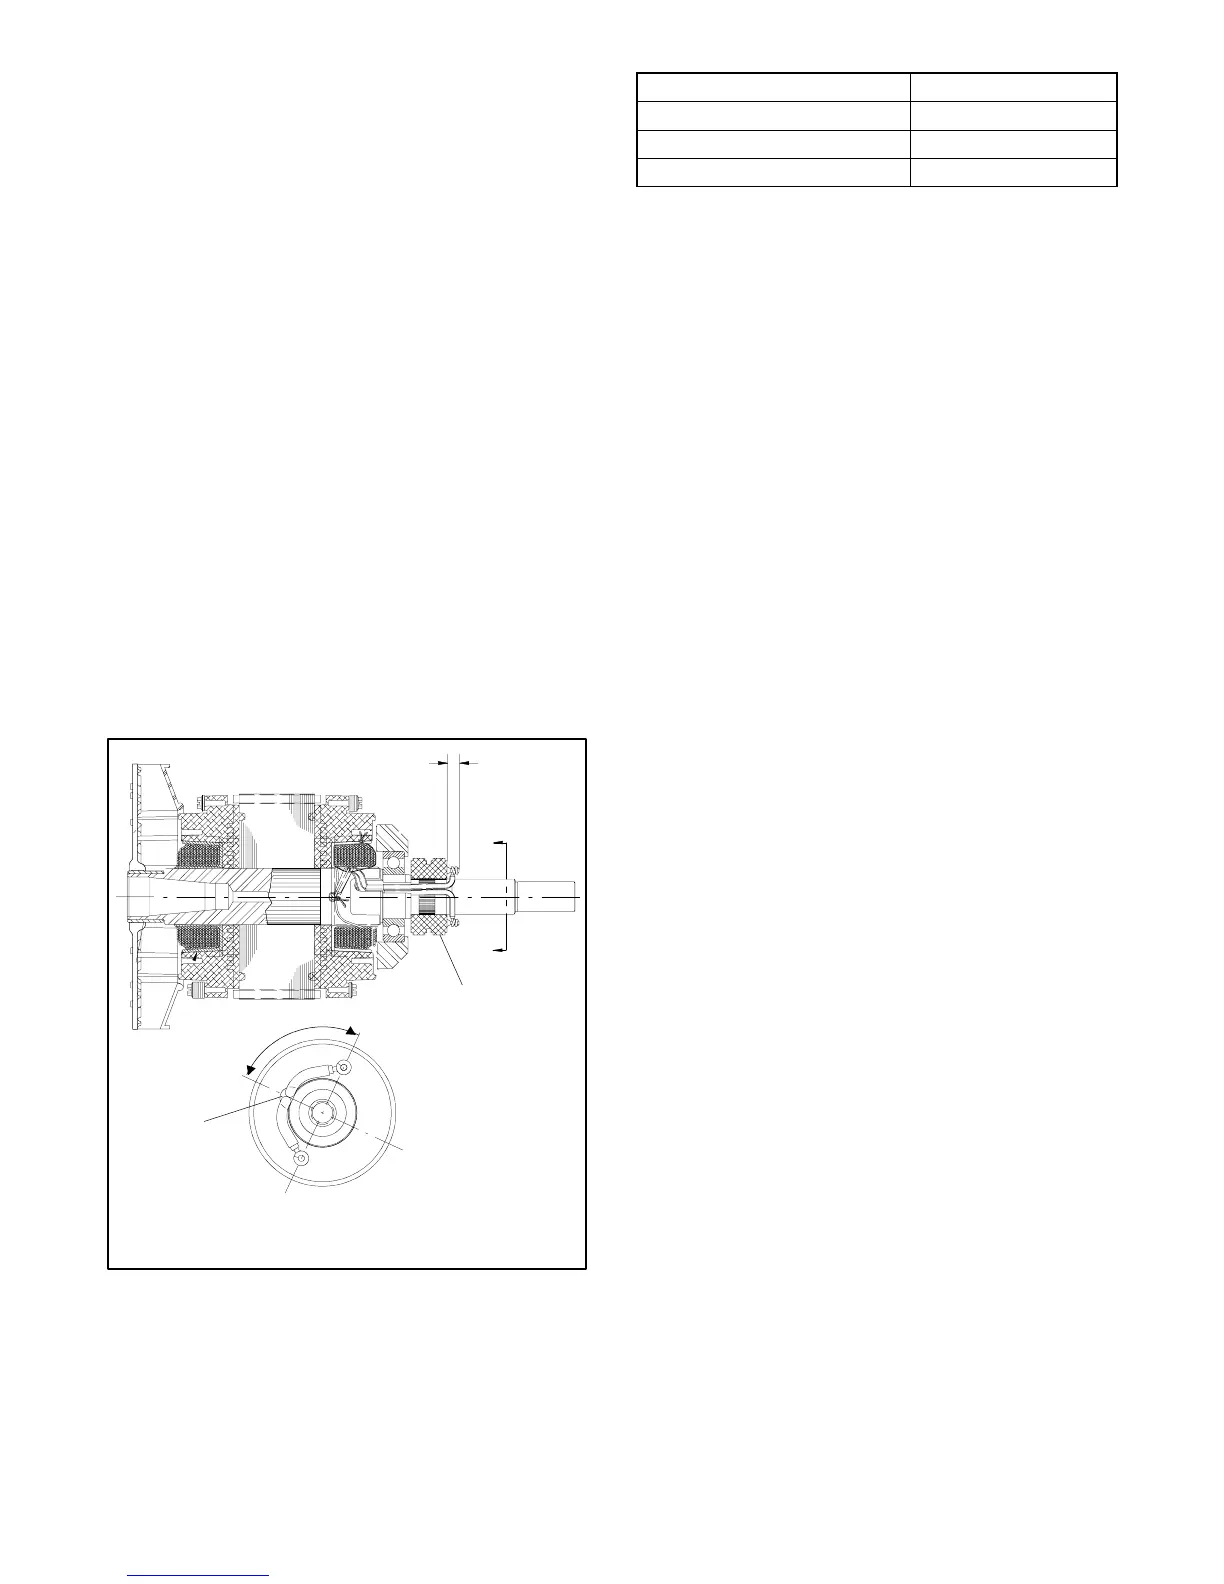
5. Align the collector ring keyway with the keyway on
the rotor shaft. See Figure 7-5.
6. Press the new collector rings onto the rotor shaft.
Note: The new collector rings must be turned
downtoafinishof32microinchesusinga
lathe and commutator stones. Turn down
the collector rings on the rotor shaft. See
Figure 7-6.
7. Solder the leads onto the collector ring terminals.
The connection is not to exceed 9.65 mm (0.38 in.)
beyond the collector rings. See Figure 7-5.
8. Test to ensure continuity at the collector rings.
598695
1. Collector ring leads
2. Keyways
A
A
1
2
90°
.38 maximum
(as soldered)
VIEW A-A
Figure 7-5 Rotor Assembly
Minimum diameter, mm (in.) 57.15 (2.250)
Maximum finish, microinches 32.00
Maximum eccentricity, mm (in.) 0.08 (0.003)
Maximum out-of-round, mm (in.) 0.01 (0.0002)
Figure 7-6 Collector Ring Dimensions
7.3 Reassembly
1. Apply antiseize compound to the tapered shaft of
the engine.
2. Align the rotor onto the engine shaft and secure the
rotor with the rotor bolt. Torque the rotor bolt to
23.1 Nm (204 in. lb.).
3. Carefully slide the stator assembly over the rotor.
4. Install the end bracket and torque the overbolts to
13.6 Nm (120 in. lb.). See Figure 7-2.
5. Feed the brush leads inside the s tator housing up
through the opening. Secure the brush holder
using the original screws.
6. Remove the brush retainer wire and check the
brush alignment. See Section 5.5.
7. Install the coverplate and torque it to 6.8 Nm
(60 in. lb.).
8. Install the fuel line and fuel pump.
9. Guide the leads from the stator through the bottom
opening of the controller. Secure the controller.
10. Reconnect the leads from the stator to the
controller using the reverse procedure of that listed
in Section 7.1. Refer to Section 8, Reconnection
and Wiring Diagrams.
11. Connect the generator set starting battery, the
positive (+) lead first.
12. Test the generator operation.
 Loading...