TP-6836 4/14 19Section 2 Installation
2.7 Electrical Wiring
All internal electrical connec tions are factory-wired and
tested. Field installation includes connecting the
sources, loads, generator start circuit(s), and auxiliary
circuits, if used.
Note: A protective device such as a molded-case circuit
breaker or fused disconnect switch MUST be
installed on both sources of incoming power for
circuit protection and used as a disconnect
device.
Refer to the wiring diagrams provided with the transfer
switch. Observe all applicable national, state, and
local electrical codes during installation.
Install DC, control, and communication system wiring
in separate conduit from AC power wiring.
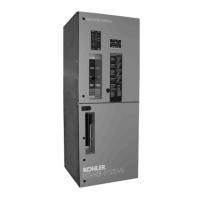
For easy access during installation wiring, the front door
of the enclosure can be removed. Simply disconnect the
cable plug that connects the front door components to
the internal components and then lift the door off its
hinge pins.
Accidental starting.
Can cause severe injury or death.
Disconnect the battery cables before
working on the generator set.
Remove the negative (--) lead first
when disconnecting the battery.
Reconnect the negative (--) lead last
when reconnecting the battery.
WARNING
Servicing the transfer switch. Hazardous voltage can
cause severe injury or death. Deenergize all power sources
before servicing. Turn off the main circuit breakers of all
transfer switch power sources and disable all generator sets
as follows: (1) Press the generator set off/reset button to shut
down the generator set. (2) Disconnect power to all battery
chargers. (3) Disconnect all battery cables, negative (--) leads
first. Reconnect negative (--) leads last when reconnecting the
battery cables after servicing. Follow these precautions to
prevent the starting of generator sets by an automatic transfer
switch, remote start/stop switch, or engine start command
from a remote computer. Before servicing any components
inside the enclosure: (1) Remove all jewelry. (2) Stand on a
dry, approved electrically insulated mat. (3) Test circuits with a
voltmeter to verify that they are deenergized.
Hazardous voltage.
Will cause severe injury or death.
Disconnect all power sources before
opening the enclosure.
DANGER
Making line or auxiliary connections. Hazardous voltage
can cause severe injury or death. To prevent electrical
shock deenergize the normal power source before making any
line or auxiliary connections.
Grounding electrical equipment. Hazardous voltage can
cause severe injury or death. Electrocution is possible
whenever electricity is present. Ensure you comply with all
applicable codes and standards. Electrically ground the
generator set and related equipment and electrical circuits.
Turn off the main circuit breakers of all power sources before
servicing the equipment. Never contact electrical leads or
appliances when standing in water or on wet ground because
these conditions increase the risk of electrocution.
NOTICE
Foreign material contamination. Cover the transfer switch
during installation to keep dirt, grit, metal drill chips, and other
debris out of the components. Cover the solenoid mechanism
during installation. After installation, use the manual operating
handle to cycle the contactor to verify that it operates freely. Do
not use a screwdriver to force the contactor mechanism.
2.7.1 Source and Load Connections
Refer to the wiring diagrams furnished with each
transfer switch.
Determine the cable size. Refer to the transfer switc h
dimension drawing to determine the cable size and
number of cables required for the transfer switch. Make
sure that the cables are suitable for use with the transfer
switch lugs. Watertight conduit hubs may be required
for outdoor use.
Drill the entry holes. Refer to the transfer switch
dimension drawings for cable entry requirements.
Some models allow top cable entry only. Cover the
transfer switch to protect it from metal chips and
construction grit. Then drill entry holes for the
conductors at the locations shown on the enclosure
drawings. Remove debris from the enclosure with a
vacuum cleaner.
Note: Do not use compressed air to clean the switch.
Cleaning with compressed air can cause debris
to lodge in the components and damage the
switch.

 Loading...