26 Easy scan utility
If the adjust-image option was checked in the previous screen, the adjust-image screen is dis-
played. The same automatic image-processing functions shown in the previous screen are also
displayed here.
Click and drag the brightness, contrast, and
saturation sliders to adjust the image; change
are reflected in the display. Any changes made
remain in effect until reset or the utility is
closed. Returning to the previous screen and
unchecking the adjust-image box will not reset
these settings.
After making adjustments to the image, click
the next button.
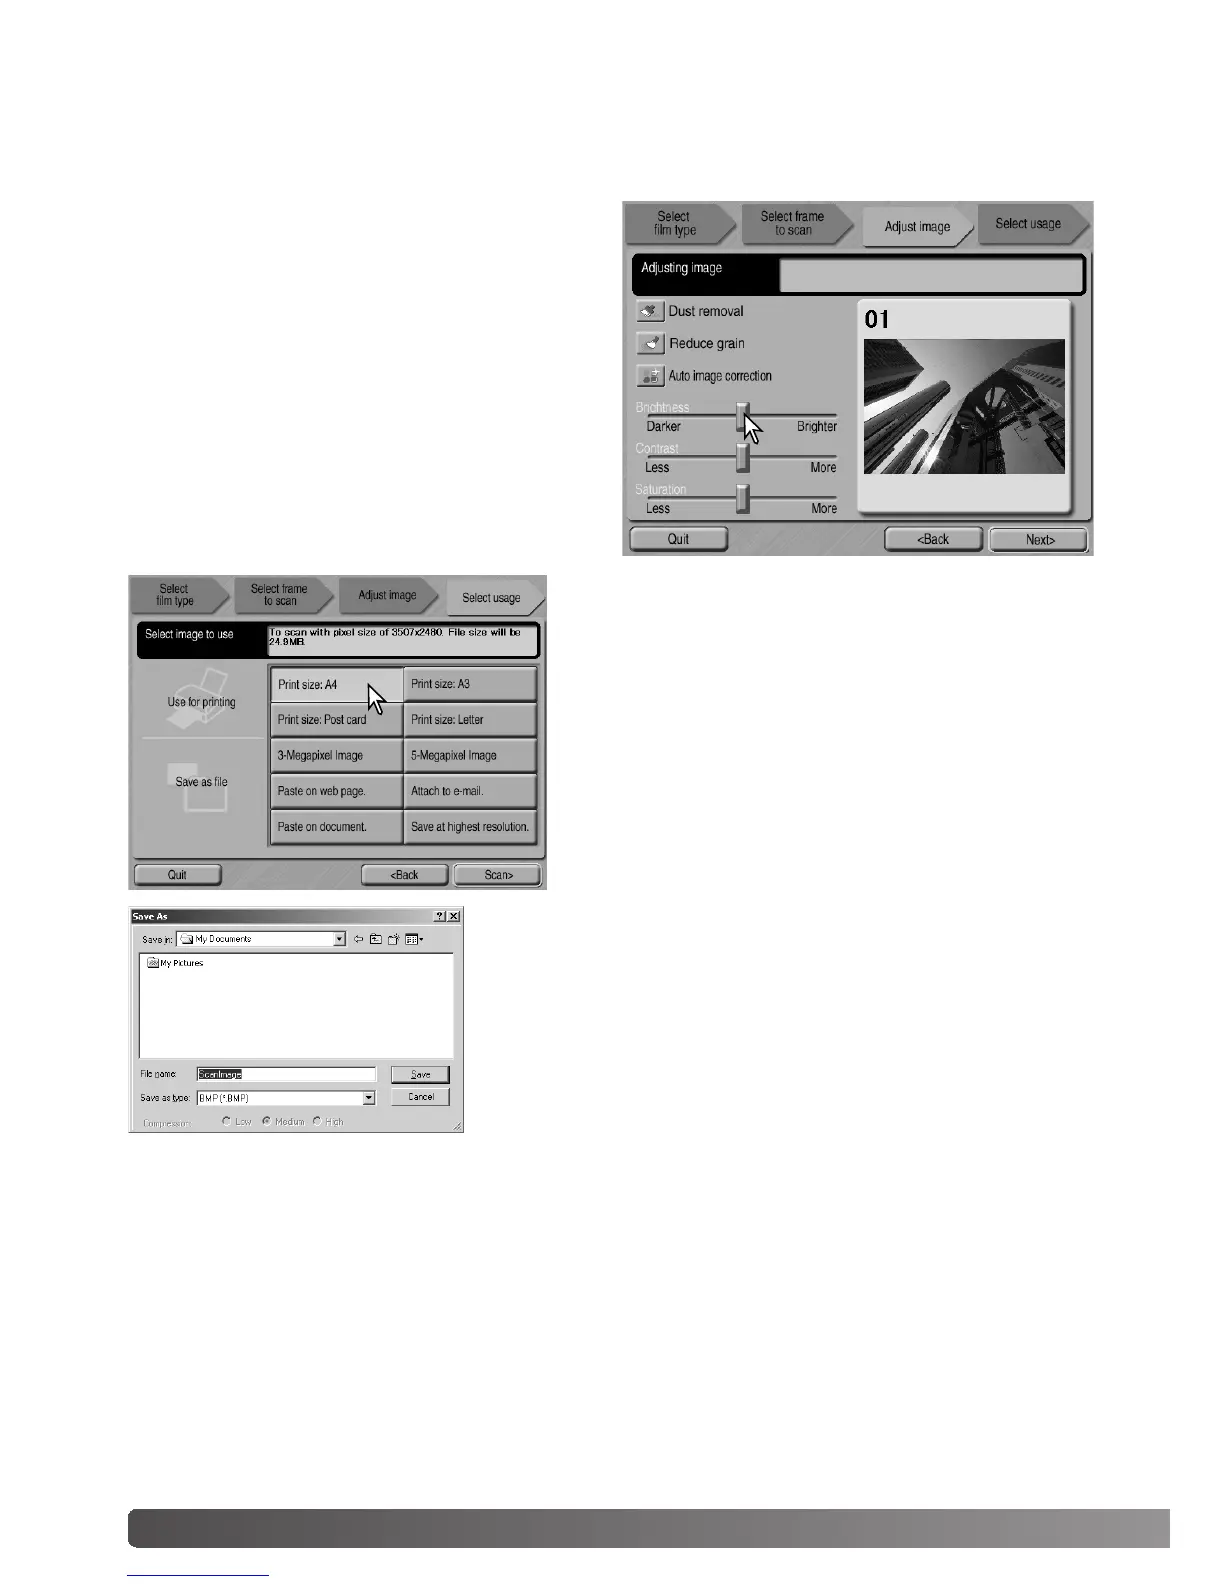
Select the option which best describes the final use
of the scanned image. Only one choice can be
made. Click the scan button to continue; the save-as
screen will open. If an image has multiple uses,
repeat the Easy Scan procedure for each use of the
image.
On the save-as screen, specify the file name, file format, and
destination of the image data. Images can be saved in BMP,
JPEG, TIFF, or PICT file formats. See page 35 for more about
these formats. When saving JPEG files, the compression ratio
can be specified. Click the save button to complete the final
scan.
When using a USB storage device on the same bus as the scanner, save the data on the com-
puter’s hard disk first before transferring it to the storage device. Saving the scanned data direct-
ly to the device may corrupt the image data.
 Loading...