42
A
DVANCED RECORDING
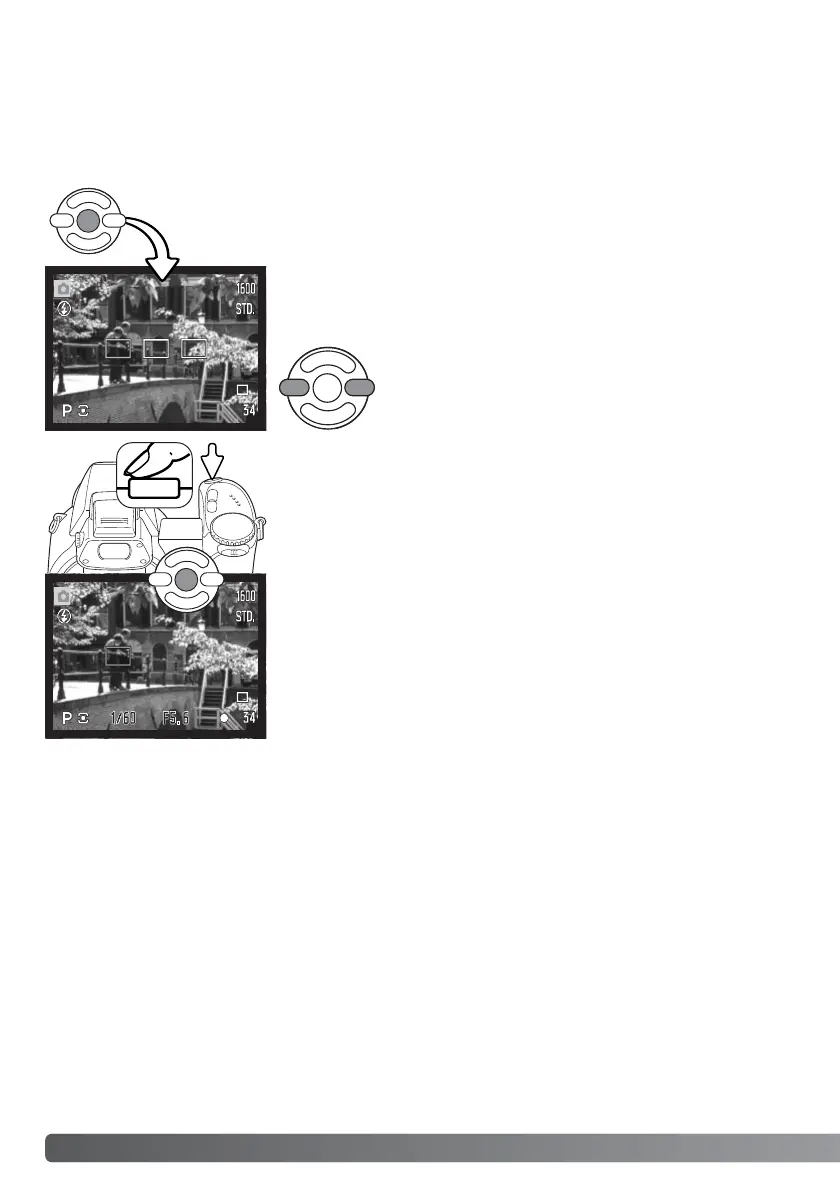
Press the shutter-release button partway down or press the central
button of the controller to select the area; the other two areas disap-
pear. Only when a focus area has been selected, can the controller
be used for other camera operations.
Take the picture as described in the basic recording section; press
the shutter-release button partway down to lock focus and exposure.
Press the shutter-release button all the way down to take the picture.
Once a focus area is selected, it will remain active even after the pic-
ture has been taken. Press and hold the central button of the con-
troller to return to the standard focus frames.
Press and hold the central button of the controller until the three spot focus
areas are displayed.
Focus area selection
Use the left/right keys of the controller to highlight the desired auto-
focus area; the active area is blue.
Individual focus areas can be selected when recording still images. With auto recording and Digital
Subject Programs, focus area selection is reset when the exposure-mode dial is moved to another
position or the camera is turned off. In P, A, S, and M exposure modes, the selected focus area
remains active until reset.
 Loading...