Changing the sound set settings
13
Changing the sound set settings
You can freely change the settings of a sound set that you have
selected. Here, we will try making changes to the content of a
sound set so that it matches the settings you like.
Tip:
The changes you have made will revert to their default
state once you turn off the power. To keep your settings intact,
save them in a set list (page 16).
Turning the keyboard parts on/
off and changing their volume and
sounds
You can turn the keyboard parts in a sound set on or off, as
well as change their respective volumes and sounds.
Turning a part off (mute)
y
Hold down the EXIT (SHIFT) button and press the button
of the part you want to turn off (the button will go dark).
To turn the part back on, hold down the EXIT (SHIFT) but-
ton and press the button corresponding to the muted part
once again. (The button will light.)
Tip:
Operating the LOWER/SPLIT button will at the same
time turn the split function on and off.
Adjusting the volume
y
Turn the dial while pressing the button corresponding to
the part for which you want to adjust the volume.
The volume of that part will appear on the display.
Tip:
You can also adjust the volume balance between the key-
board and accompaniment parts (page 20).
Changing sounds
1.
Press the button for the part whose sound you want to
change (the button will blink).
The sound name for the part will appear on the display.
2.
Use the dial, +/– button and CATEGORY t, u buttons to
select the sound set you want to play.
Press the CATEGORY
t
,
u
buttons to switch the sound
between different categories.
3.
Press the EXIT (SHIFT) button to return to the sound set
select screen.
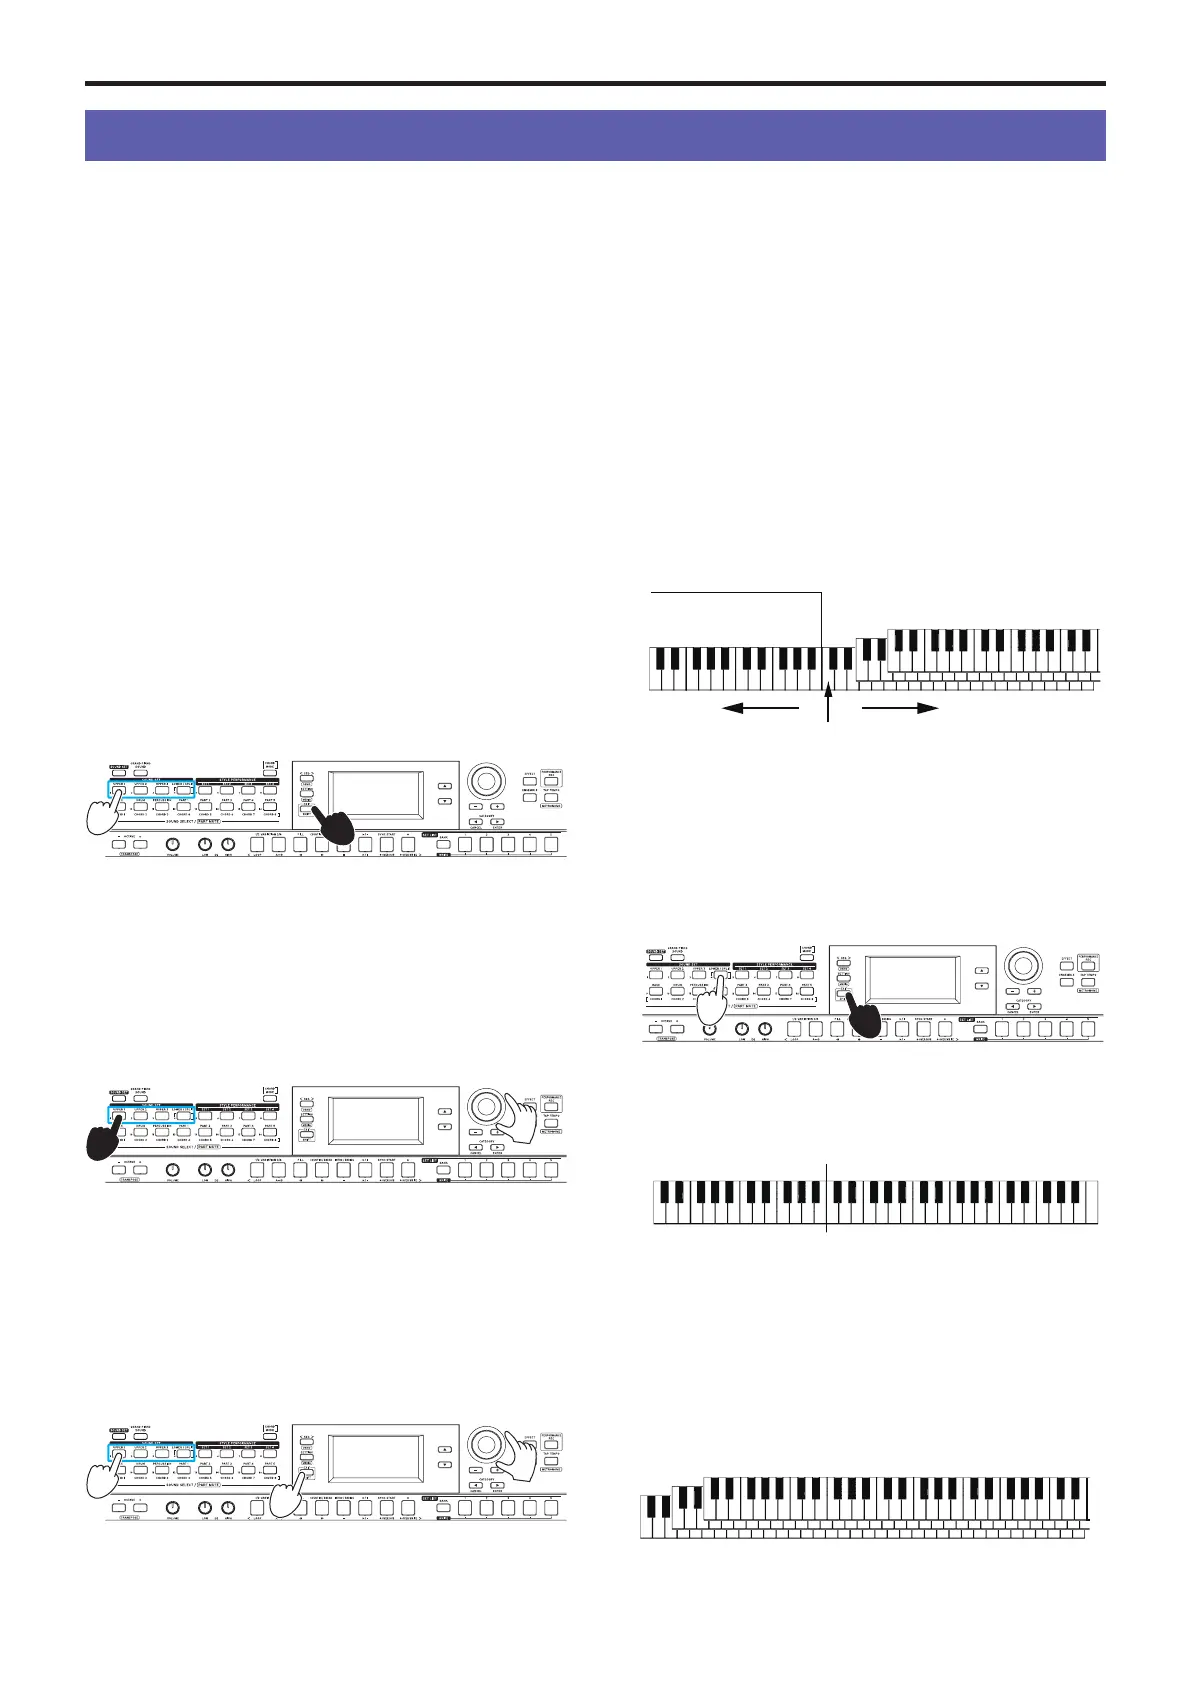
Changing the sounds on the left
and right (split)
You can use the split function to divide sound sets into a high
note range (for upper parts) and a low note range (for the low-
er part). If necessary, you can also turn off the split function or
change the split point that divides the upper and lower parts.
Split point
Right sideLeft side
Lower part
Upper parts 1–3
Tip:
You can set the split point in “Split Point” (page 26),
Setting mode.
Turning the split on
y
Hold down the EXIT (SHIFT) button and press the LOW-
ER/SPLIT button. The button will light up green.
The lower part will turn on (mute cancel), letting you play
the keyboard with two separate ranges. The lower part can
be used for both playing and for recognizing chords.
Turning the split off
y
Hold down the EXIT (SHIFT) button and press the LOW-
ER/SPLIT button. The button will go dark.
The lower part will be turned off (muted), letting you play
the sound of the upper parts over the entire keyboard
range. This will turn the entire keyboard a chord recogni-
tion range.
Upper parts 1–3
Upper parts 1–3Lower part