8
tal Performer mode, it will continue operating in that mode.
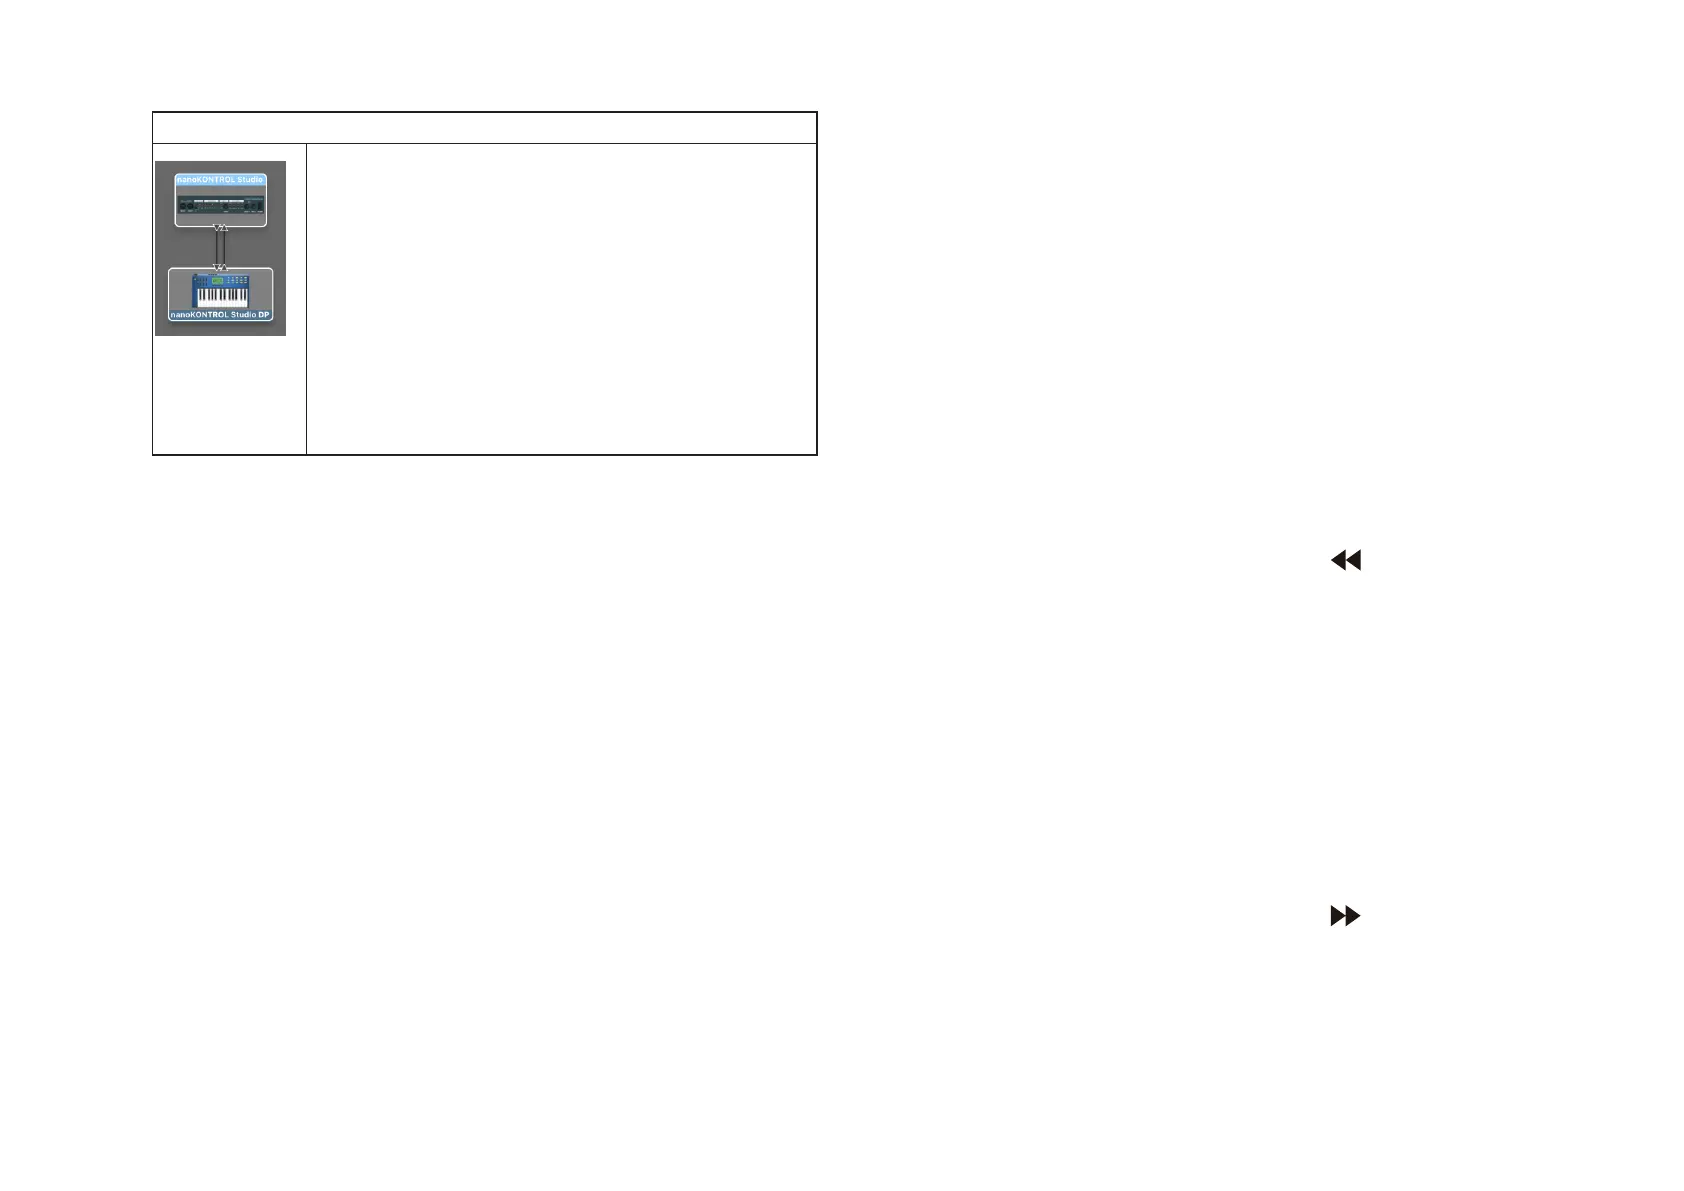
Using a USB connection
• Open “Applications” → “Utilities”, start
“Audio MIDI Setup”, open the “MIDI Studio”
window, and then click “Add Device”.
• Specify an appropriate name for the device
to be added. (Example:
nanoKONTROL Studio DP)
• Connect the added device to the
nanoKONTROL Studio, as shown on the
left.
2. In Digital Performer, open the “Control Surface” window,
and then select “Mackie Control” for “Driver” and “Unit”.
3. Select the nanoKONTROL Studio port for “MIDI”.
Button operations with Digital Performer
With Digital Performer, the Cycle button turns on/off Memory
Cycle. However, the Cycle button will not light up when Memory
Cycle is turned on.
TIP The Marker Set button does not operate with Digital Per-
former.
TIP The jog wheel works only when the Scrub function is
turned on. To use the Scrub function, set the
nanoKONTROL Studio global parameter “Use Scene Button
as Scrub” to “Enable”.
Live
1. While holding down the Scene and Marker buttons, turn
on the nanoKONTROL Studio to set it to Live mode.Once
the nanoKONTROL Studio has been set to Live mode, it will
continue operating in that mode.
2. In Live, open the “Preferences” window, and then select
“Mackie Control” for “Control Surface”.
3. Select the nanoKONTROL Studio ports for the MIDI input
and output ports to be used by Mackie Control.
GarageBand/Logic
Download the nanoKONTROL Studio Control Surface plug-in from
the Korg website (http://www.korg.com/), and then set it according
to the instructions in the supplied document.
Pro Tools
1. While holding down the Scene and (Rewind) buttons,
turn on the nanoKONTROL Studio to set it to Pro Tools
mode. Once the nanoKONTROL Studio has been set to Pro
Tools mode, it will continue operating in that mode.
2. In Pro Tools, open the “Peripherals” window, and then se-
lect “HUI” for “Type”.
3. Select the nanoKONTROL Studio ports for the sending and
receiving ports to be used by HUI.
SONAR
1. While holding down the Scene and (Forward) buttons,
turn on the nanoKONTROL Studio to set it to SONAR mode.
Once the nanoKONTROL Studio has been set to SONAR
mode, it will continue operating in that mode.
2. In SONAR, open the “Preferences” window, select the