9
nanoKONTROL Studio port check boxes for both “Inputs”
and “Outputs” in the “Devices” page, and then click the
Apply button.
3. In the “Control Surfaces” page, click the Add New Control-
ler/Surface button to open the “Controller/Surface Set-
tings” dialog box, and then select “Mackie Control” for
“Controller/Surface” and the nanoKONTROL Studio ports
for “Input Port” and “Output Port”.
TIP The Marker Set button does not operate with SONAR.
TIP As a default in SONAR, the Select button does not function.
Launch SONAR, open the Mackie Control properties from
the ATC module in the Control Bar, and then select the “Se-
lect highlights track” check box.
Studio One
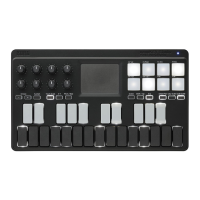
1. While holding down the Scene and Track buttons, turn on
the nanoKONTROL Studio to set it to Studio One mode.
Once the nanoKONTROL Studio has been set to Studio One
mode, it will continue operating in that mode.
2. In Studio One, open the “Preferences”, and then click the
Add... button in the “External Devices” to open the “Add
Device” dialog box.
3. Select “Mackie” → “Control”, select the
nanoKONTROL Studio ports for “Receive From” and “Send
To”, and then click the OK button.
TIP The Scrub function does not operate with Studio One.
Setup for using the nanoKONTROL Studio
in the Assignable Mode
nanoKONTROL Studio setup
While holding down the Scene and Cycle buttons, turn the
nanoKONTROL Studio on to set it to assignable mode. Once the
nanoKONTROL Studio has been set to the assignable mode, it will
continue operating in that mode.
Application setup
In this mode, MIDI control change messages are assigned to the
controllers of the nanoKONTROL Studio. By sending MIDI control
change messages that correspond with the parameters that you
wish to control, you can easily use the nanoKONTROL Studio to
control your software synthesizer or DAW software, for example.
TIP
The method and procedure for linking messages with param-
eters will differ depending on the software you are using, so
please refer to the instruction manual for your software.
About Scenes
Groups of settings assigned to the controllers can be saved as one of the
five user-configurable Scenes available on the nanoKONTROL Studio.
This way, you can create Scenes to control your different software
synthesizers and DAW system, and then switch between then instantly.
Switching scenes
Each press of the Scene button advances to the next Scene in a cycli-
cal order.
 Loading...